Accessing your Windows Server via Remote Desktop
The Windows Server operating system is most often accessed and managed through a protocol called RDP, or Remote Desktop Protocol. This provides you with a graphical interface of your Windows Server that looks and acts just like a standard Windows OS, like the one you have on your Home PC.
Credentials
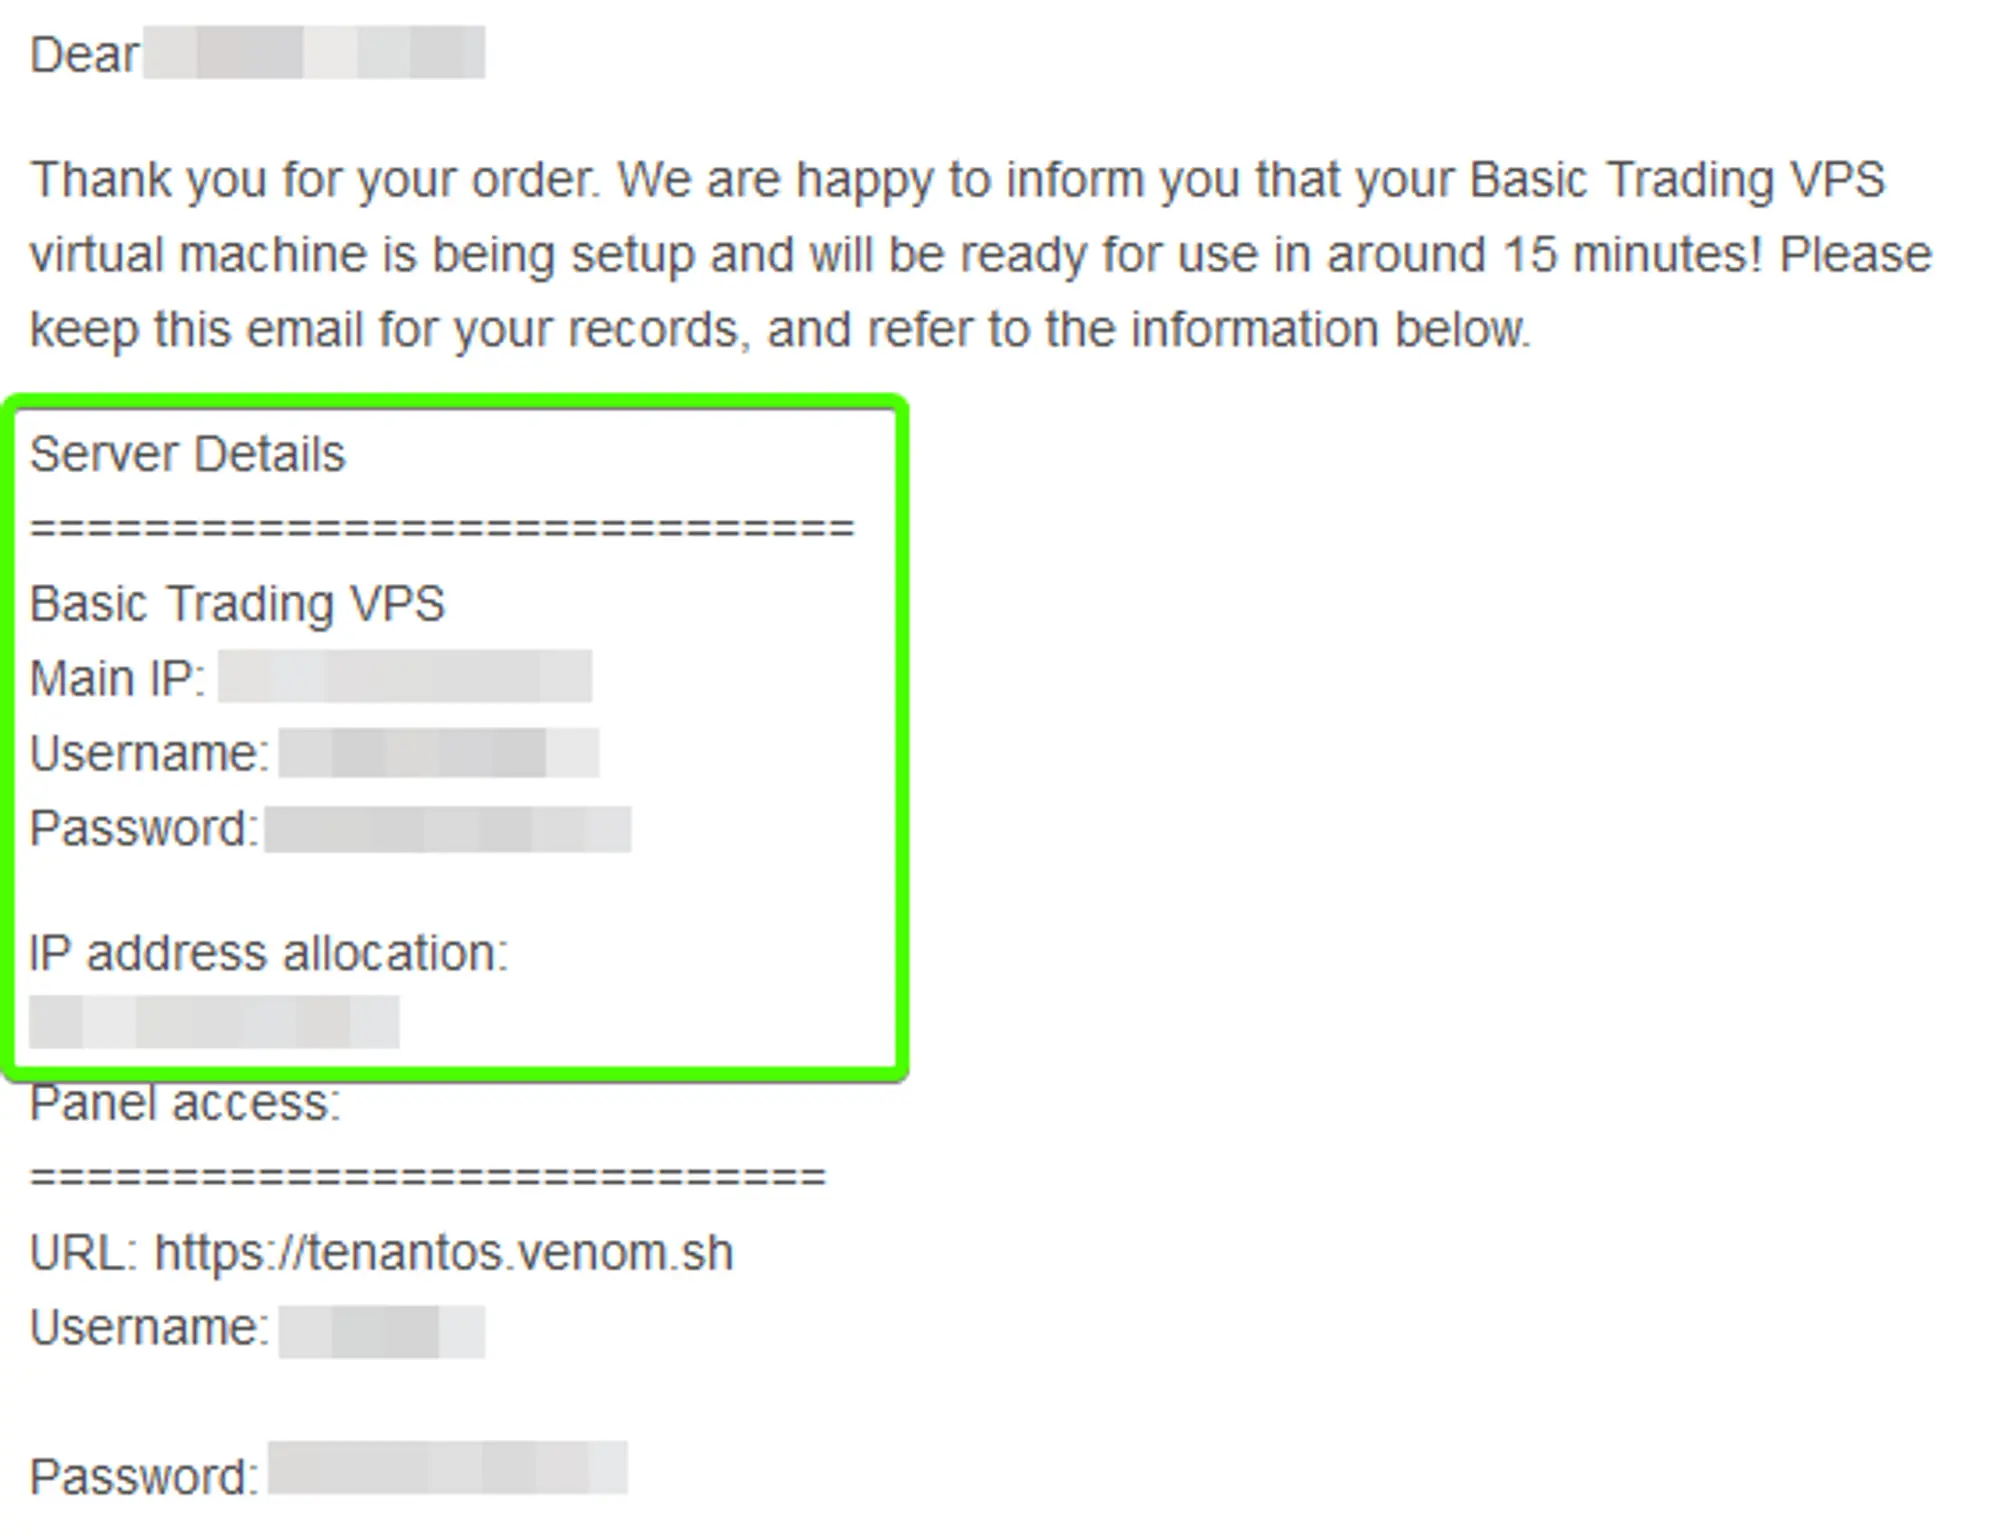
You’ll be able to log-in to your HostVenom VPS that’s running Windows Server 2019/2022 using the credentials provided to you in the VPS Welcome email sent to you by HostVenom at the time of purchase.
You’ll want to use the credentials and IPv4 address provided in the “Server Details” section of the email, shown in the image to the right.
 Loading...
Connecting
Using the credentials provided in the aforementioned email, you can log-in to your VPS’s RDP server using the Windows RDP client on your Windows PC by following the steps outlined below.
Microsoft also has official RDP Clients for operating systems other than Windows, but we’ll just be covering the Windows client here. For information on where to get and how to use the other clients on your operating system, check out the links below.
If you'd like to follow along with a video tutorial instead, check out this one we posted to our YouTube channel!
RDP Application
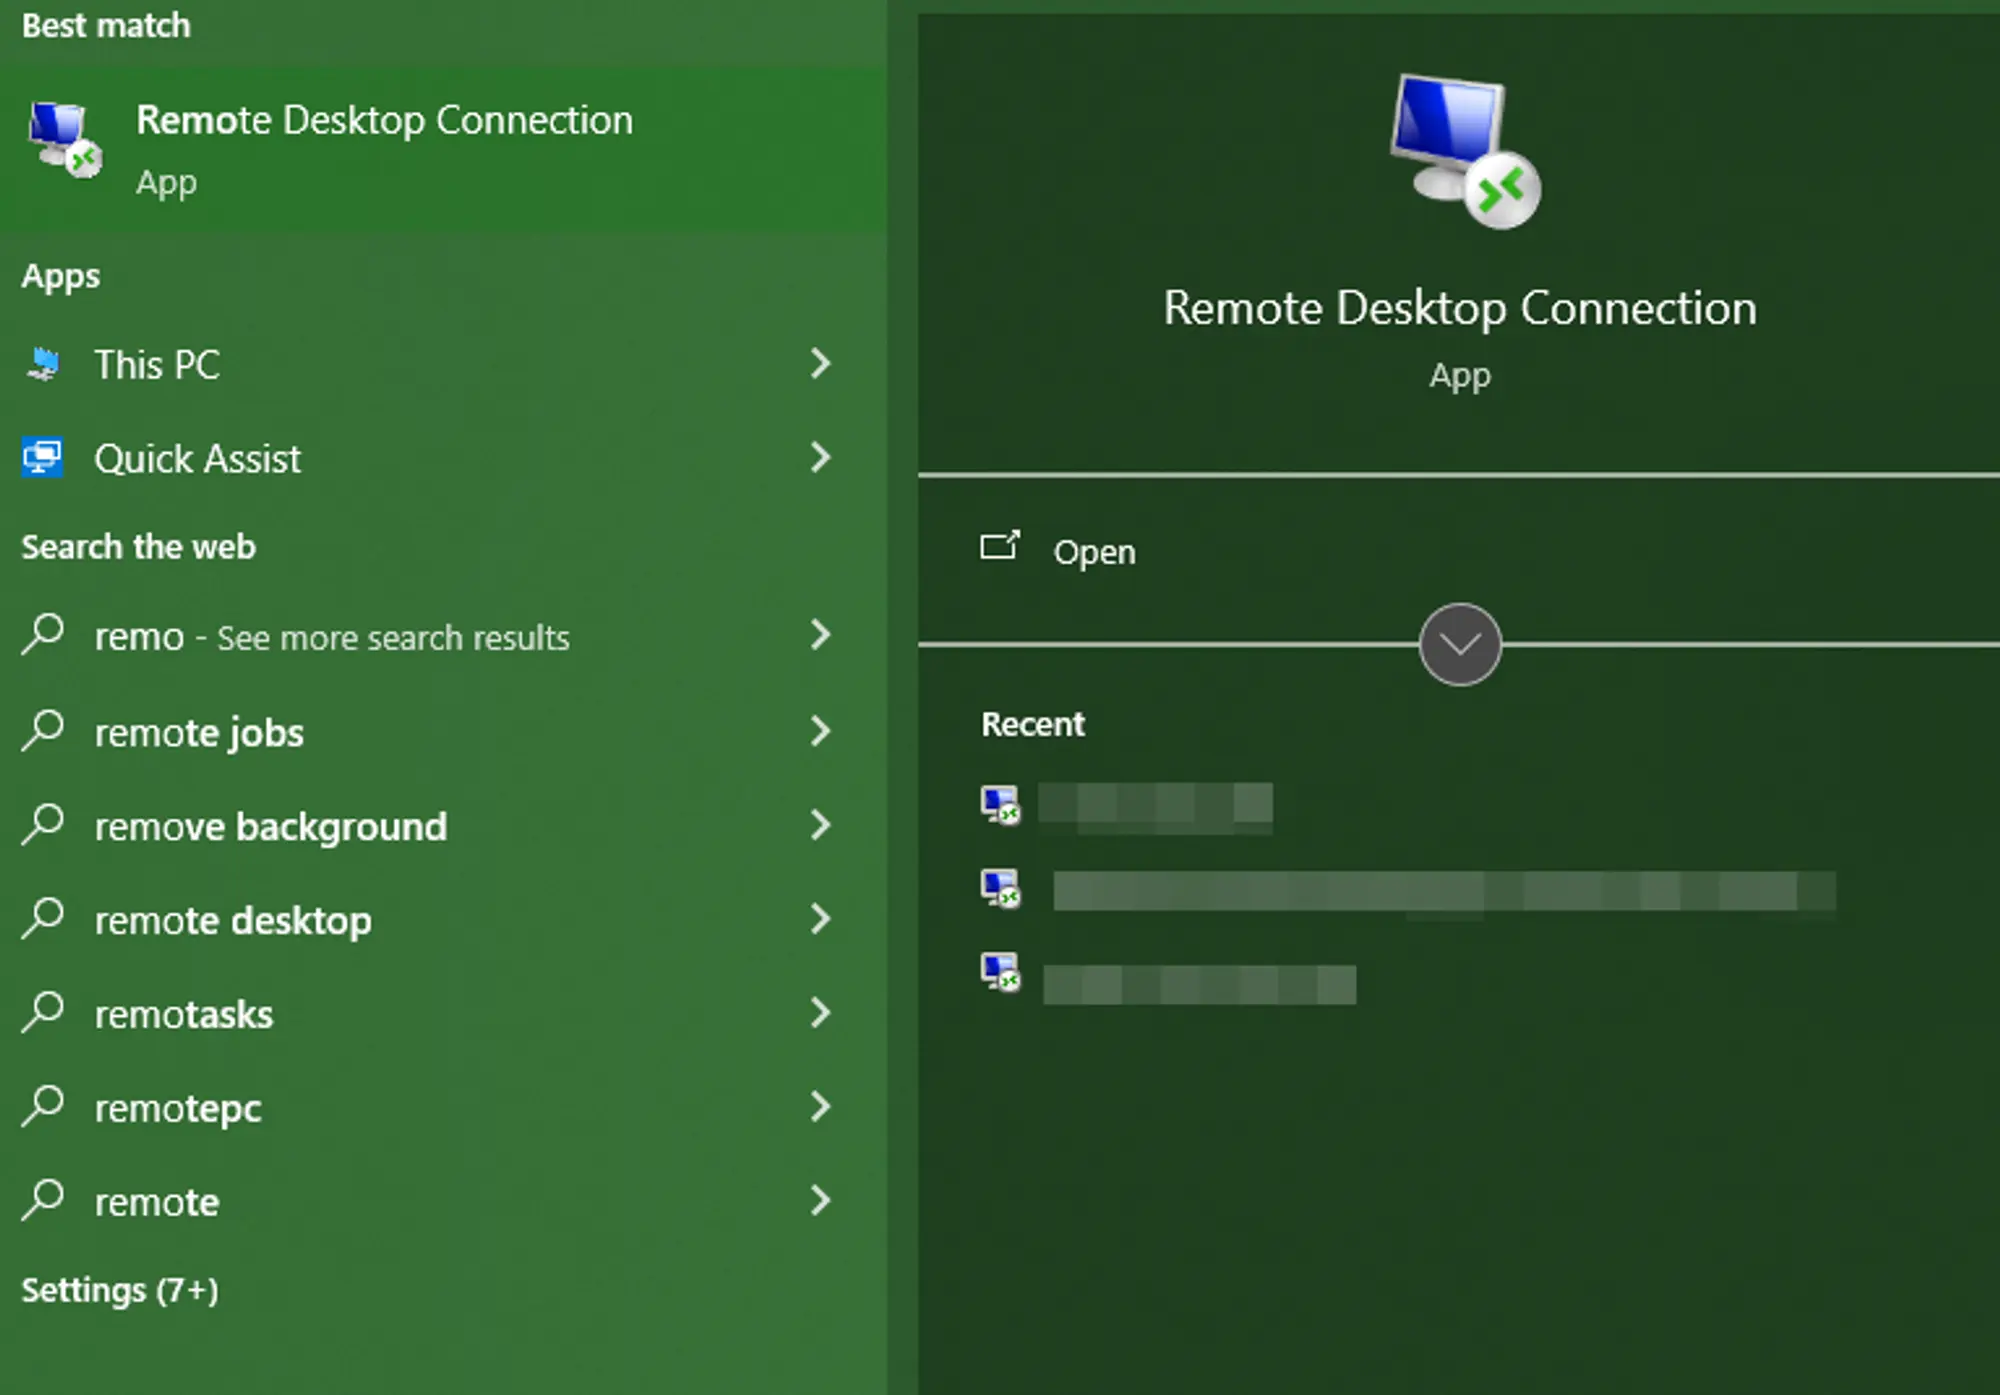
First, you’ll want to launch the Remote Desktop Connection application. You can do this by opening the start menu on your Home PC and typing “Remote Desktop Connection” into the start menu. If you have a search bar directly in your taskbar, that can be used as well.
As you start to type the name of the program into the Start Menu, you should see the program appear in the results in a similar way to the image on the right. You can then either click on the entry in the list, press enter to launch the currently selected item, or press the Open button on the right side of the start menu.
 Loading...
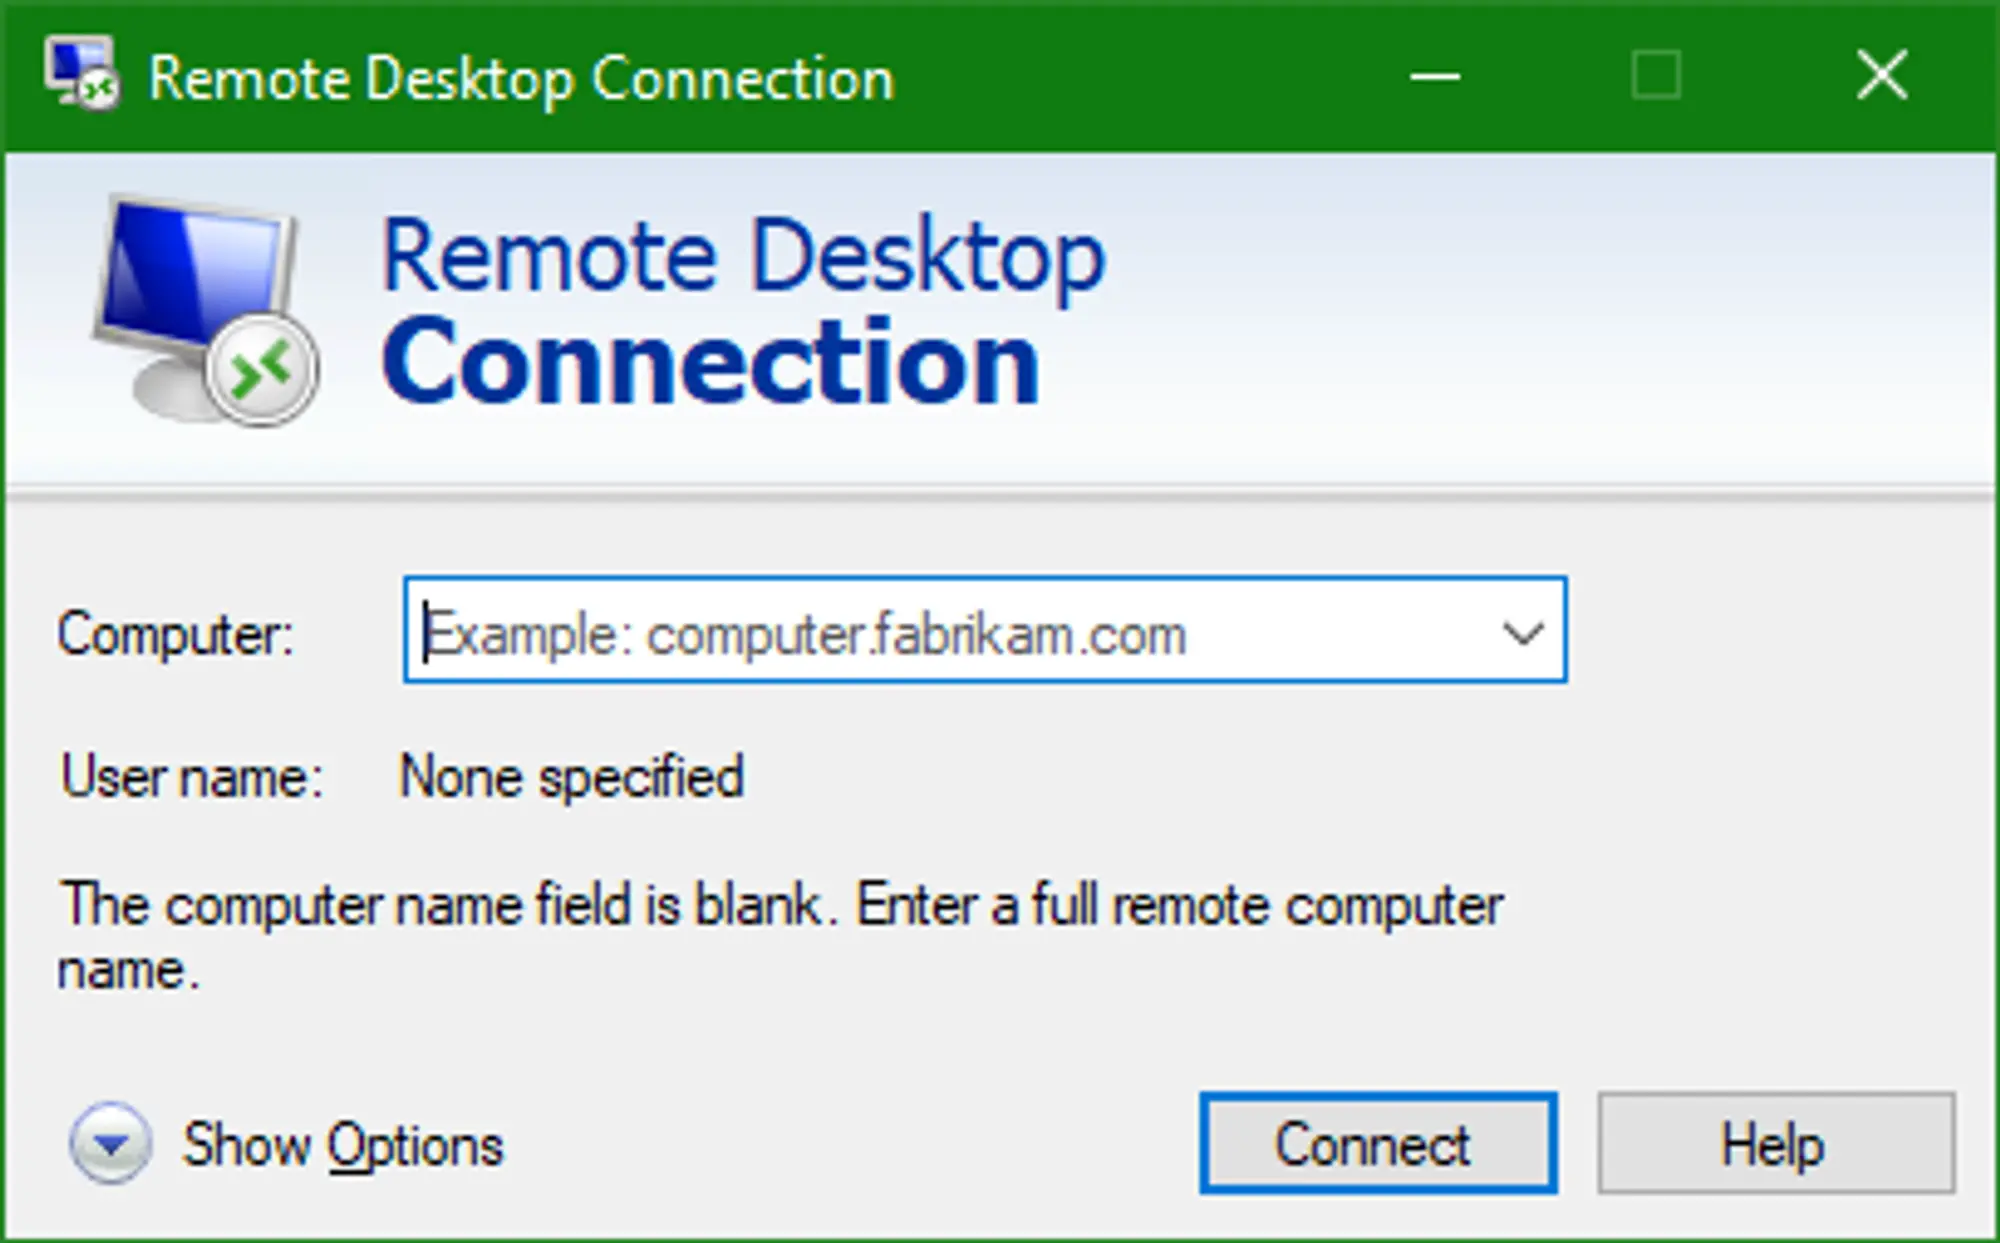
Once you open the Remote Desktop Connection application you should see a window that looks similar to the image shown on the right, with an empty computer address and a “none specified” username.
You’ll want to enter the IPv4 address contained within the VPS Welcome email you received from HostVenom into the computer field and click Connect.
 Loading...
Login
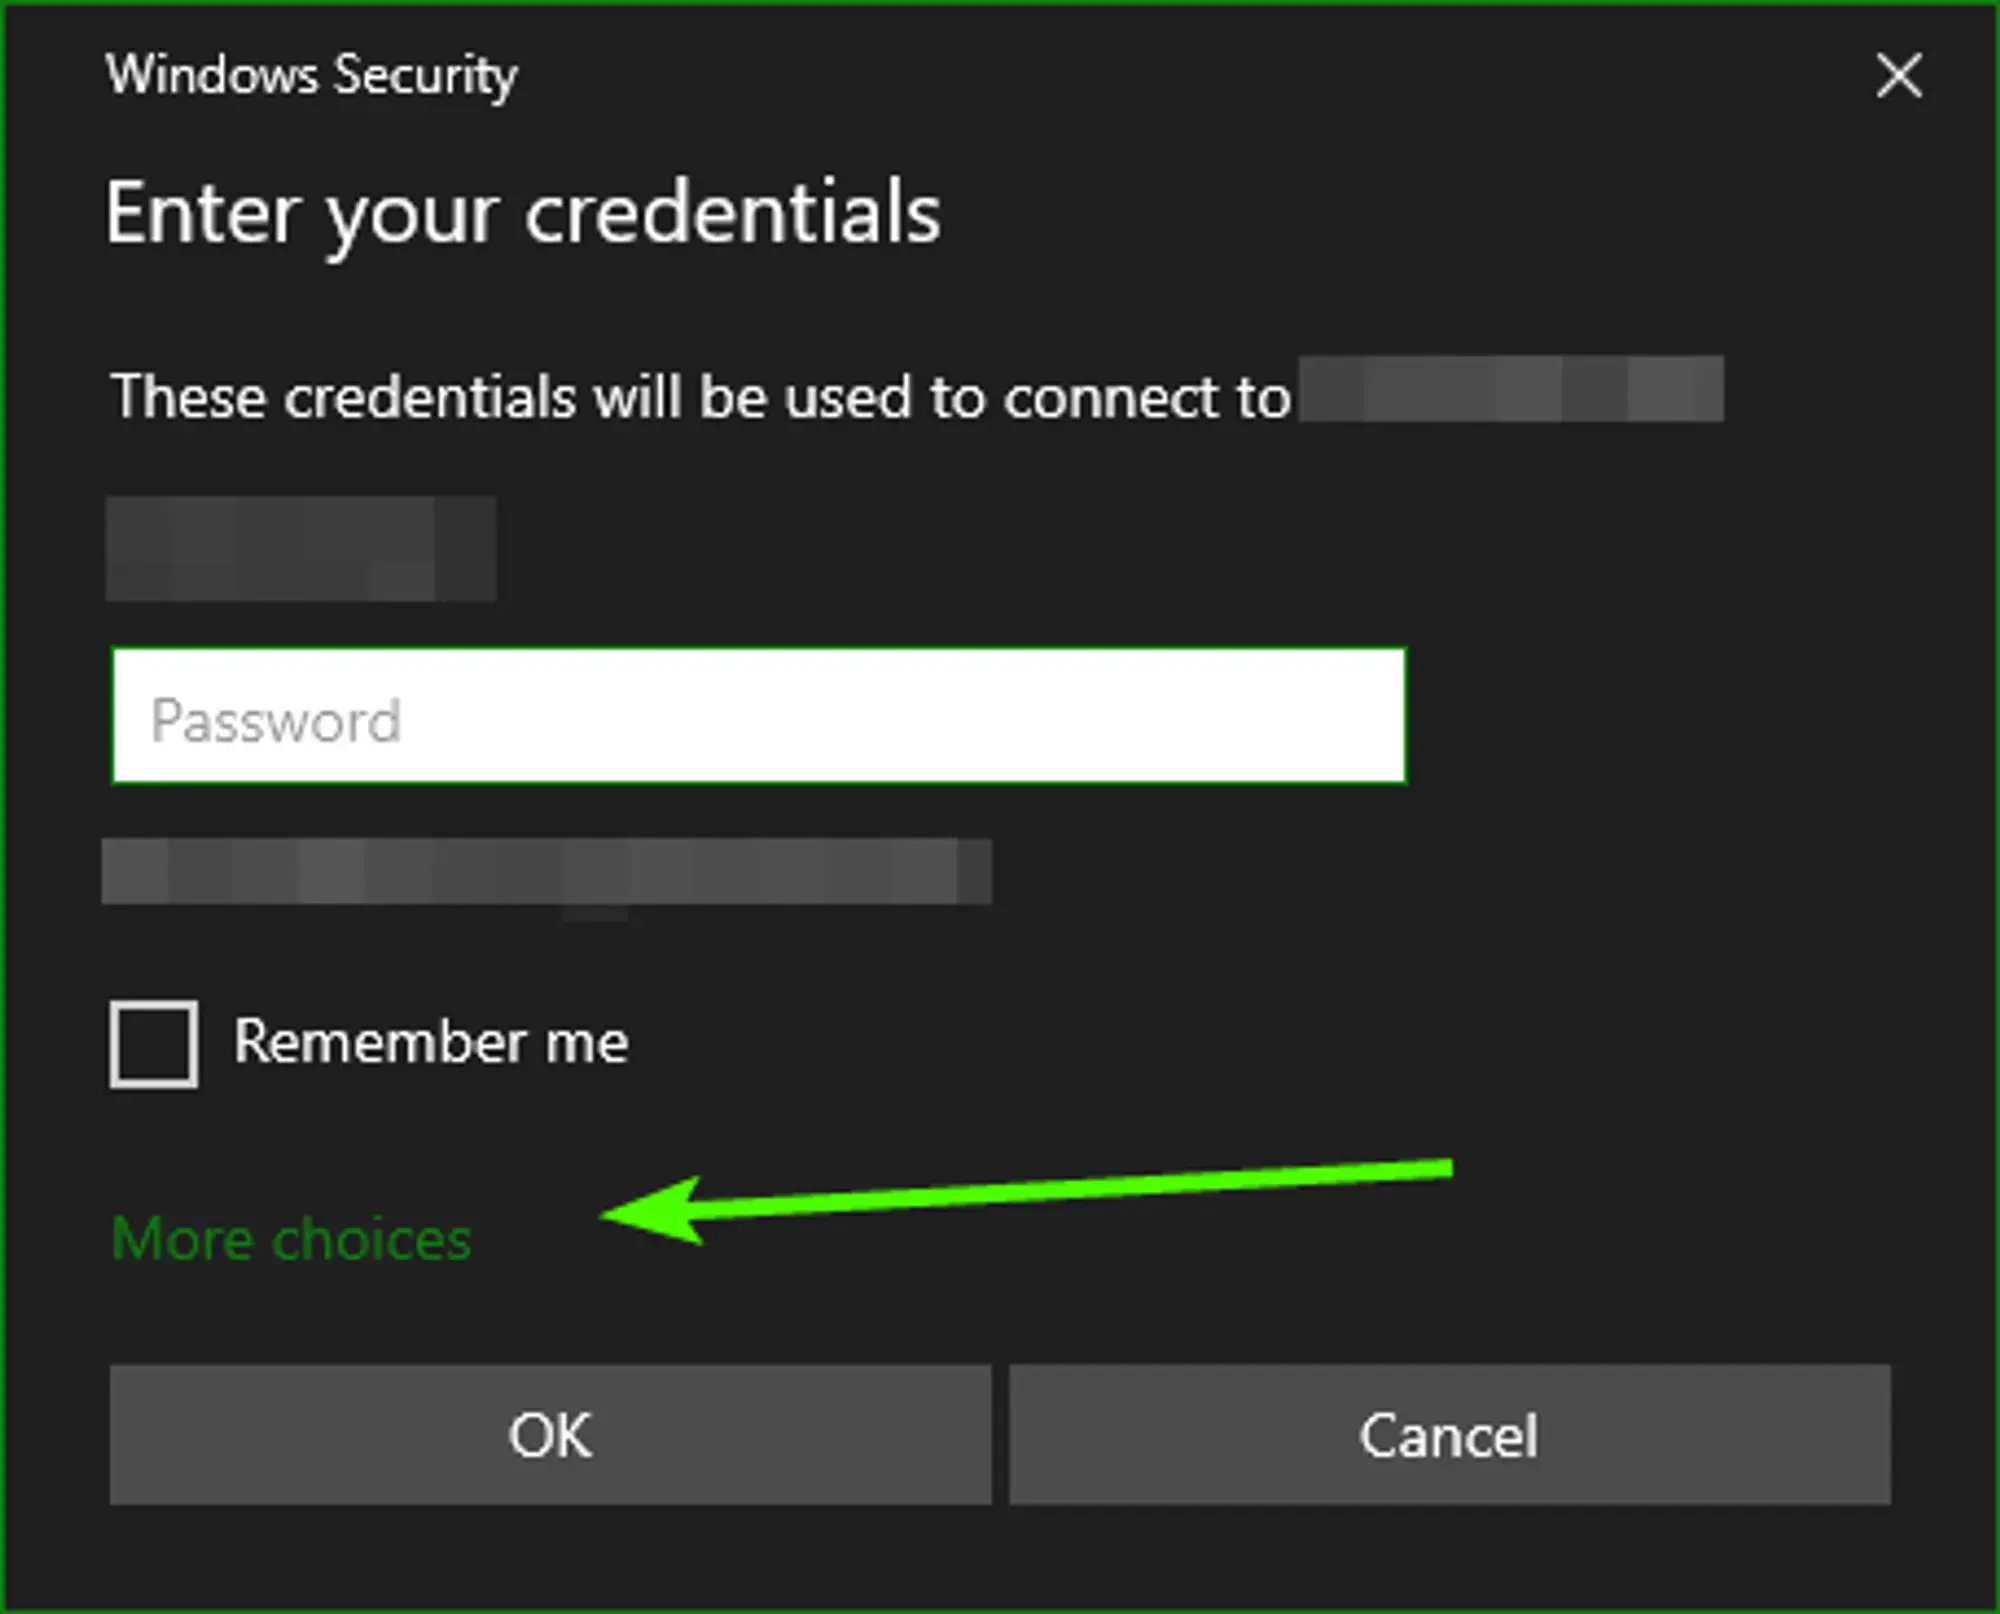
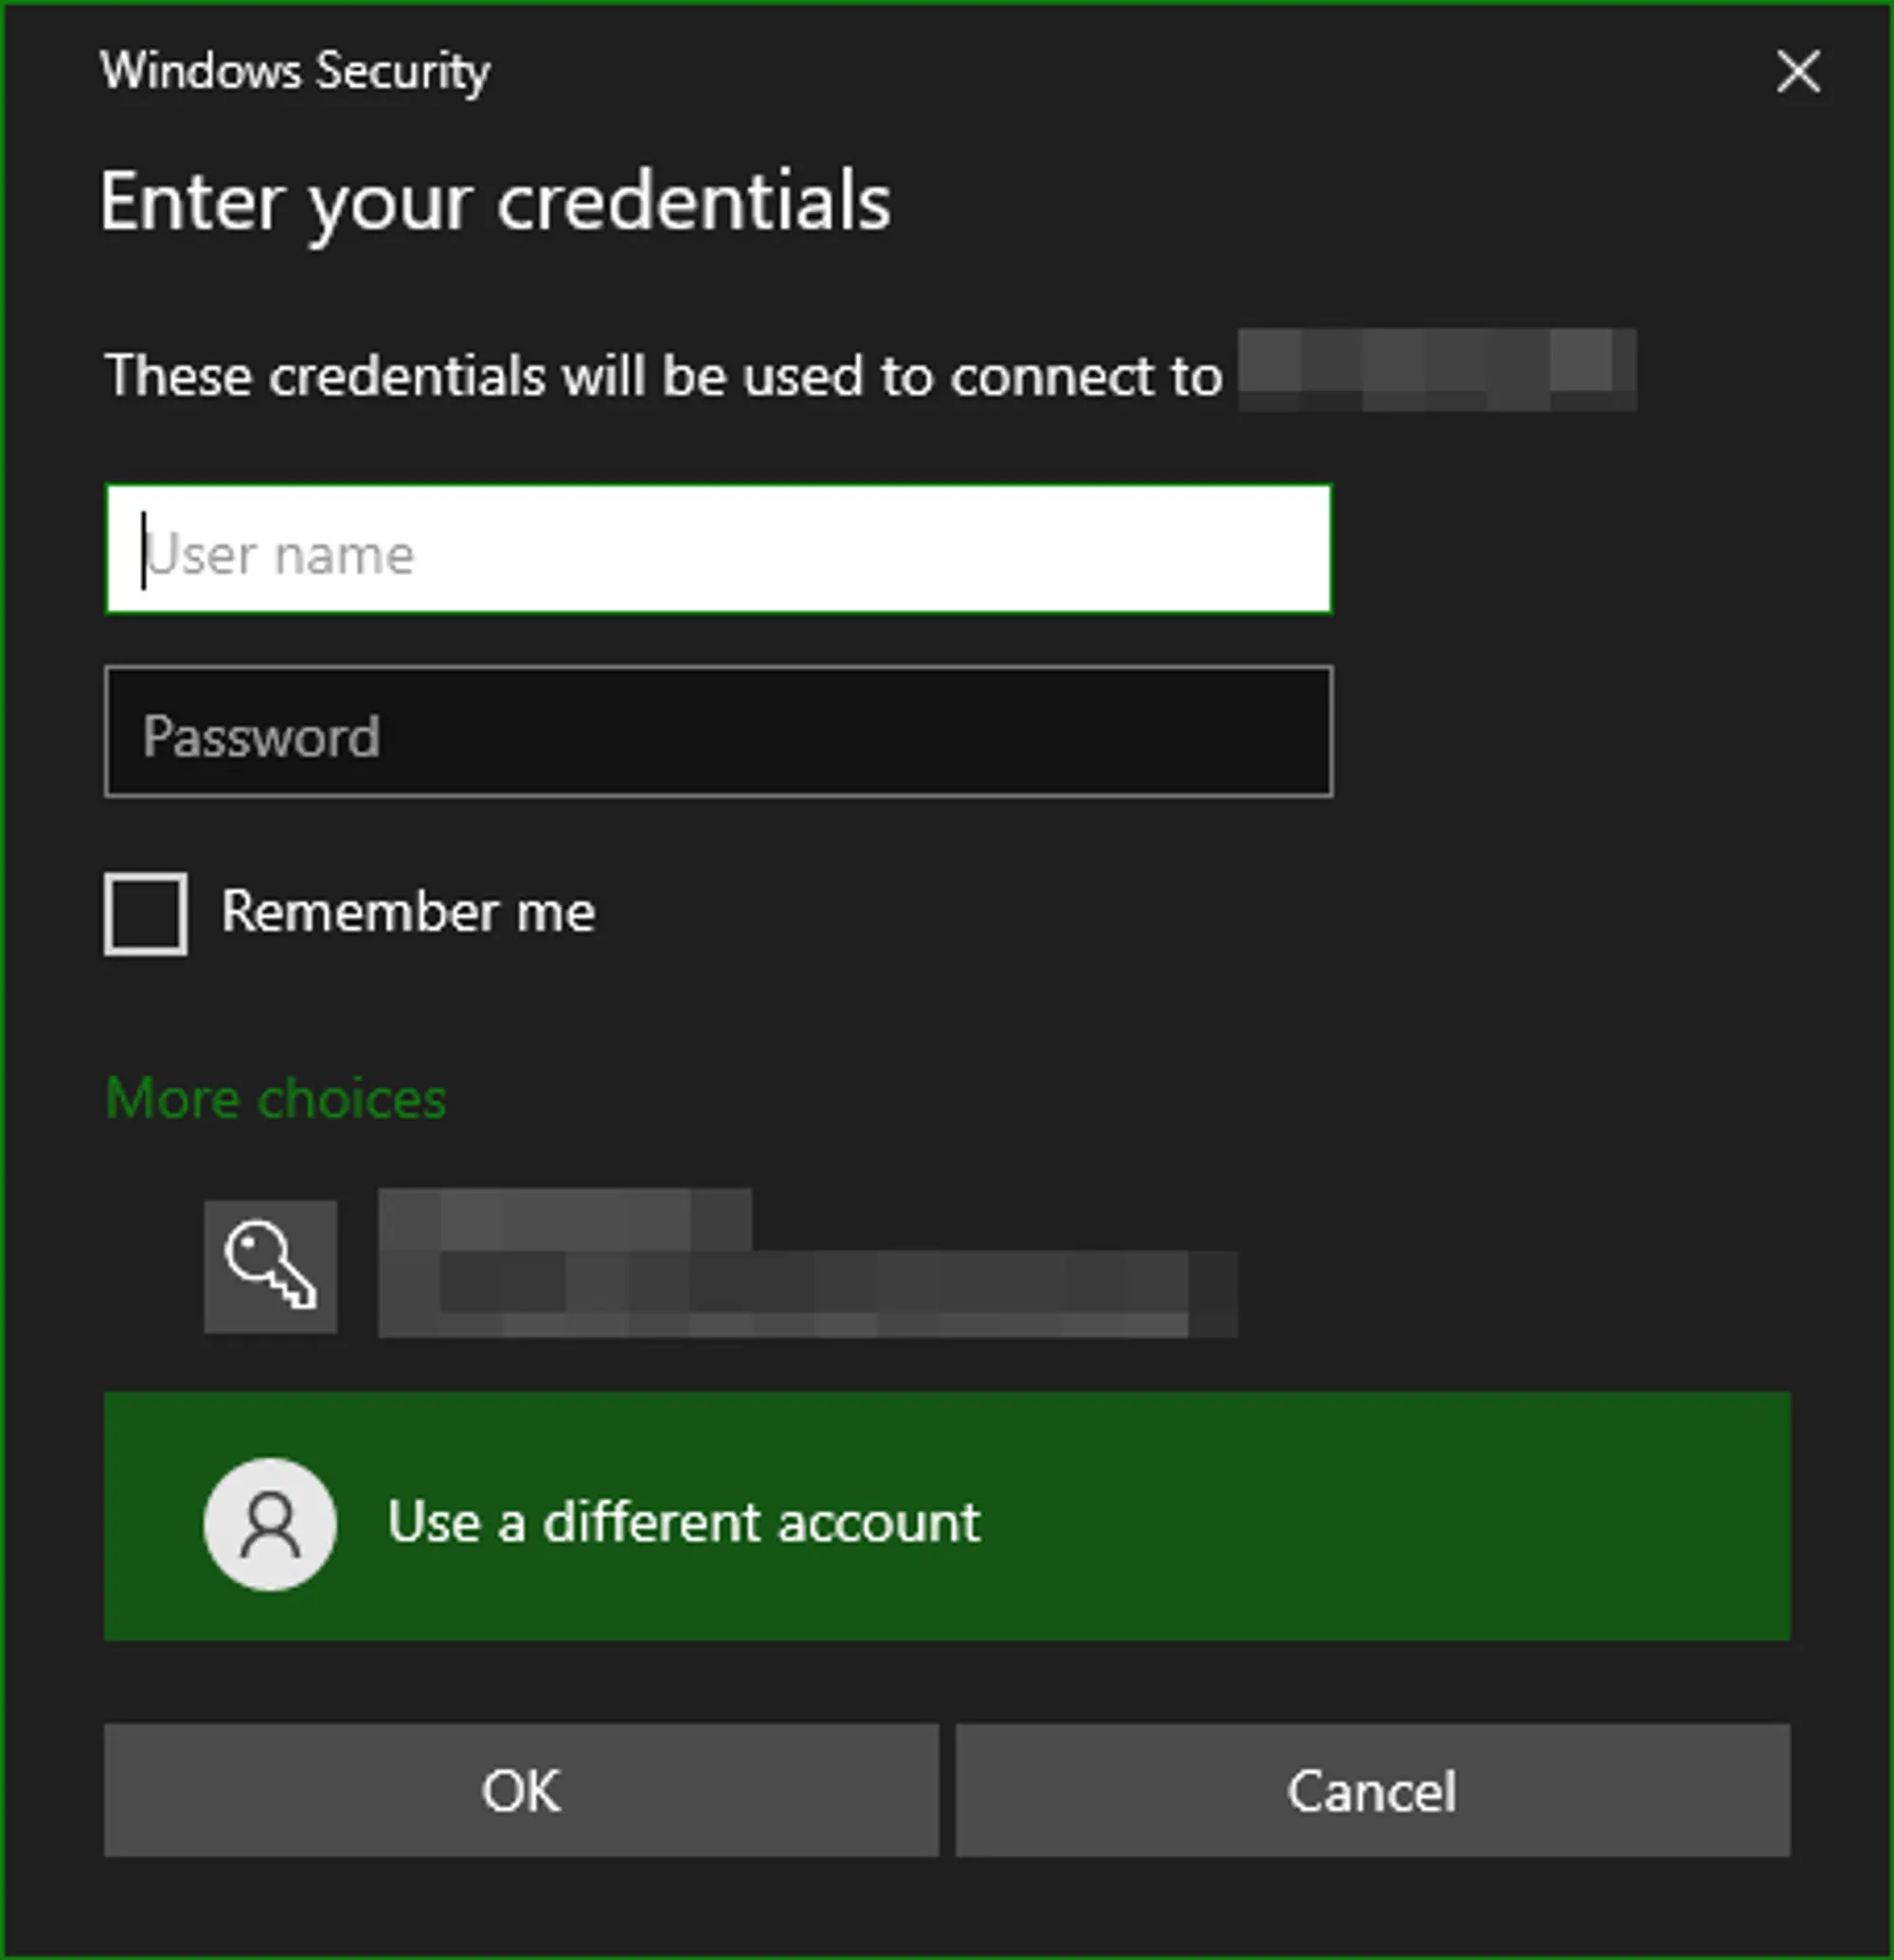
After clicking Connect you’ll be presented with a login screen. The login screen will try to use the credentials of your current Windows user by default, so you’ll want to click on the More choices option at the bottom of the window and select Use a different account. This will allow you to enter both a username and password instead of just a password. You’ll need to enter the username and password provided by the VPS Welcome email you received from HostVenom.
 Loading...
 Loading...
Certificate
You may get a warning during your first connection to your Windows 2019/2022 server saying that the remote computer could not be identified. This is normal for the first connection and has to do with the certificate used to prove that the server is the server you’re wanting to connect to.
Since you haven’t connected to the server in the past, and the server’s certificate isn’t registered with a 3rd party, your computer is relying on you to say that you want to trust this connection. The only time you should be worried about this warning is when it shows up when you are connecting to a Windows 2019/2022 server you’ve connected to before.
 Loading...
Otherwise, click the “Yes” option, confirming that you do trust the certificate and would like Windows to remember that choice.
Server Manager and Desktop
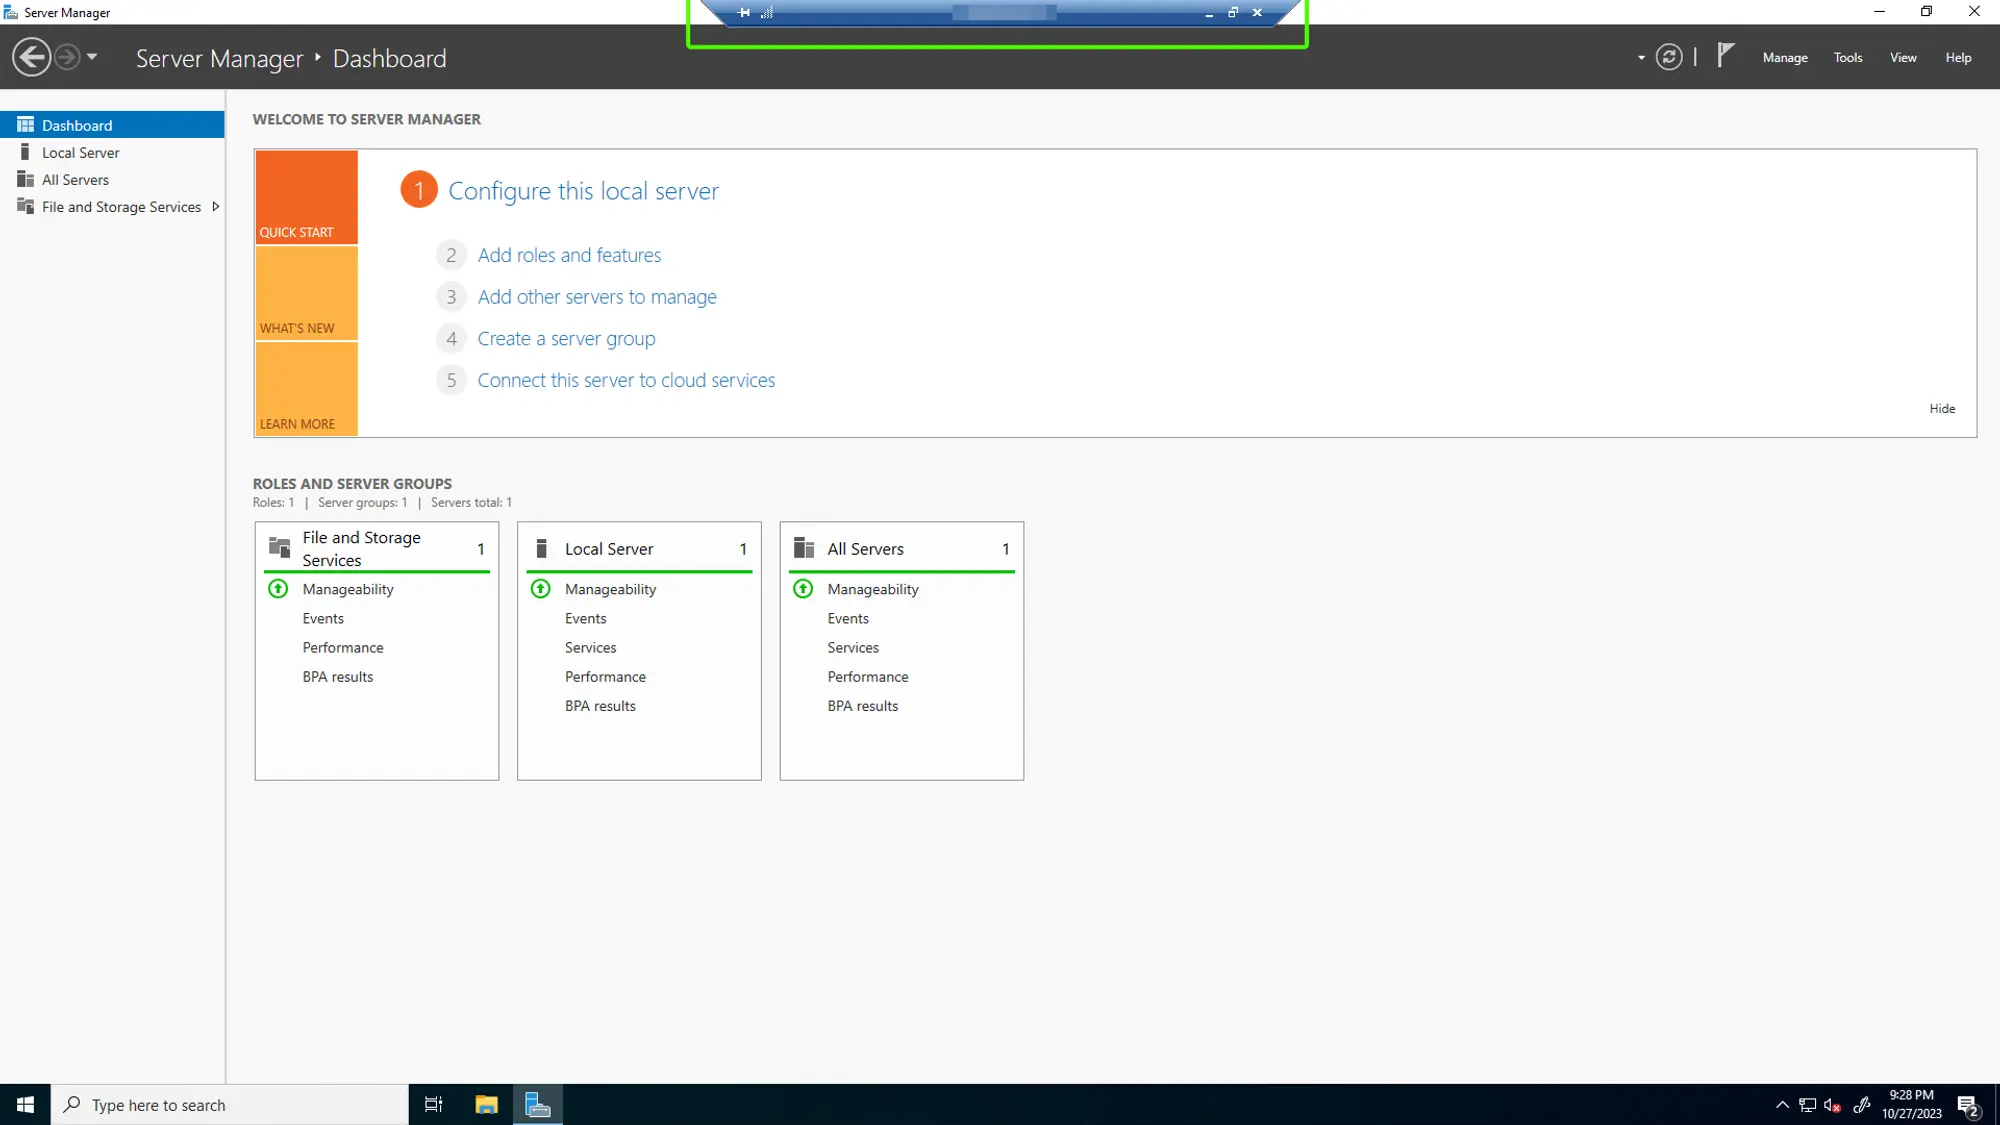
After entering the credentials, you’ll want to click OK. This should connect you to the RDP server that’s running on your Windows 2019/2022 VPS and will open a new full screen window similar to the one shown on the right.
 Loading...
On the first connection, HostVenom VPSs will have the Windows Server Manager open, which is used to interact with and configure your server remotely. You can close this application using the close button in the top right corner, just like on your Home PC running Windows.
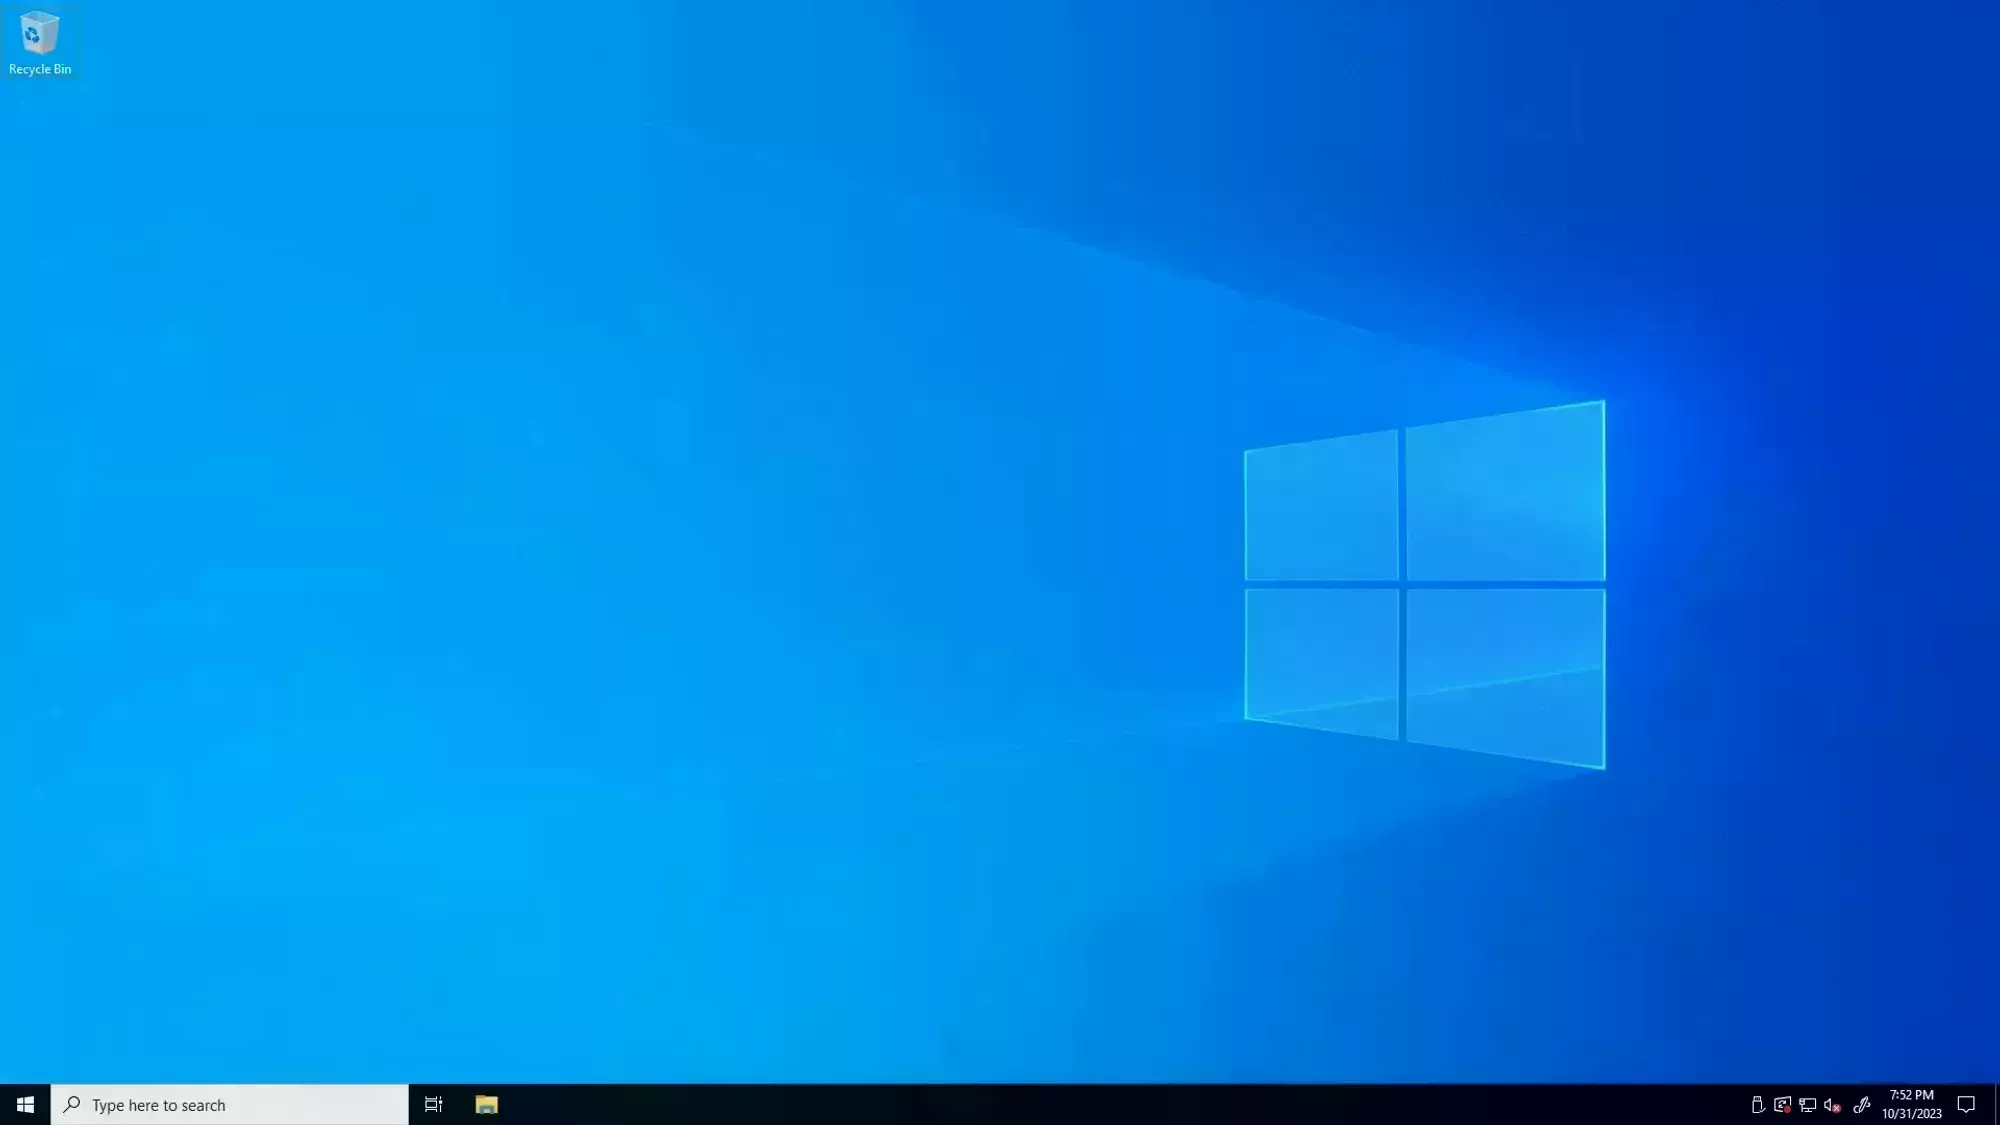
After closing the Windows Server Manager, you should see the default windows background and a Windows taskbar. There won't be any icons on the desktop but most of the default Windows applications will be installed, like Microsoft Edge, so you'll need to open them through the start menu.
 Loading...
If you restart your VPS frequently, you might want to check out our section on ![]() Disabling the Server Manager startup on boot.
Disabling the Server Manager startup on boot.
What is RDP and what is your PC?
Since the RDP session looks just like a standard Windows client, it may be difficult to tell the difference between your PC and the RDP session. There are a couple of ways you can easily tell though.
When you move your mouse to the top of an RDP session, a thin blue bar will appear with information about the session and the standard close/minimize/maximize window icons. You can “pin” this bar so that it’s always visible by clicking the push pin icon on the left, and drag the bar across the top of your monitor in order to see content that may be hidden behind it.
The styling of your Home PC and the RDP session are independent, so you can change the theme of one or the other so that applications and the taskbar make it more obvious which one you’re currently viewing.
Exiting or Minimizing the RDP session
The RDP session can be temporarily “minimized” by moving your mouse to the top of the screen to reveal the blue status bar. On the right side of the bar you’ll have the standard close/minimize/maximize window icons that appear on most Windows applications. Clicking the _ icon will minimize the RDP session to your PC’s taskbar as a normal application and you can re-open it by clicking on it in the taskbar like you would any other application.
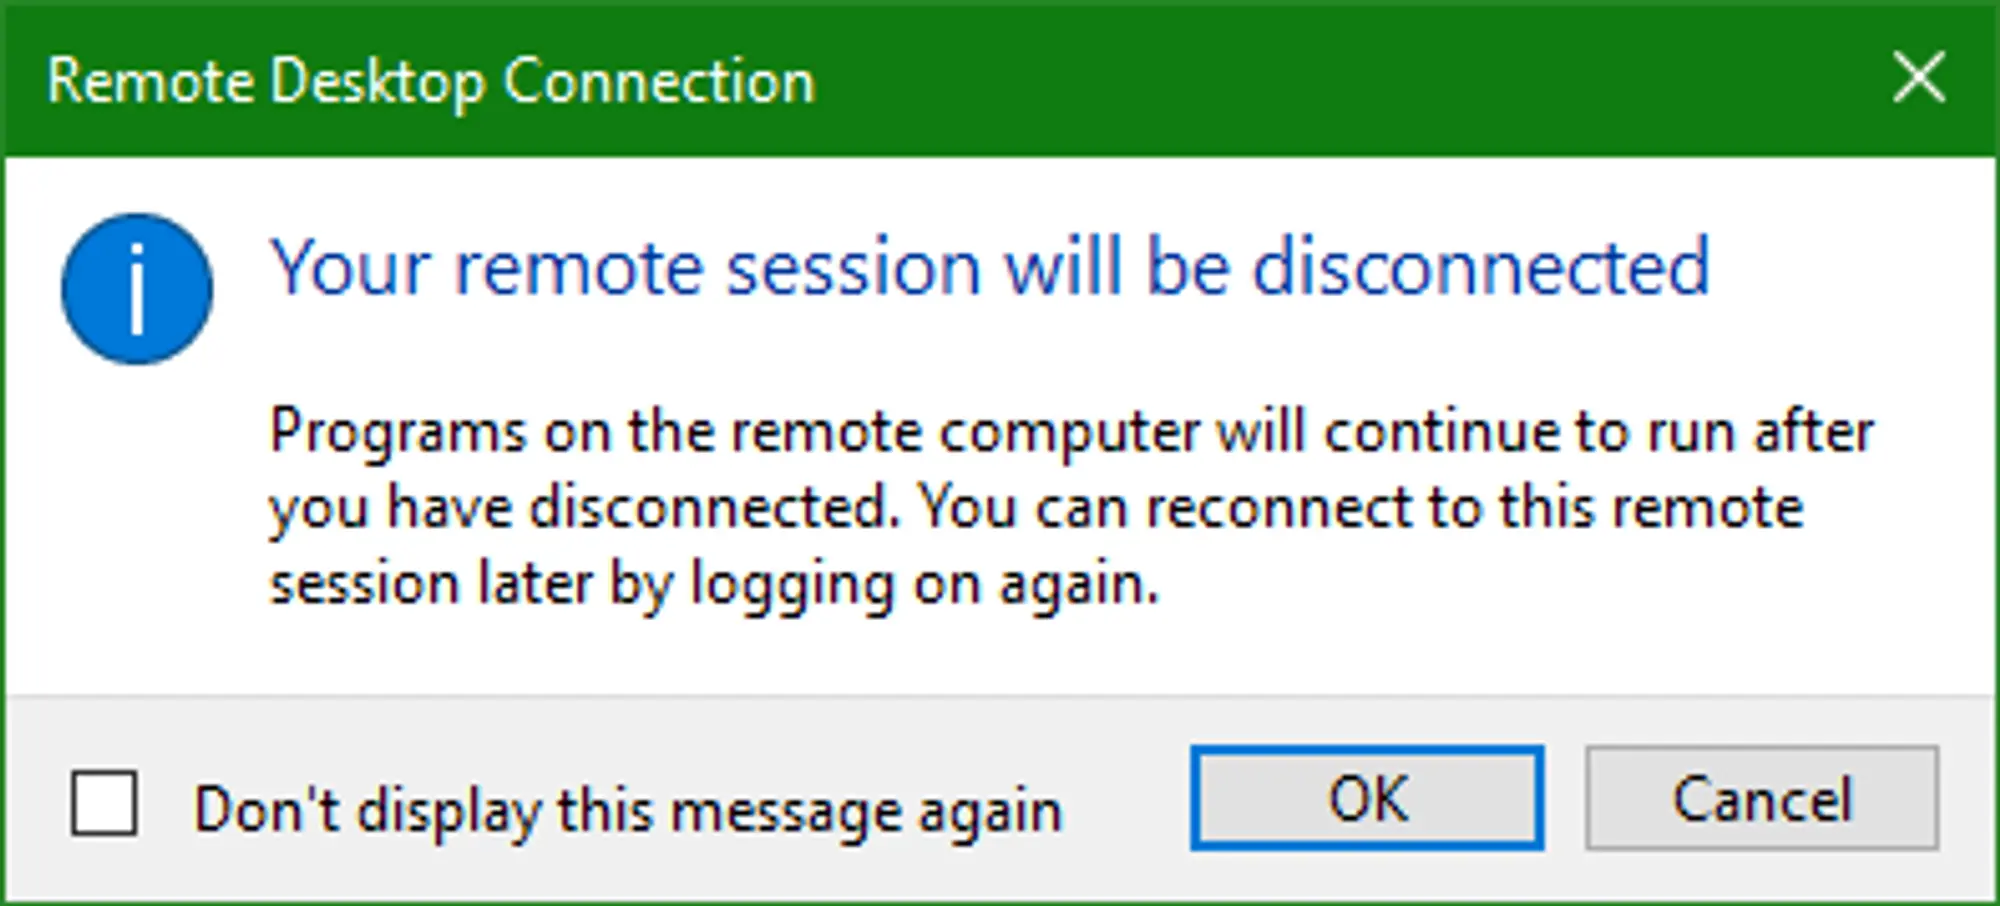
You can fully exit the RDP session by moving your mouse to the top of the RDP session’s screen in order to reveal the blue status bar. Then you can click the X icon on the right of the bar. You’ll be prompted with a message similar to the one shown in the image to the right, which you can disable with the checkbox. By clicking OK, you’ll exit the session but leave the programs you have running open on your VPS.
 Loading...
 Loading...
Saving your Connection Details
Now that you’ve connected to your Windows VPS, you may want to save your connection details in a way that allows you to easily connect to the server again. Saving your connection details also allows you to add additional configuration options like display settings and file sharing.
The Windows Remote Desktop Application has the ability to open and save .rdp files with the connection details you’ve provided to it. These files can also be edited using the Windows Notepad. We’ll be covering how to save a connection and how to open the .rdp file with the Windows Notepad, if you want to see what all can be configured using the .rdp file, check out this Microsoft article.
Saving
To start with, .rdp files are opened by double clicking on them like you would any other shortcut. So when you save it, make sure it’s in a location that you would have easy access to, like your desktop or a folder/drive with relevant files.
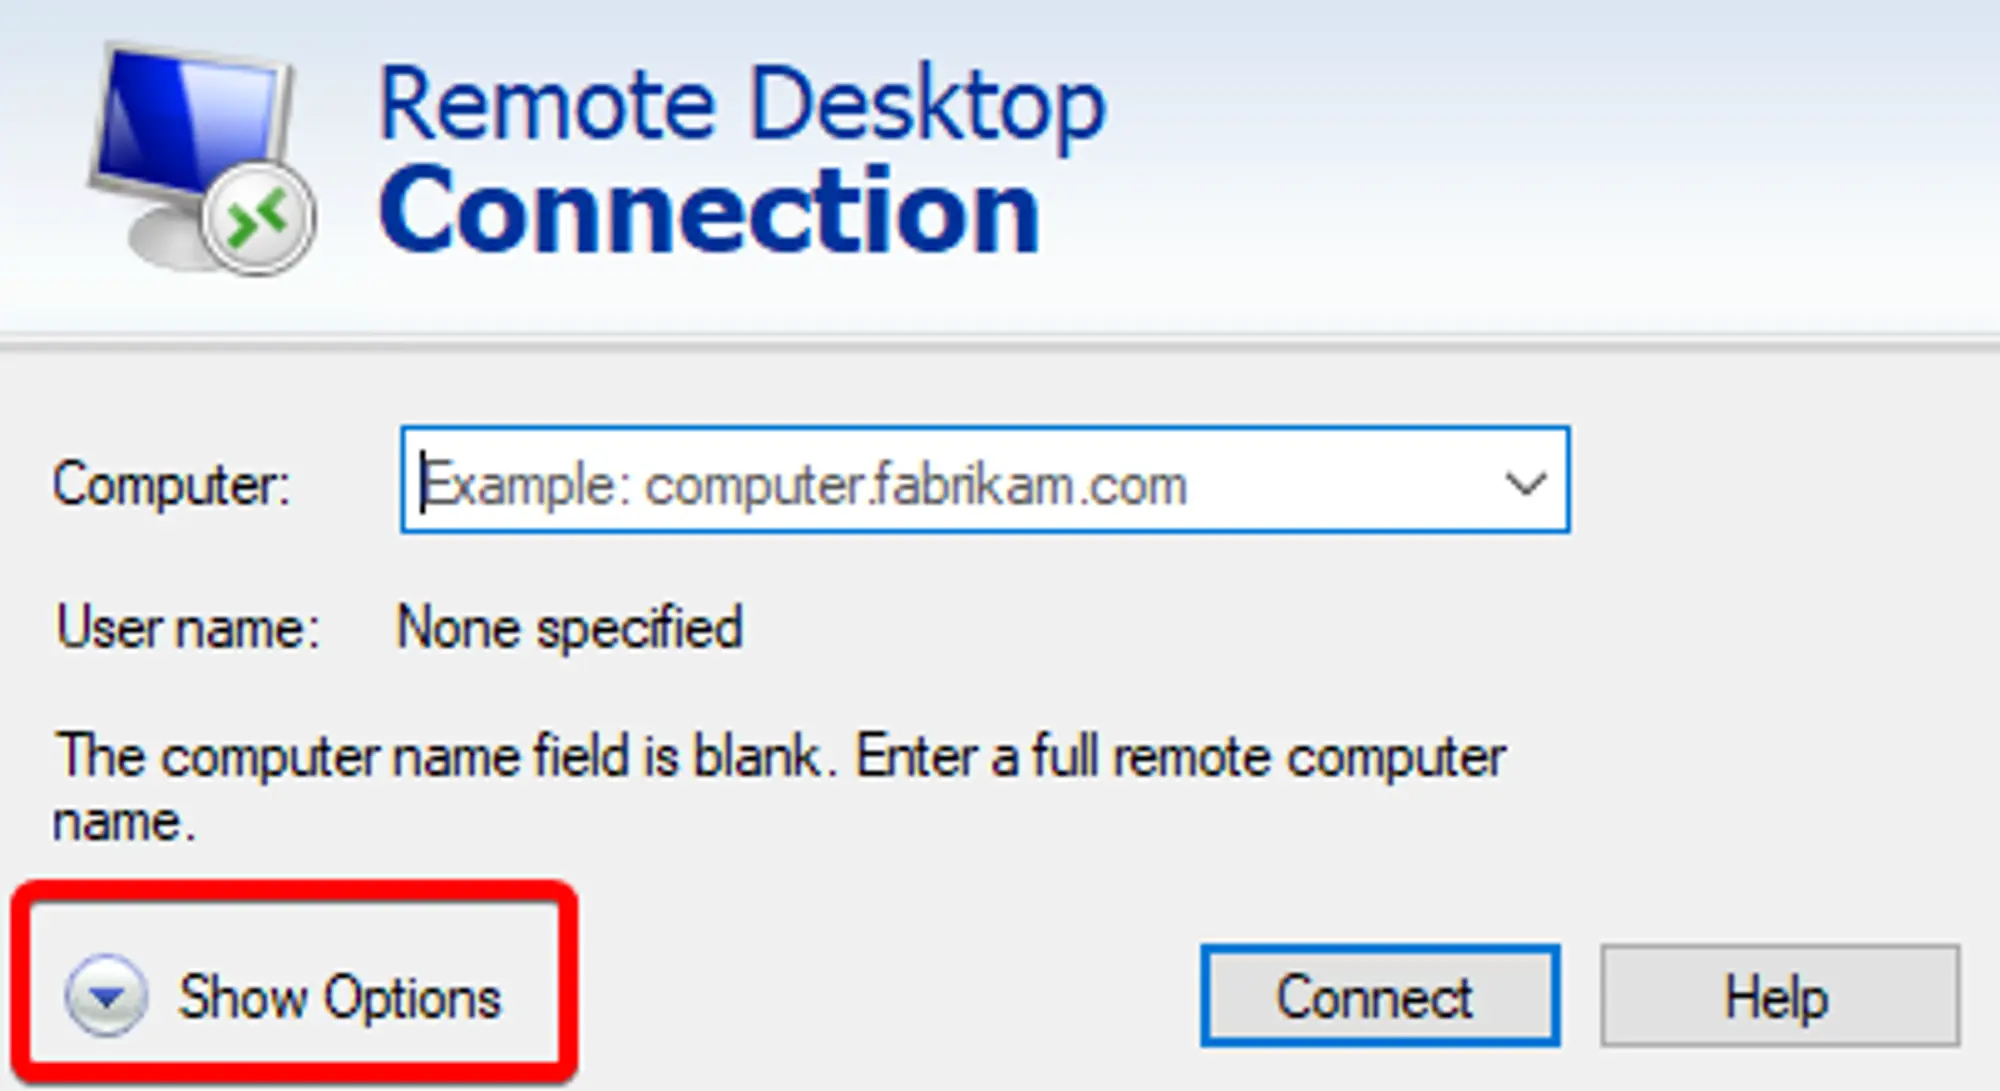
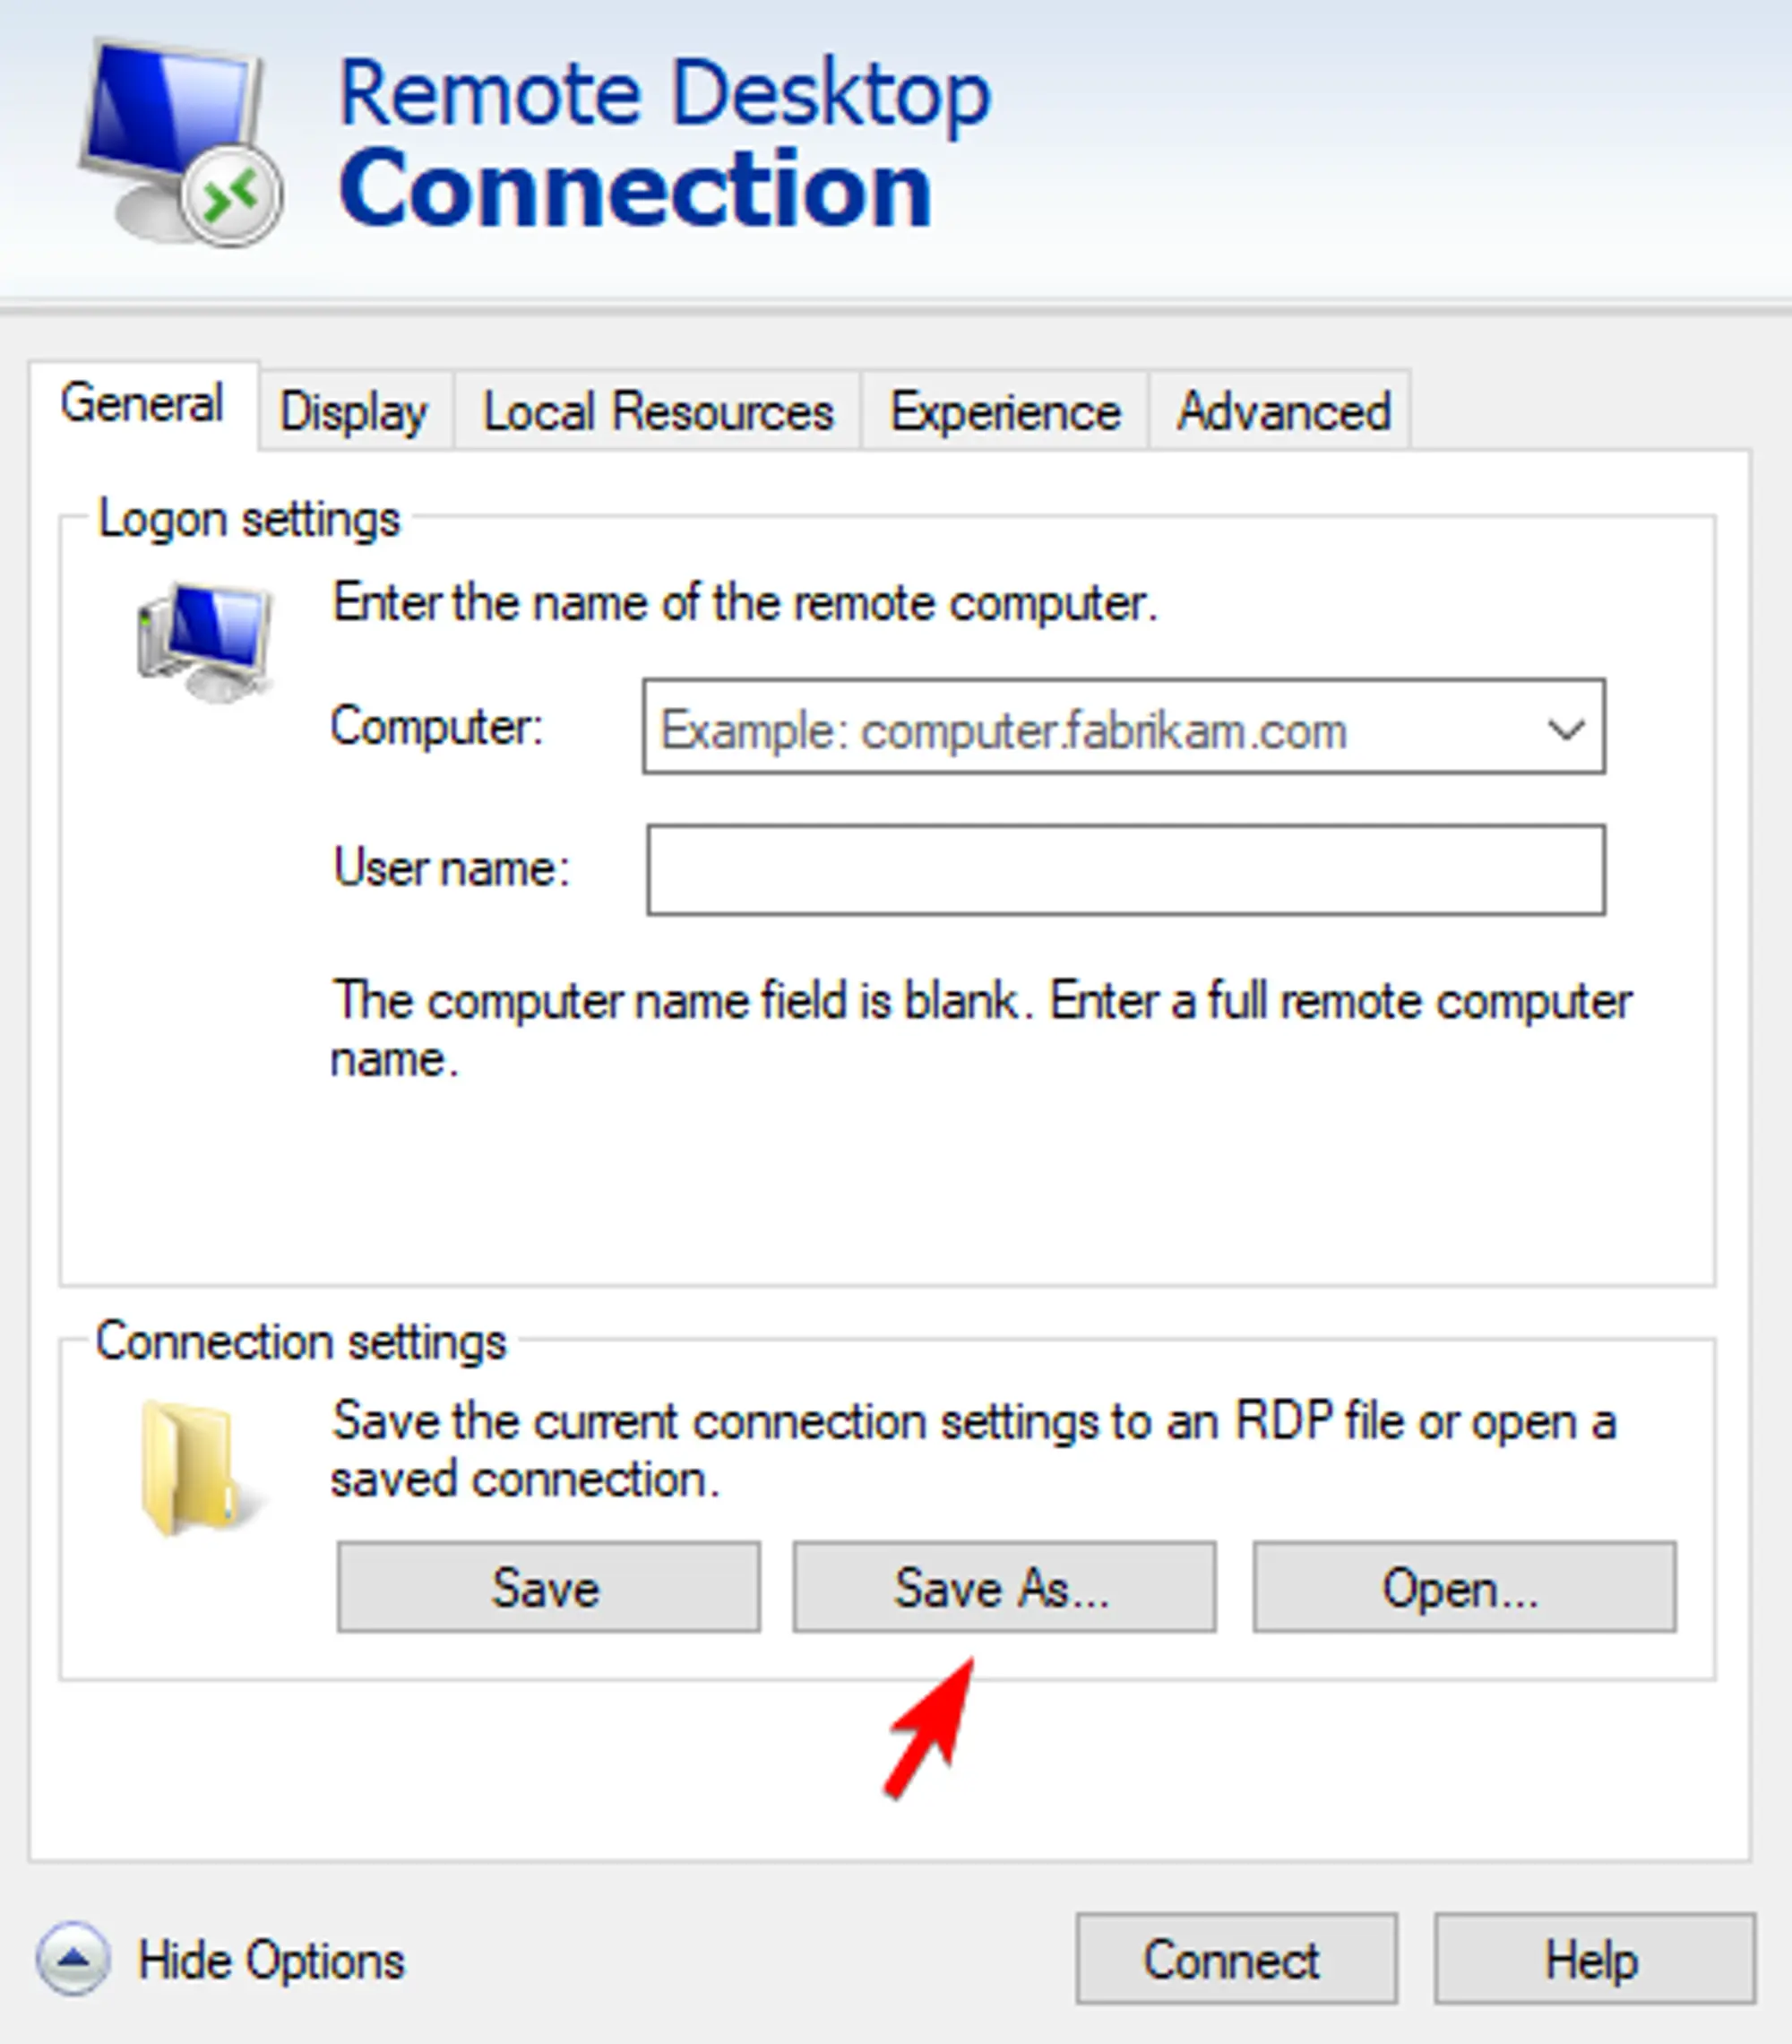
To save a connection, open the Windows Remote Desktop Connection application and click the Show Options drop down in the bottom right corner. This will alter the window to show a Connection settings box in a similar way to the one in the image to the right.
You’ll want to fill out the Computer field with the IP Address of your VM, just like when you originally connected, and then put the username you received in the VPS welcome email into the Username field.
With both of the fields filled out, you can click the Save As... button to save the .rdp file. As mentioned you’ll want to save it to a location you’ll have easy access to because the .rdp file will need to be double clicked in order to open the session.
 Loading...
 Loading...
Editing
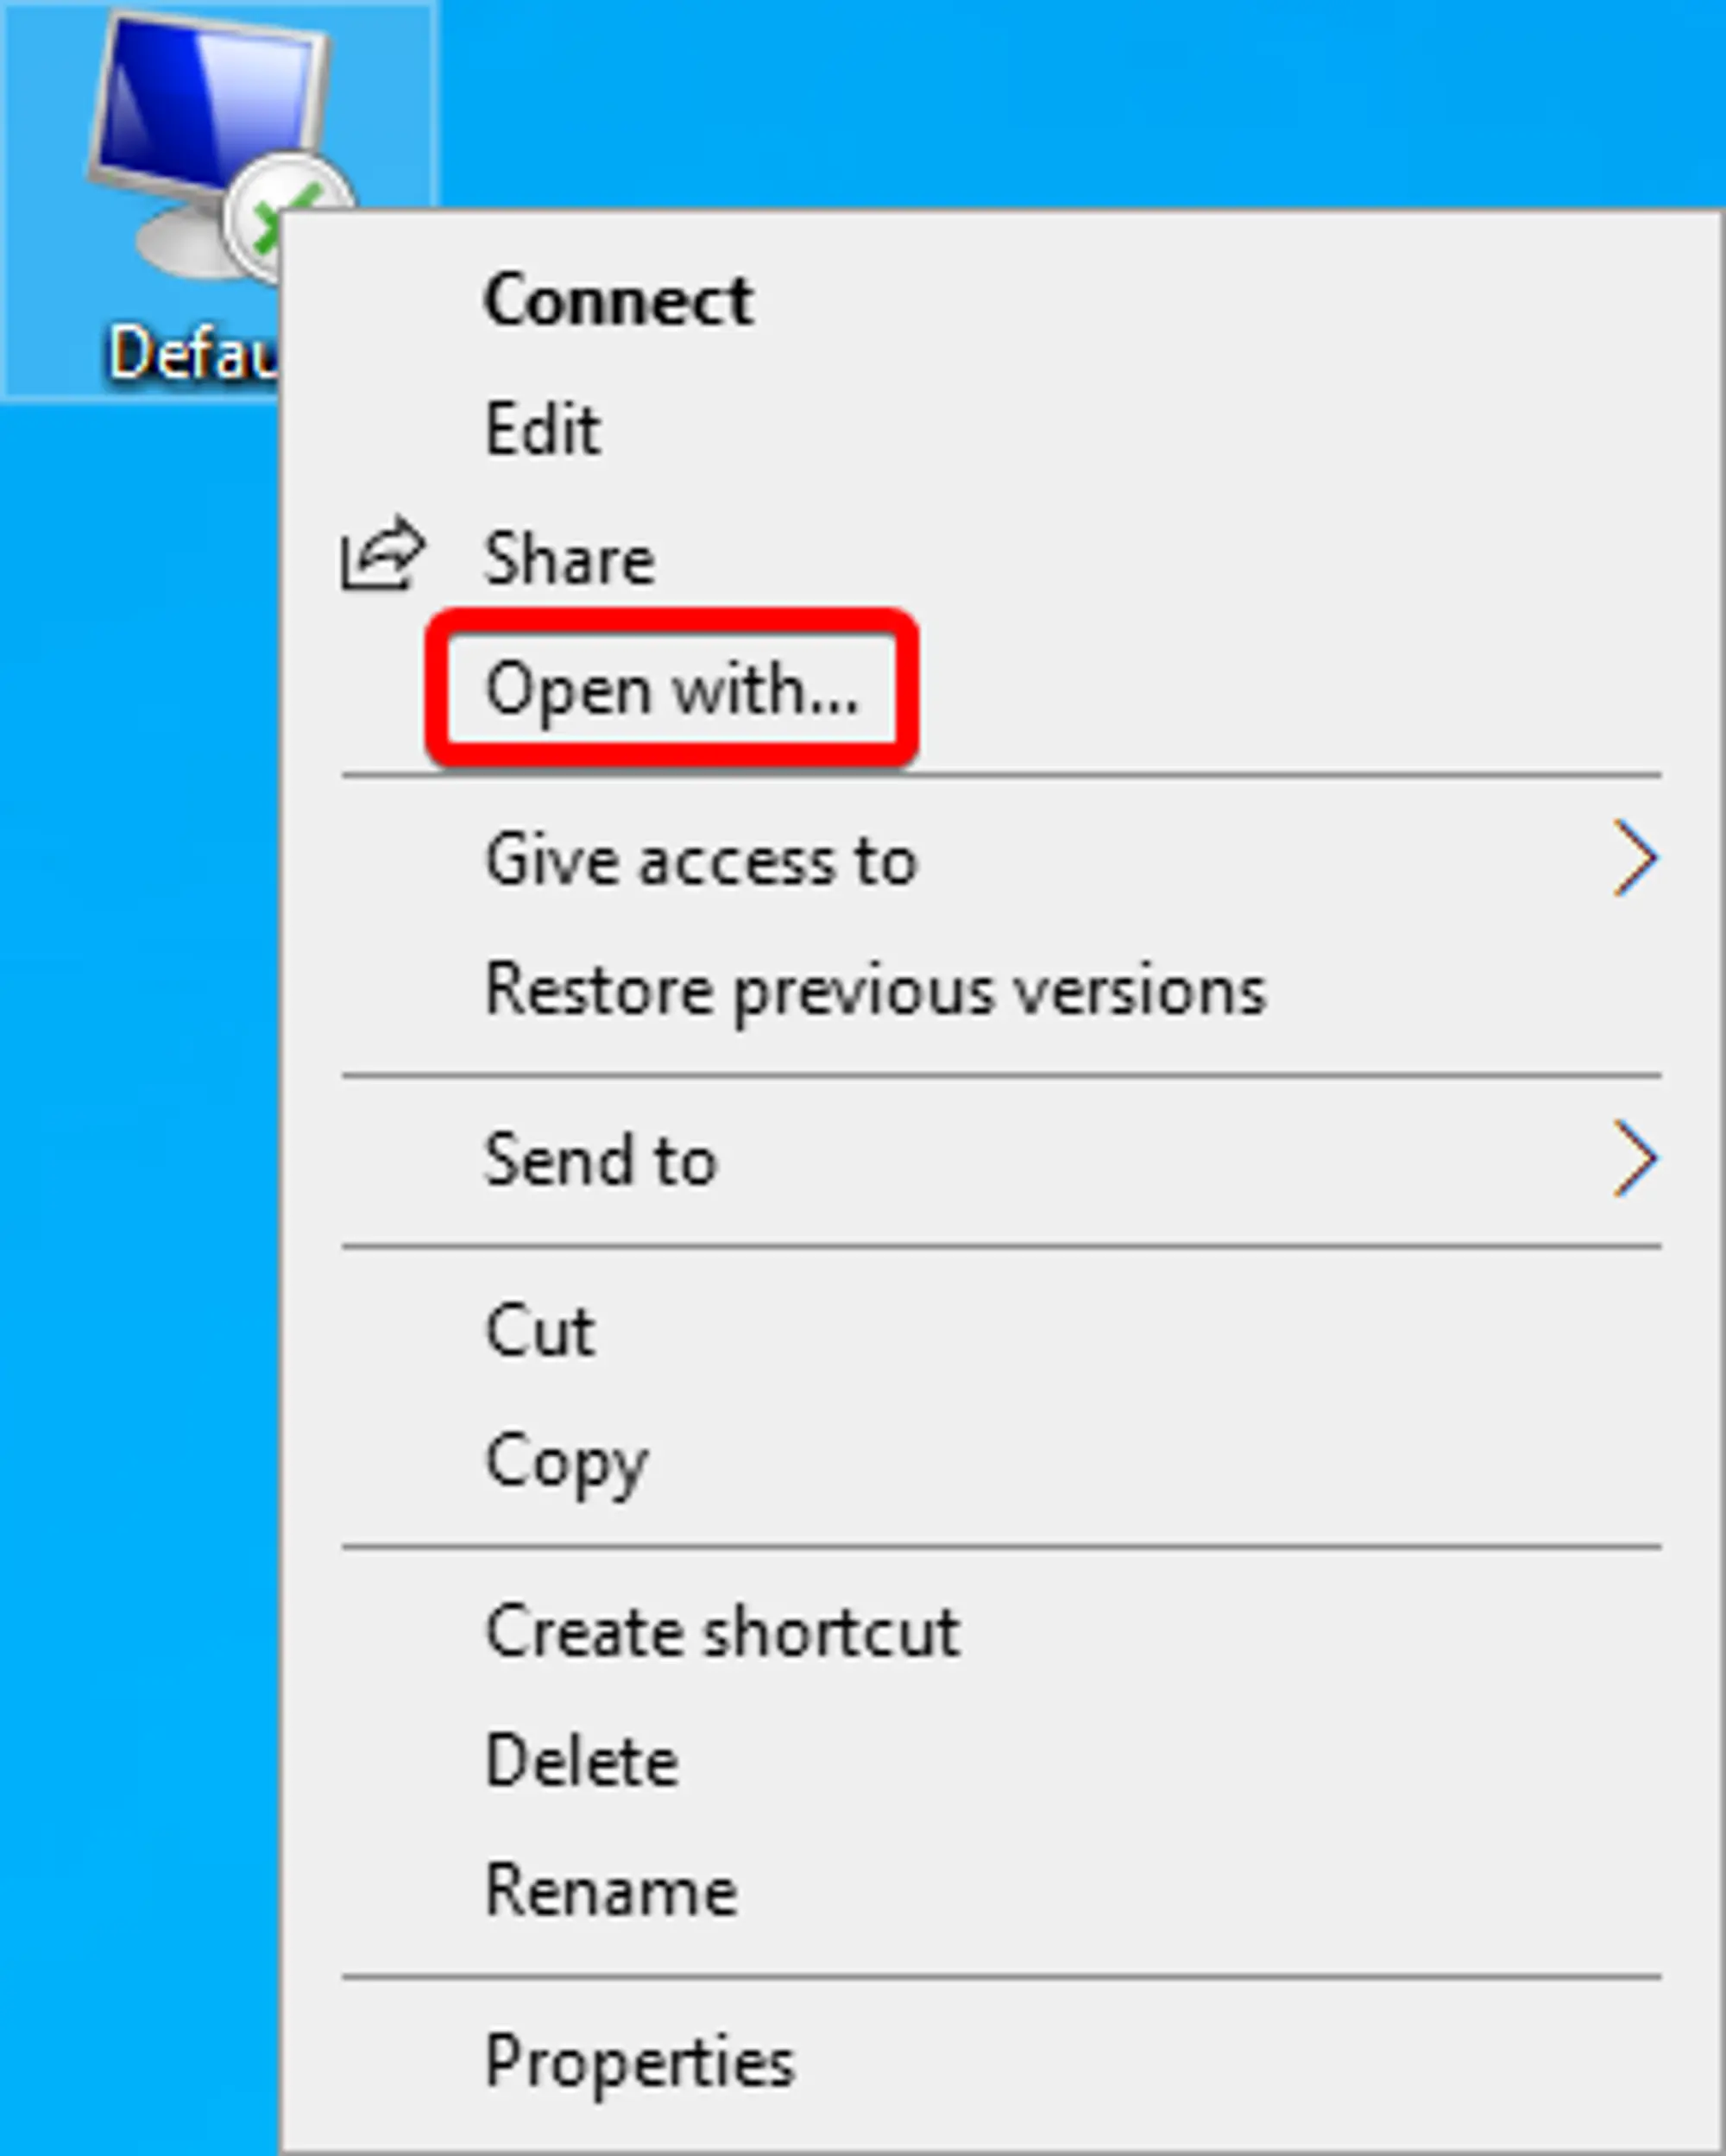
You can edit .rdp files with the Windows Notepad in order to add additional configuration parameters that are listed on this Microsoft article. By default, double clicking an .rdp file will open the connection, so you’ll need to right click on the file and click on the Open With option in context menu. The window that opens should have the notepad program as an option, selecting it will open the .rdp file in the Windows Notepad program and saving the notepad with CTRL + S or the Menu bar under File -> Save will save your modifications to the .rdp file.
Make sure not to select the Always use the app to open... check box in the Open with window!
 Loading...
Using Multiple Monitors
If you have multiple physical monitors on your Windows PC, you can configure the Remote Desktop session to use 2 or more of the monitors instead of the default of only using one. You can either use the connection GUI, or you can use the .rdp file you create by following ![]() this section.
this section.
Multiple monitors using the GUI
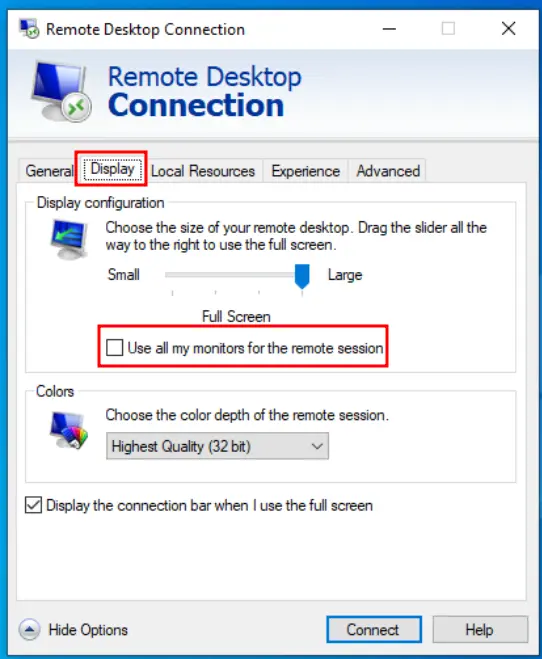
You'll need to start by opening the ![]() RDP Application, clicking the "More Options" button, navigating to the "Display" tab, and finally clicking the "Use all my monitors for the remote session" check box.
RDP Application, clicking the "More Options" button, navigating to the "Display" tab, and finally clicking the "Use all my monitors for the remote session" check box.
Loading...
When you click "Connect" your settings will be saved as the new default for all connections. If you'd like to only use some of your monitors, or use different settings for different connections, check out the section on ![]()
.rdp files and ![]() this section on using
this section on using .rdp files to change monitor settings.
 Loading...
Multiple monitors using .rdp
If you want to use a subset of your monitors and/or already have an .rdp file you use to connect to your Windows server, then you can add the multimon parameter to change the settings fot multiple monitors over your RDP session.
To start, you’ll need to follow the steps of ![]() this section of this article to save your connection details into an
this section of this article to save your connection details into an .rdp file.
After you’ve saved the connection details into an .rdp file, you’ll want to ![]() open the
open the .rdp file in Windows Notepad. We’re going to add a couple of the property values from this table on the Microsoft Help Center.
use multimon:i:1
selectedmonitors:s:1,2
The first property value should be use multimon:i:**1** where 1 stands in for true and sets the use multimon property. The second property is selectedmonitors:s:0**,1** where 0,1 is the list of monitor IDs that will be used as remote monitors. This defaults to all of the monitors on your Windows PC, so if you don’t want to limit the monitors you use, or you only have two, you don’t need to use this option.
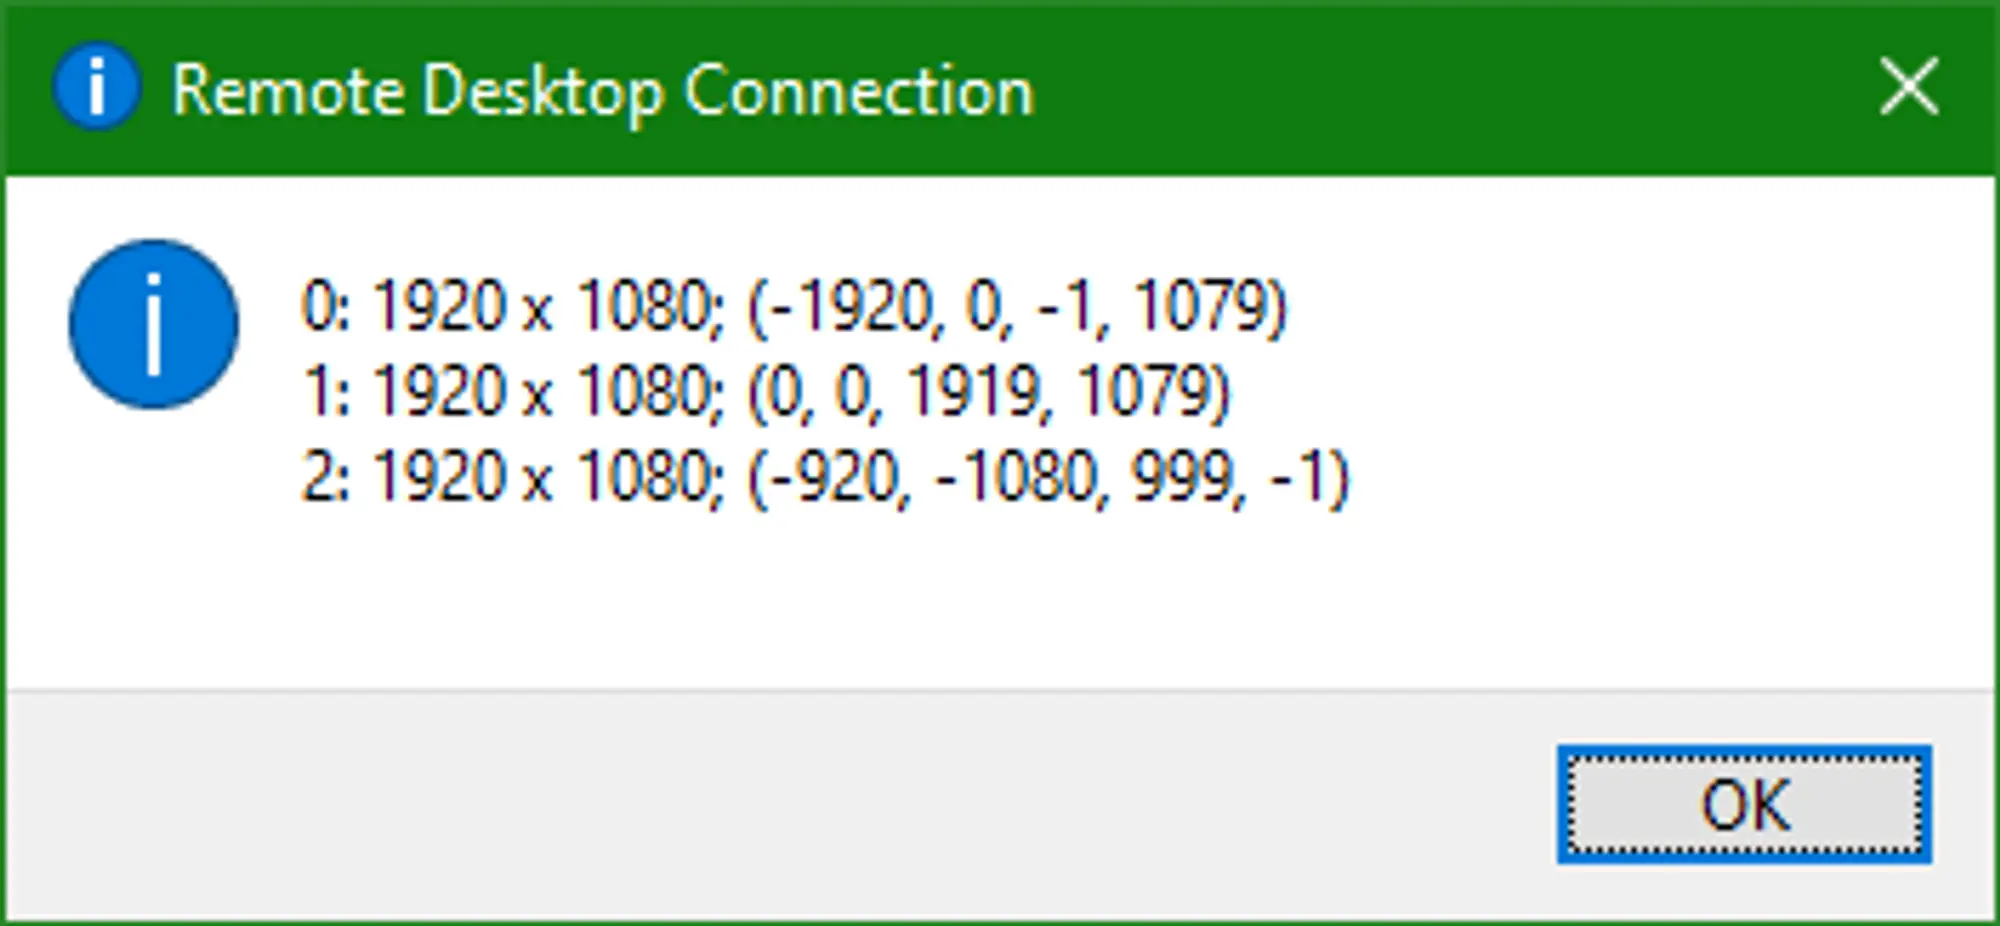
The monitor IDs start at 0 and go up, where 0 is your primary monitor. You can get the IDs of each of your monitors by using the command mstsc /l in the Windows Command Prompt. When running that command, you’ll get a new window that looks similar to the one on the right, where the first column of data is the Monitor ID of each monitor, the second column is the resolution of the monitor, and the 3rd is it’s position relative to the larger monitor structure.
 Loading...
If you only want to use all of your monitors, you don’t need to use the selectedmonitors:s: property!
After getting the response from the command, place the IDs of the monitors you want to use in a comma separated list after the selectedmonitors:s: property. For example, if you want to use your primary monitor and monitor 1, you’d have the property selectedmonitors:s:0,1.
If the number you entered isn’t the monitor you wanted, just try another number from the list. The exact ordering of the list can be a little ambiguous and trying again doesn’t hurt anything. Just close the session, edit/save the file, and start the session again.