Getting Started with your Windows Server
HostVenom offers Windows Server as an operating system for our platform of both Dedicated servers and VPSs, and is the OS of choice for our Trading VPS service. In order to follow along with this getting started guide, we recommend you read our Remote Desktop Connection guide to get connected to your server using RDP.
There are some differences between your home PC and a Windows Server, but once you get past the initial set up you should find the interface and feel very similar to your Windows PC. The following guide will help you do things like find your browser, understand the software installation process, and locate the Windows Update settings.
We recommend you read our Remote Desktop Connection guide to get connected to your server using RDP.
Server Manager
When you initially connect to your Windows Server Remote Desktop, you will see the "Server Manager". The average user will not need to interact with the Server Manager, and you can close the window using the close button on the right side of the title bar.
Disable Autostart
The Server Manager window will automatically re-open when your VPS restarts. This can be disabled from within the Server Manager application by selecting "Manage" -> "Server Manager Properties" from the menu bar, and then ticking the box next to "Do not start Server Manager automatically at logon".
 Loading...
The Default Browser
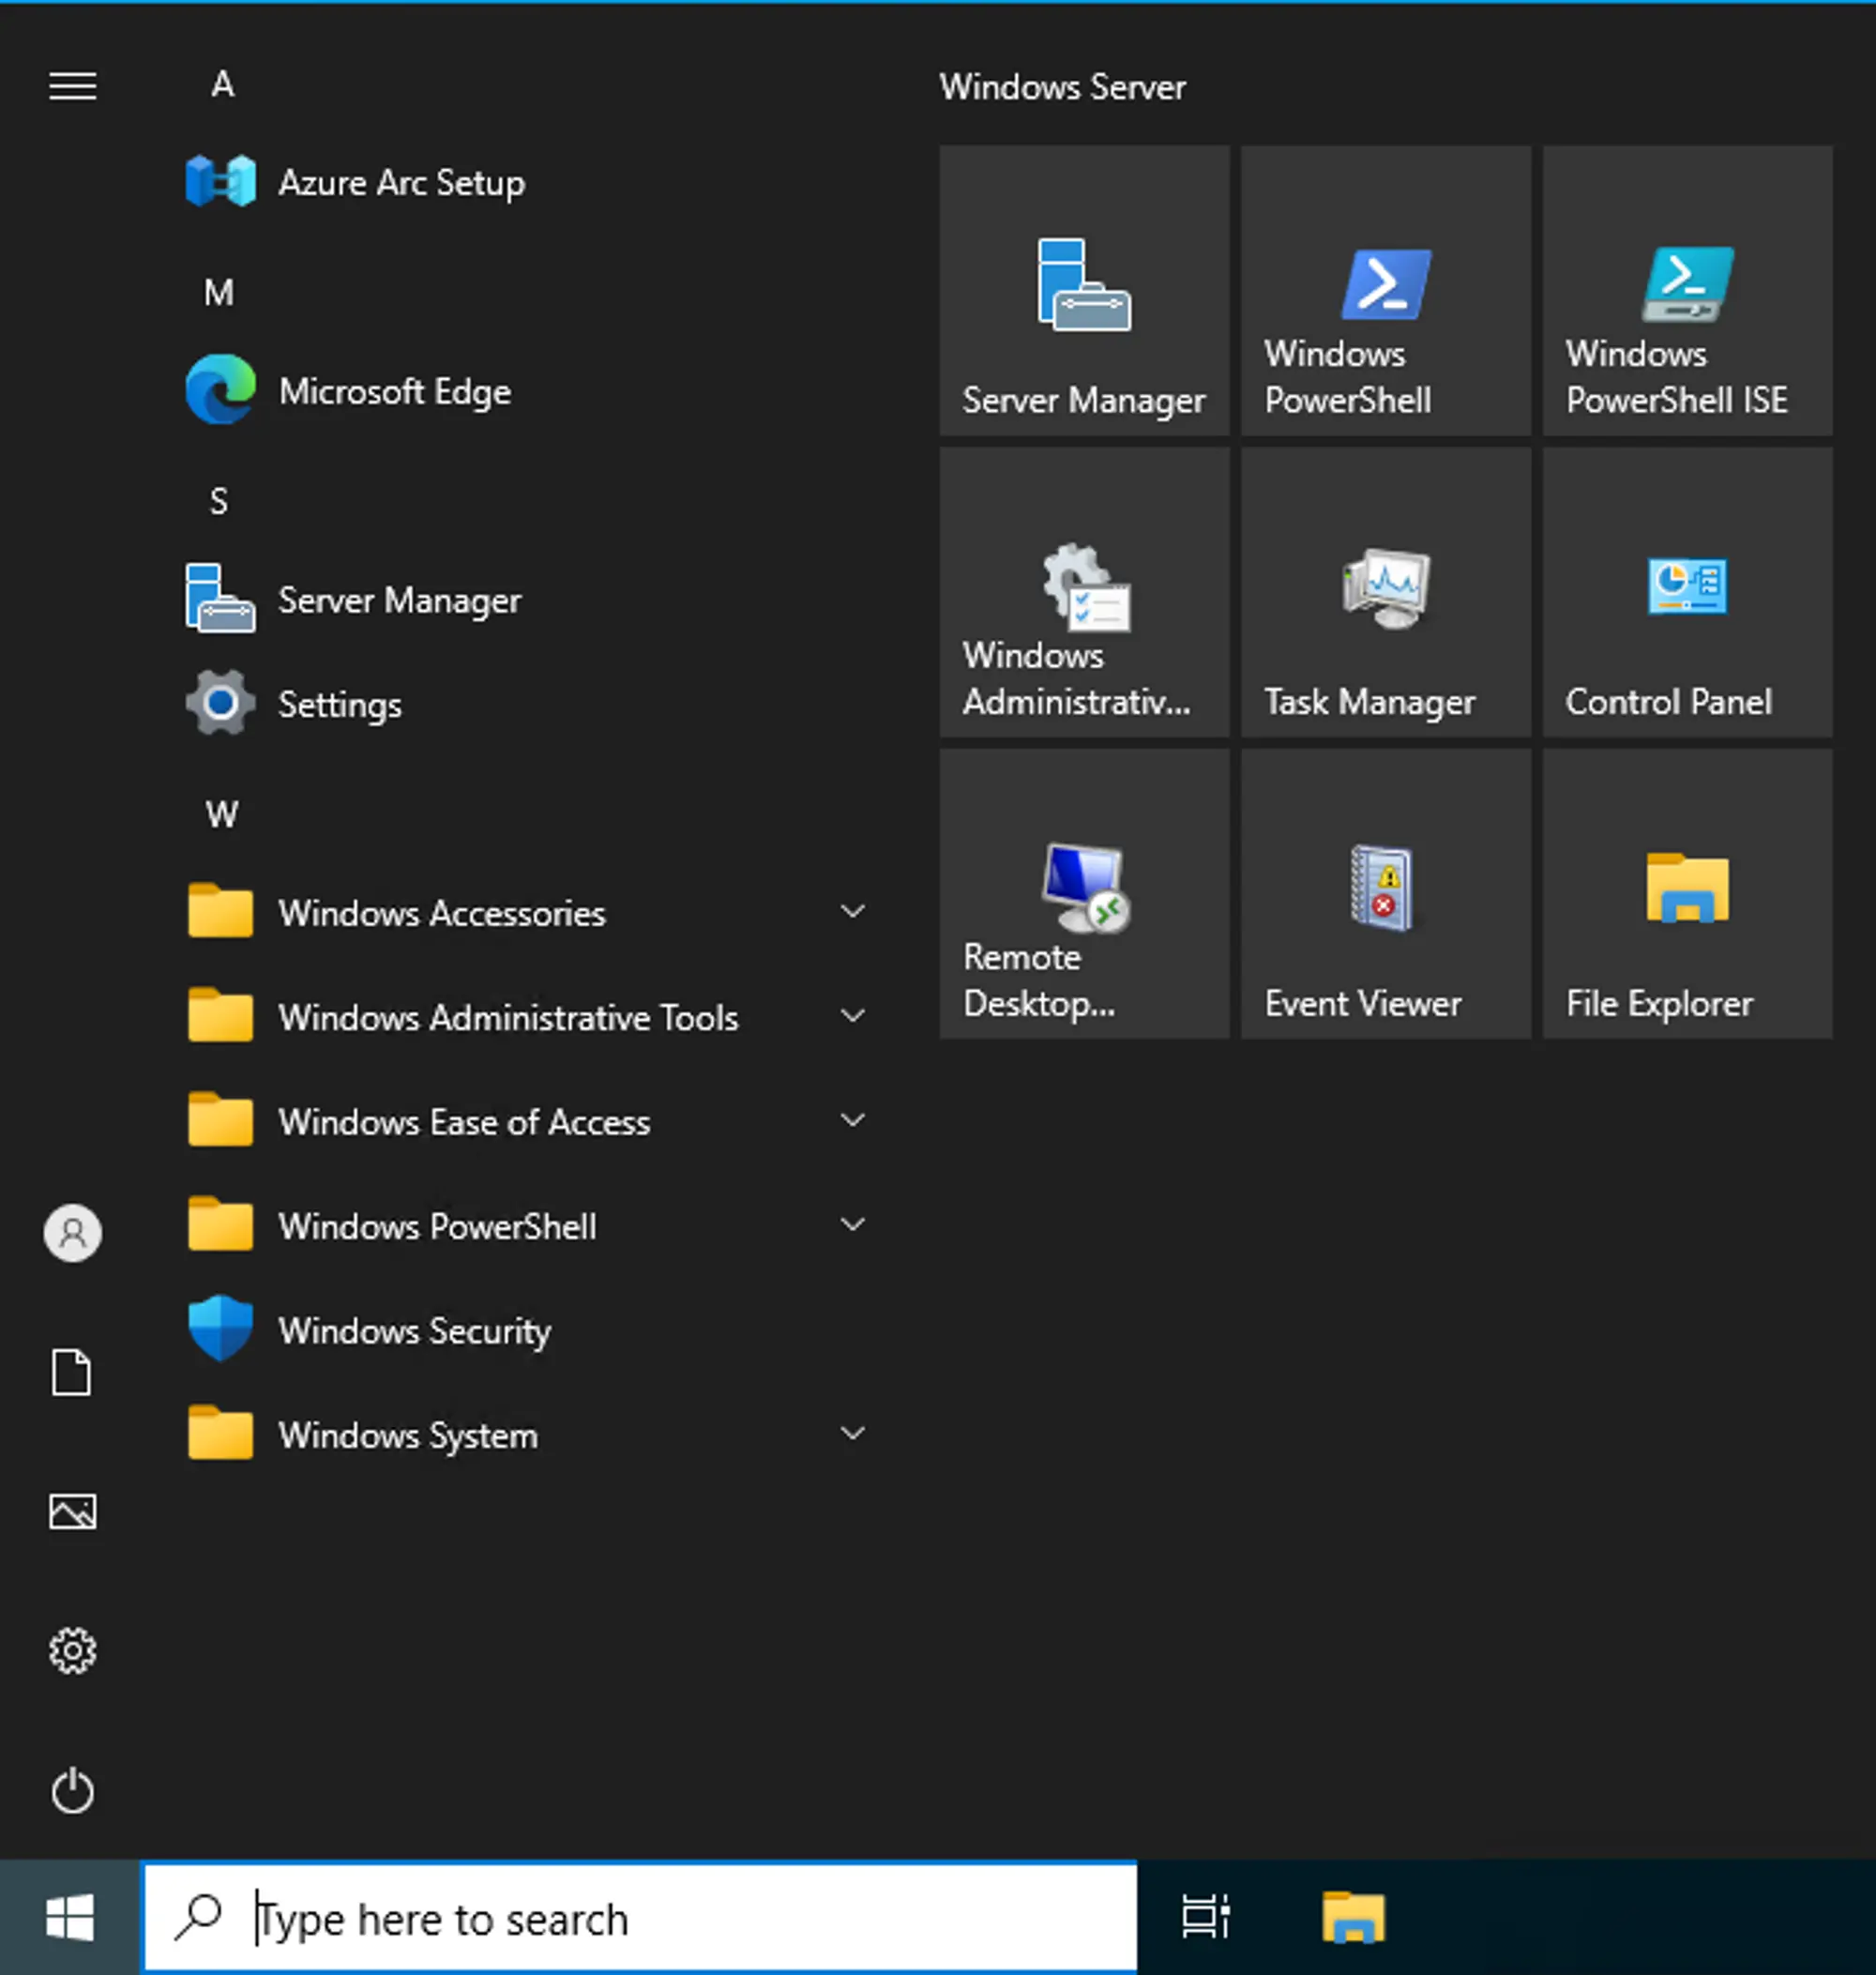
One of the first things you’ll probably want to do after connecting to your server is open your browser to install the software that you need. Just like on your home Windows PC, you can find the browser in the start menu.
Windows includes Edge as it’s default browser and since there's no icon on the desktop for it, you can find it by searching “Edge” in the start menu or by looking under the letter “M” in the program list in the start menu.
 Loading...
Installing your preferred browser
After finding and opening Microsoft Edge you may want to install a different browser. For this example we’ll be using Google Chrome, but the steps will be the same for most any browser, just substitute the initial search for the browser of your choice.
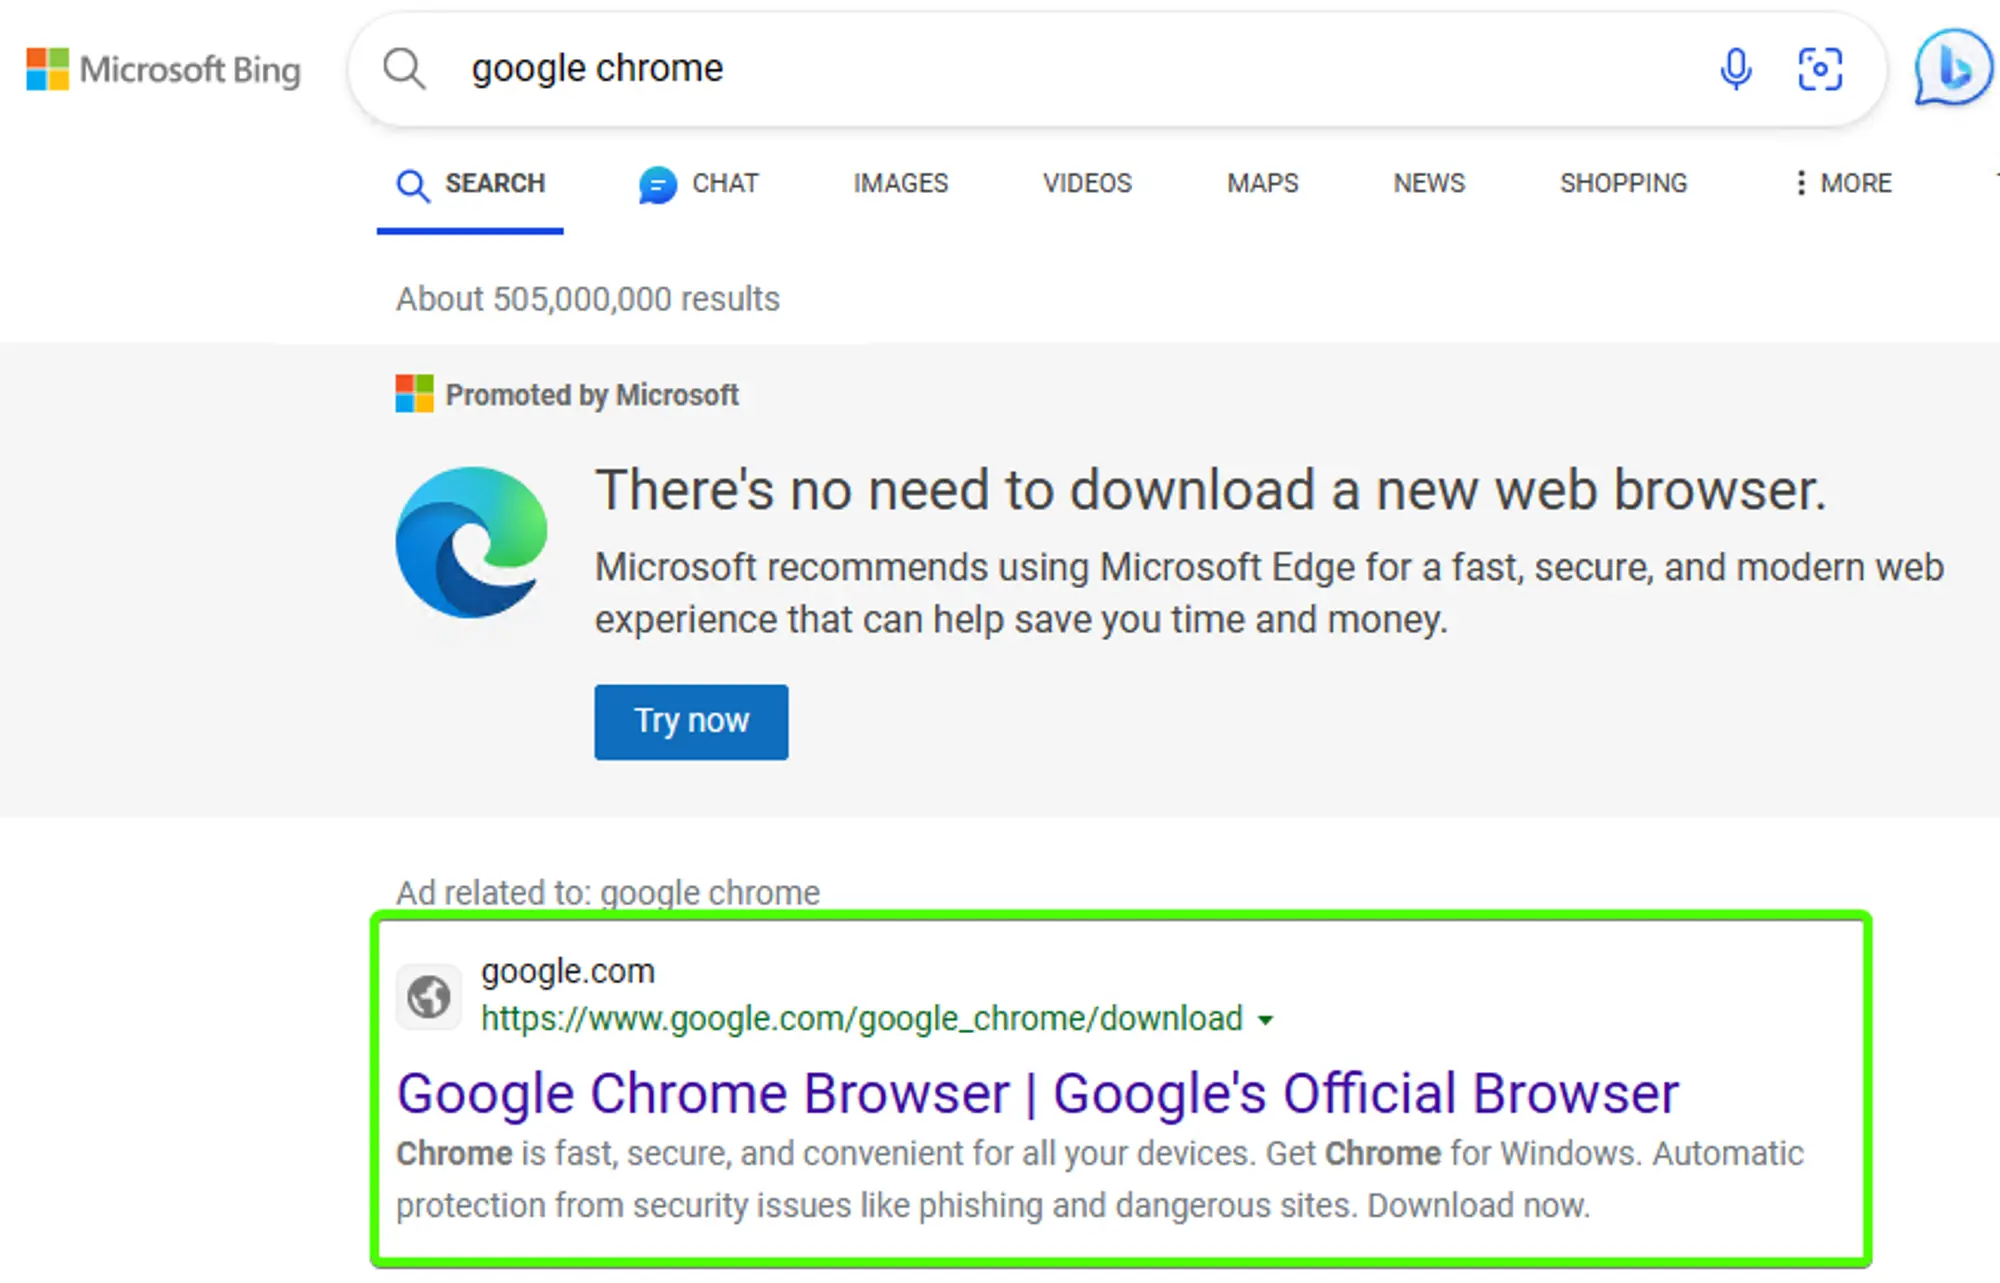
You’ll want to start by typing the name of the browser into the omni-bar at the top of the Microsoft Edge browser. This will perform a search in Bing, and should provide a link to the install page for the desired browser. The image to the right shows a Bing search for Google Chrome.
 Loading...
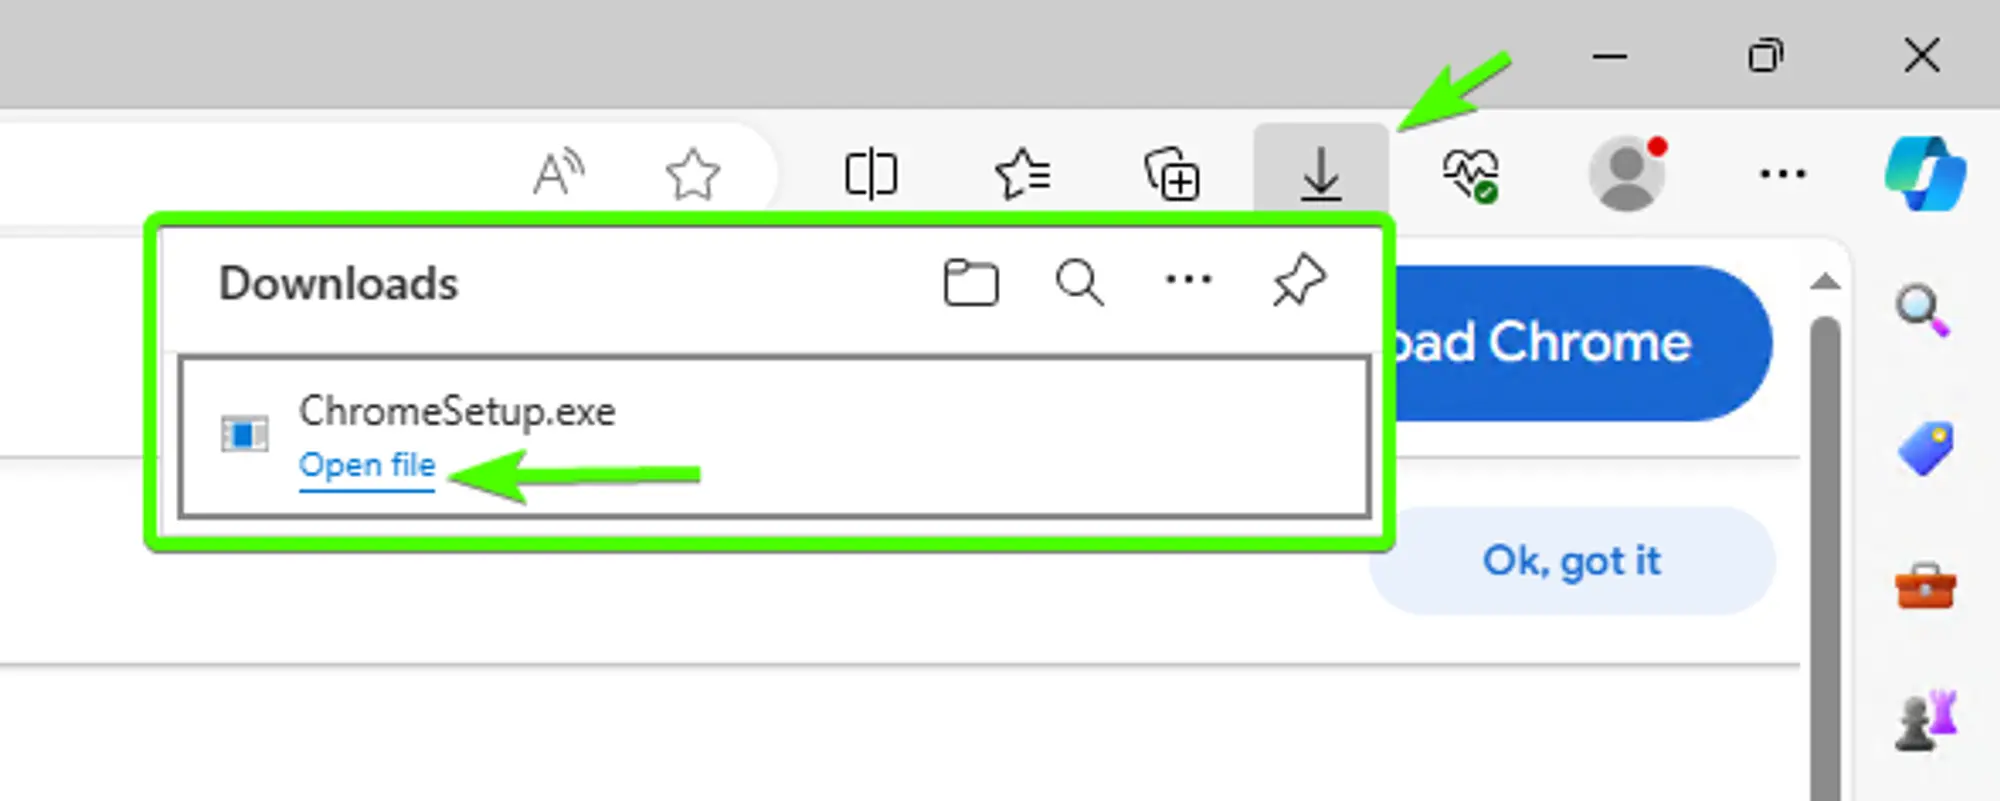
After performing the Bing search, click on the correct entry for the browser you want and find their install button. The installer will be downloaded to your Downloads folder, but in Microsoft Edge you can access it using the toolbar located on the top right of the window once it’s finished downloading.
Once the option is available, open the downloads drop down, denoted by a ↓ symbol, and click open file text under the installer file entry.
 Loading...
You can then follow the steps of the installer and open the browser using the icon on the desktop, should one be placed, or by searching for it in the Windows start menu.
Installing your Software
Now that you have your preferred browser set up, you can start downloading the software you intend to use on your Windows Server. This is done the exact same way you’d do it on your Windows PC at home, by navigating to the website, for example the NinjaTrader website, and finding their downloads page.
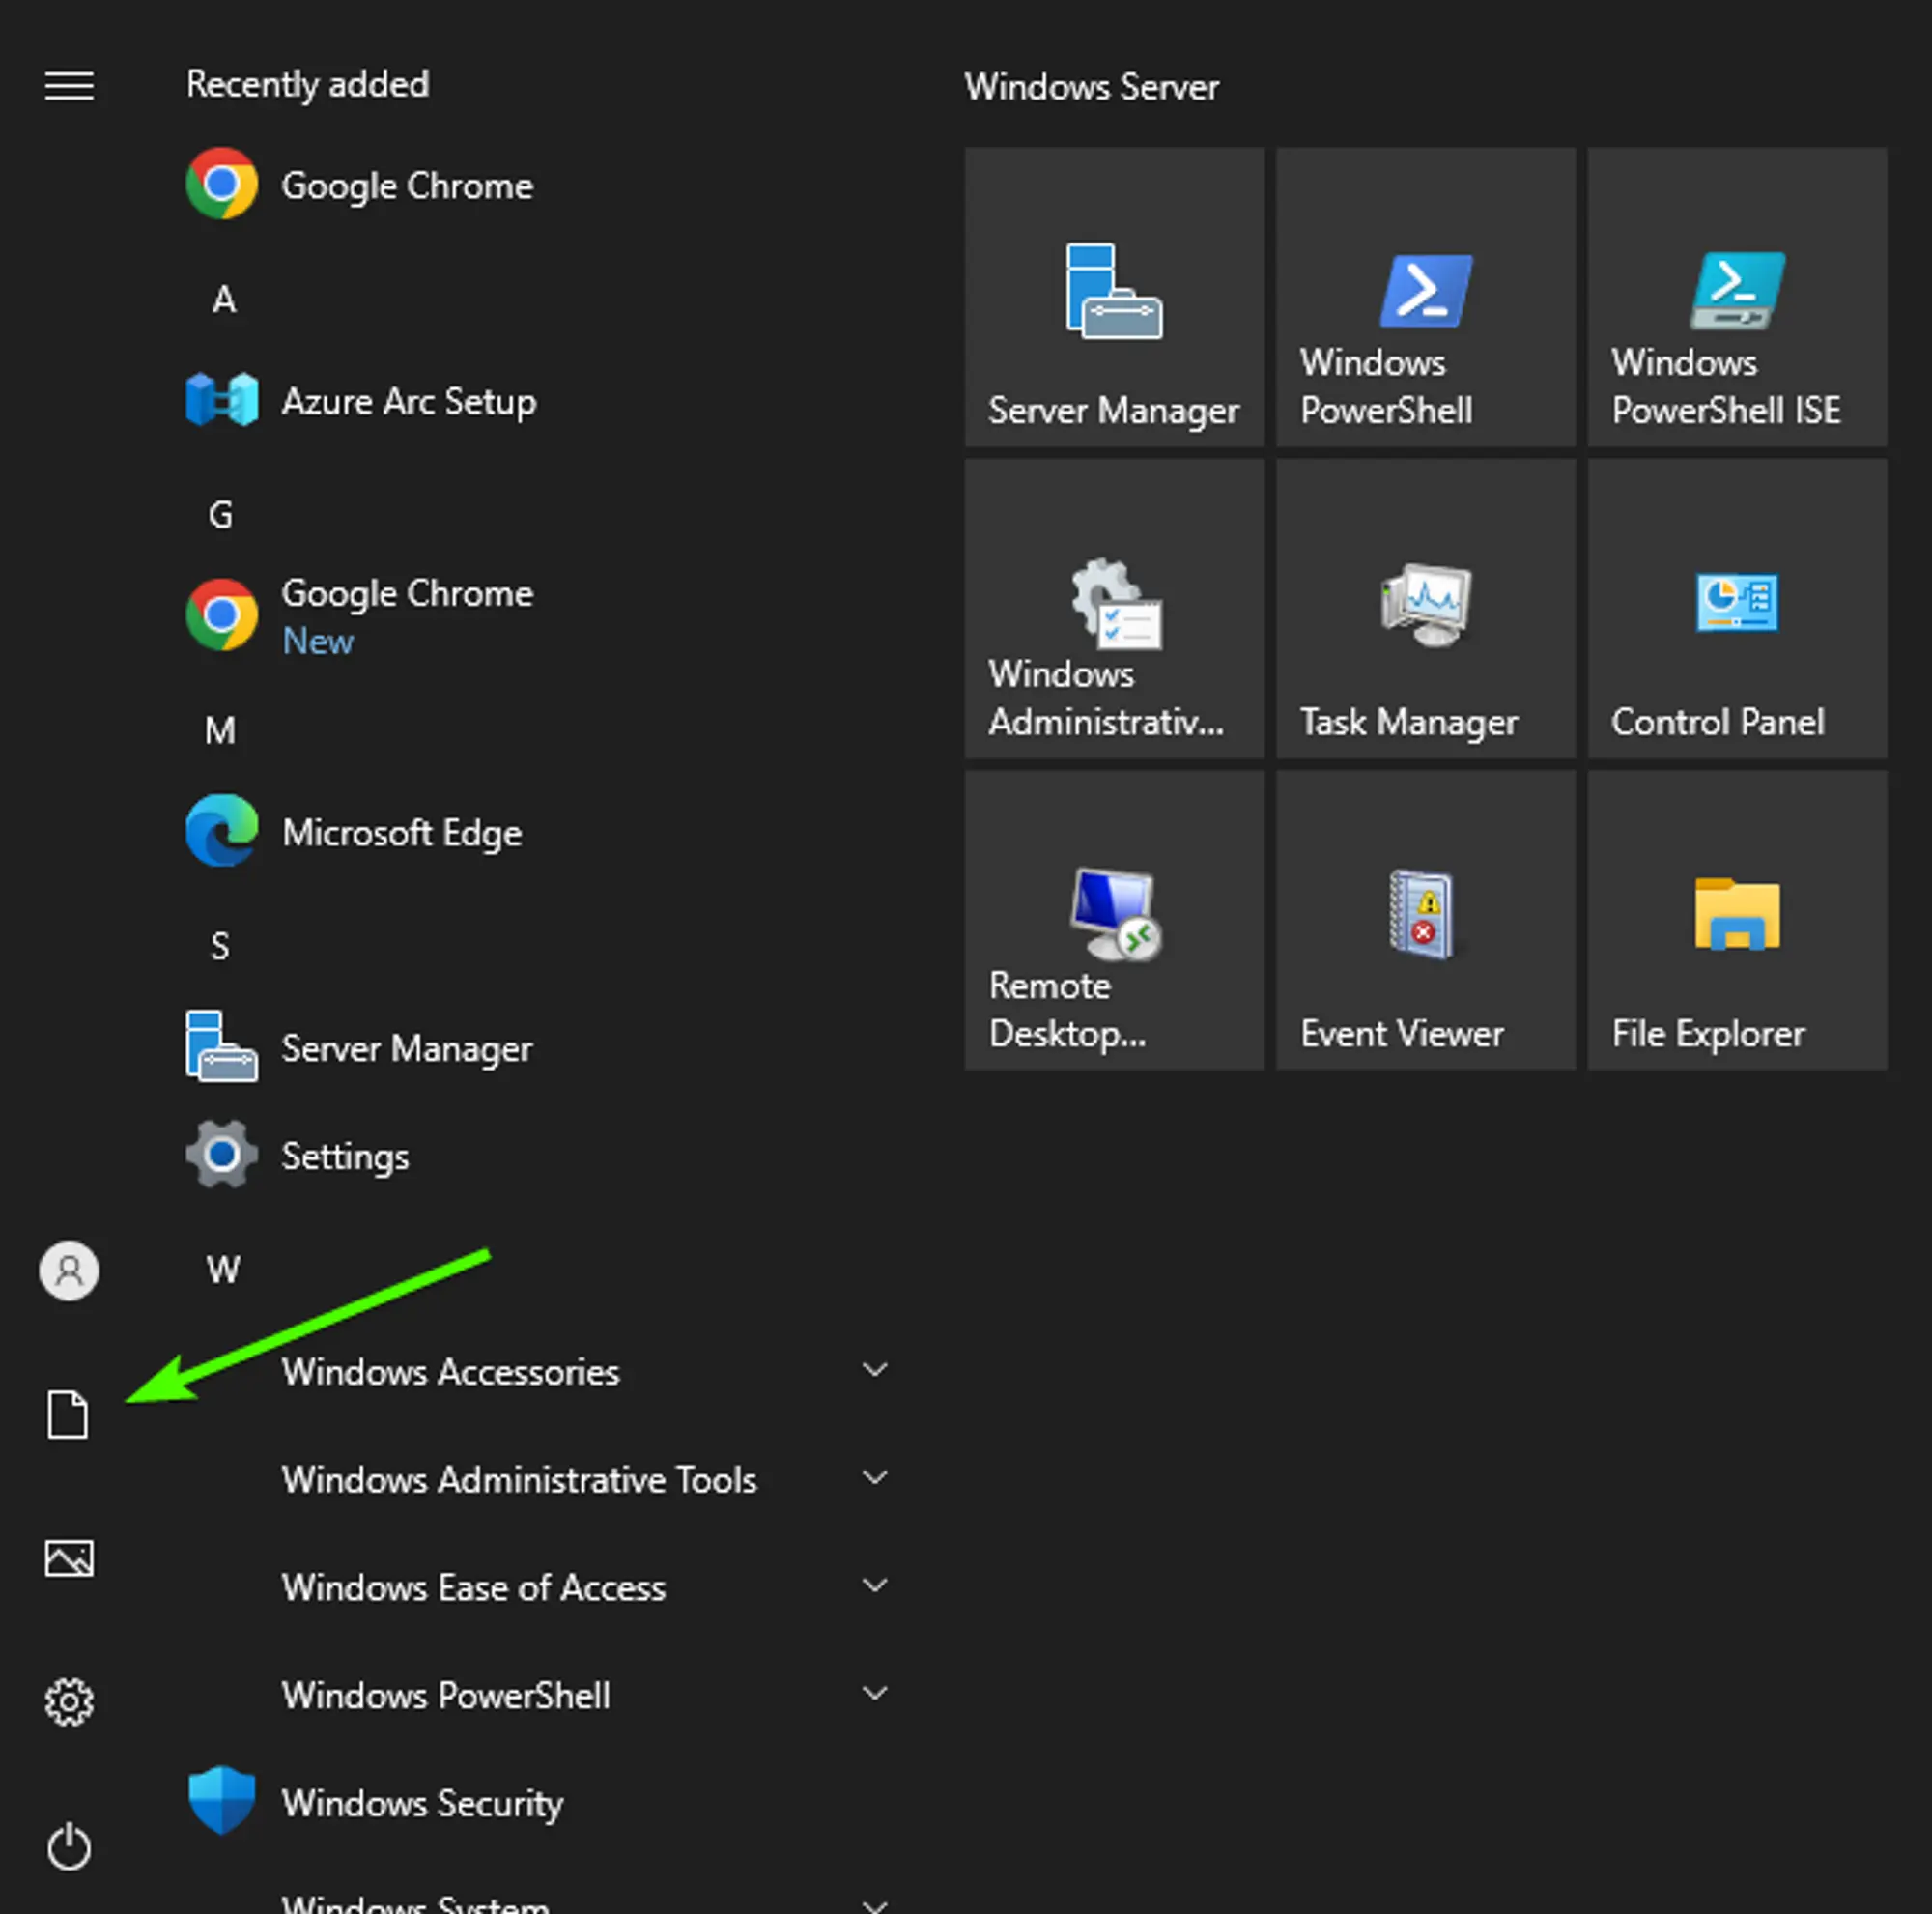
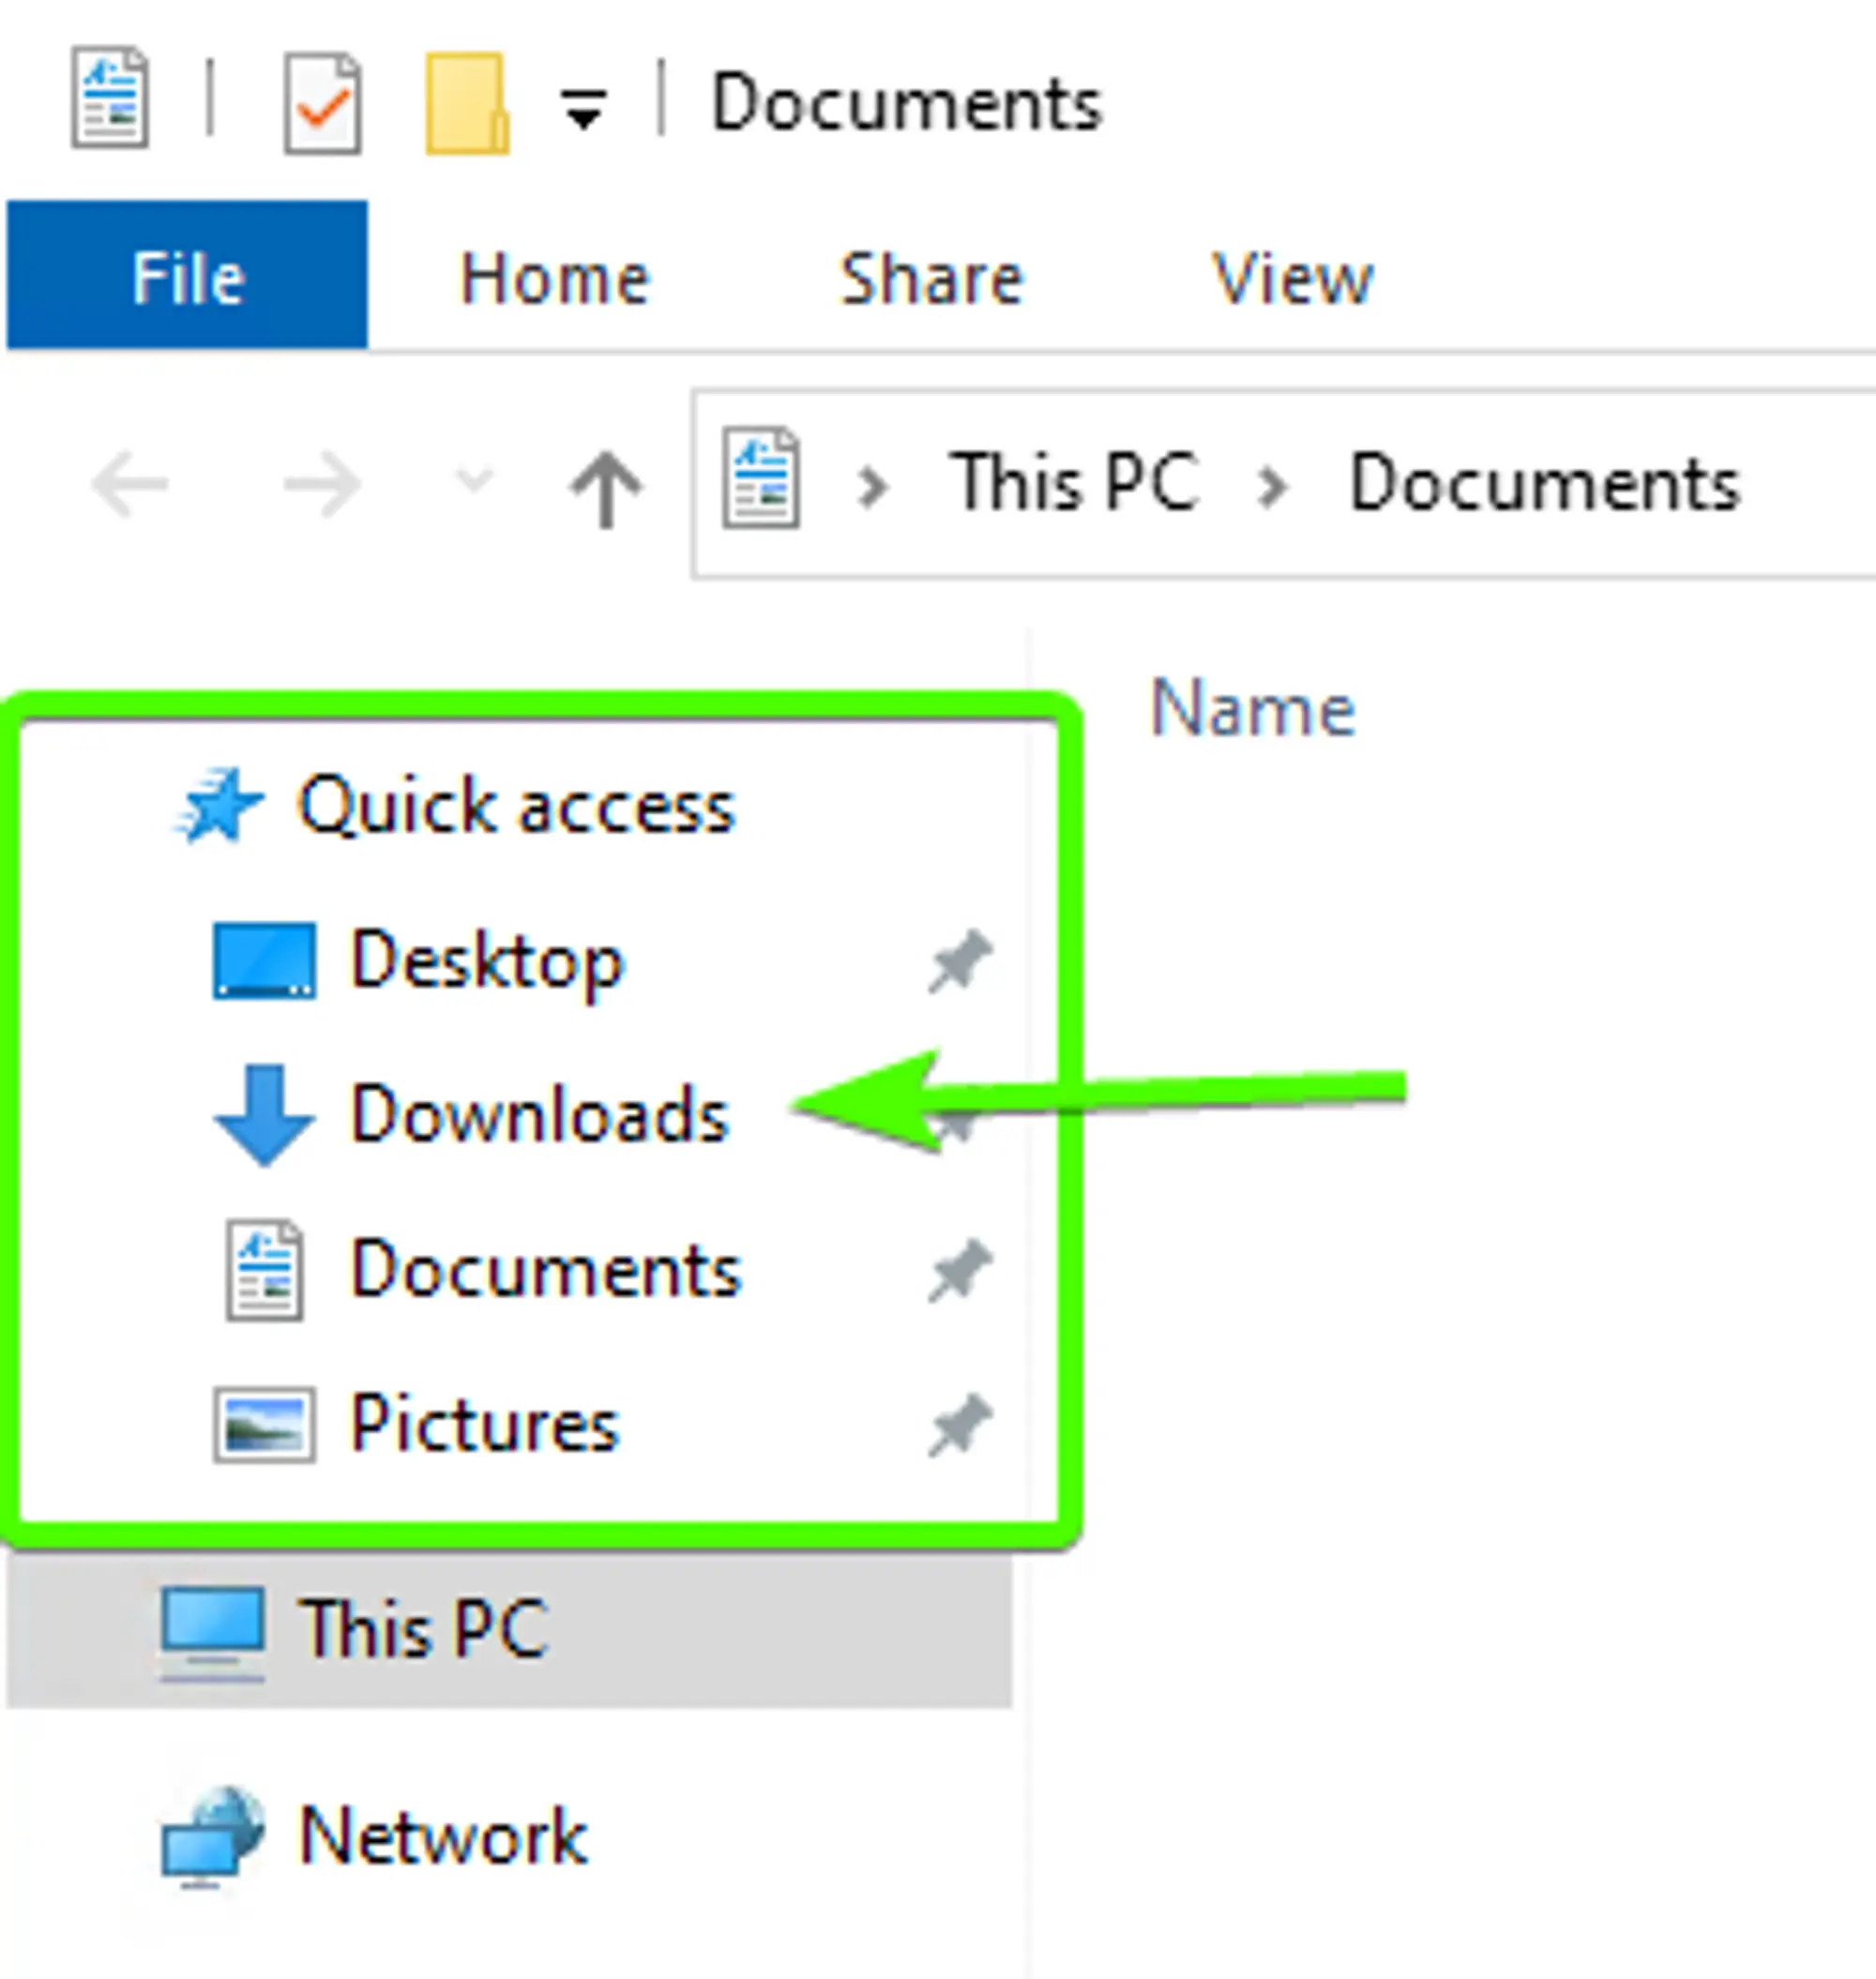
Once you’ve found it, you click download and the file will appear in your downloads folder. You can open your downloads folder by opening the start menu and clicking on the Documents icon on the bottom left of the start menu, as shown in the image to the right.
 Loading...
With the documents folder open, you’ll want to look on the top left corner of the file explorer under Quick access. One of the default entries will be Downloads preceded with a blue ⇩ icon. Click on that entry and you’ll be taken to your downloads folder, where you’ll find the default download location for most programs, included your recently installed browser.
From here, you can launch the executable you’ve just downloaded for whatever programs your heart desires.
 Loading...
NinjaTrader
If you're using your Windows Server as a Trading Server and and want to instal then popular trading platform NinjaTrader, then you can use the above sections to get your browser set up and locate your downloads folder, and then check out their article on installing their desktop application. The process will be exactly the same as the Windows Server environment functions in a very manner to the Windows 10 environment.
Setting your Server's TimeZone
By default our servers are deployed with a timezone matching US Central Time. If you'd like to change your timezone, follow the steps below or in the provided video.
If you'd like to follow along with a video tutorial instead, check out this one we posted to our YouTube channel!
- After logging into your Windows Server, right click on the time on the right side of the task bar.
- Select "Adjust date/time" from the context menu.
 Loading...
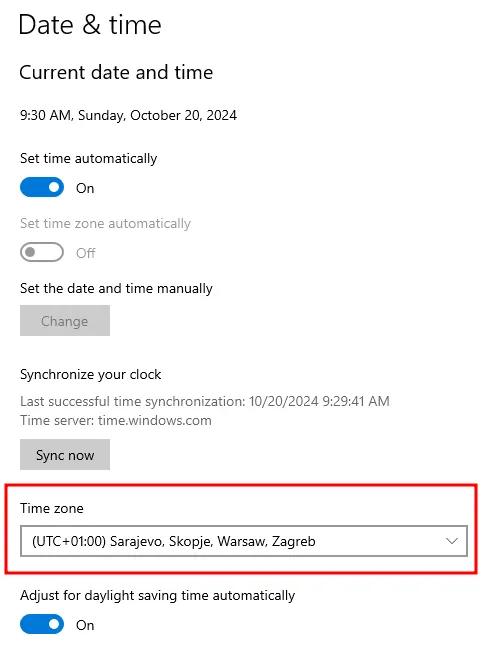
- Locate the "Time zone" section of the "Settings" application after it opens.
- Select the timezone you want to use from the list.
- The easiest way to find the timezone you want is by the UTC Offset, which is just the difference between it and the UTC timezone.
 Loading...
Windows Updates
Just like your home Windows PC, your Windows Server will receive updates from the Microsoft servers. These updates may contain new features, bug fixes, or even essential security updates.
Default Behavior
By default the Windows Server 2019/2022 OS will check for and install updates at 3am in the system timezone, after which it will restart outside of active hours to finish the installation process .
You can configure this behavior to some extent a few different ways. Changing how often updates are checked for, when they’re checked for, how much of the process is manual, and what systems you’d like to update. There are also multiple ways to configure the process, each avenue providing different levels of control. We’re going to cover three of them here in order of complexity and control provided, the Settings GUI, SConfig (Server Core), and GPedit (Group Policies).
Configuring
The easiest way to configure your Windows Server's update behavior is to use the Settings GUI, which is the same as it is for your Windows 10 Home PC, and the available update settings are largely the same as well. You can locate the Settings GUI by searching the Windows Start menu for "update" and select the "Check for updates" "system setting" entry.
On this page, you can pause the updates for 7 days, change your active hours, toggle automatic active hours, and view your past update history.
 Loading...
Under the Advanced Options section at the bottom of this page you can change whether or not you update other Microsoft products with an update, change the restart behavior after an update installs, toggle the restart required notification, and pause updates for up to 35 days. You’ll also find the Delivery Optimization section at the bottom of the Advanced Options section.
If you'd like more control over how your Windows server updates, check out the section on Updates in the Advanced Options section.
Handling
We recommend configuring windows to update on a schedule that fits your usage, however, if the advanced options are not flexible enough to configure windows to update outside of your working hours, you can manually "Check for Updates" and "Install Updates" as you see fit.
Pending Windows updates have been known to cause issues in the Operating System. If you have updates that are pending installation, we recommend using the "Update and restart" option as soon as possible.
 Loading...
Changing your credentials
It's a good idea to change your password and username to a different one from the ones we provide in your email. This increases your resistance to a Brute Force Attack and reduces the chance of someone getting into your server if your email is compromised.
You want to do this before you loose access to your server and make sure you make note of your username and password somewhere like a Password Manager.
If you'd like to follow along with a video tutorial instead, check out this one we posted to our YouTube channel!
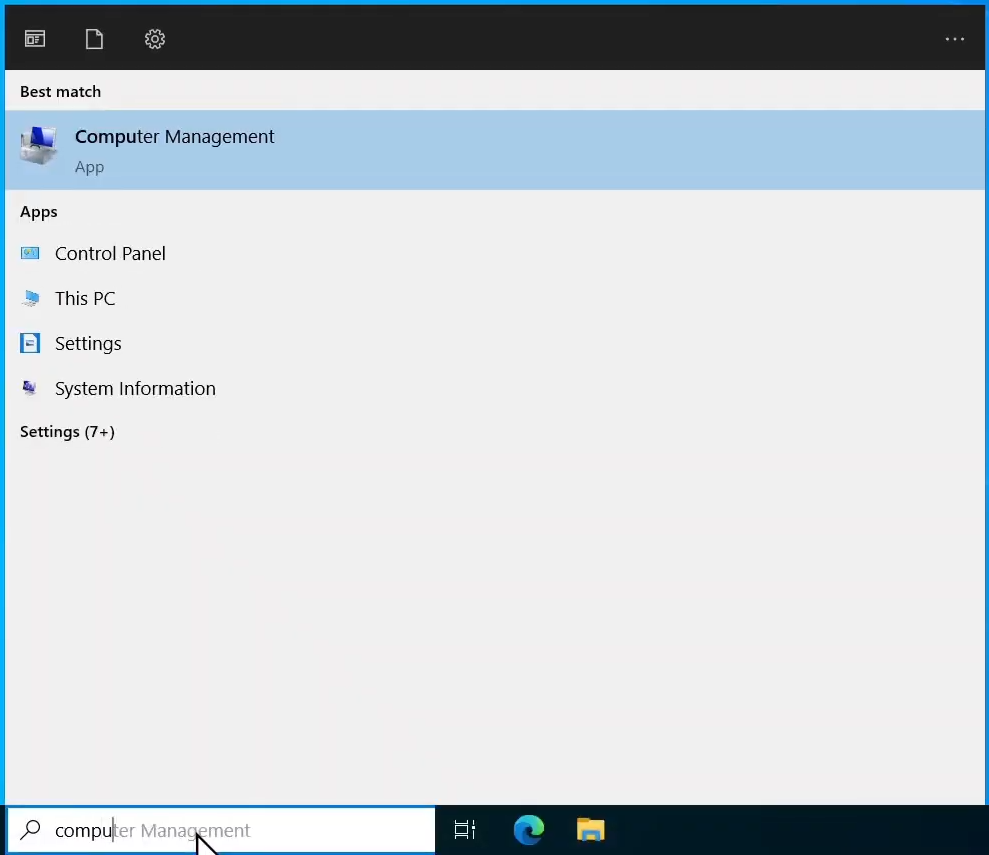
- Start by opening the "Computer Management" app by searching for it in the start menu.
 Loading...
- Locate the sidebar on the left of the "Computer Management" application after it opens.
 Loading...
- Open the "Local Users and Groups" dropdown under "Computer Management (Local)".
- Select the "Users" folder under the "Local Users and Groups" dropdown you just opened.
 Loading...
- Right click the "Administrator" user from the list on the right.
- Select Rename to change the "username" required to sign in.
- This will turn the username into something you can edit. Change it to what you want and press the
Enterkey.
- This will turn the username into something you can edit. Change it to what you want and press the
- Select "Set Password..." to change the "password" required to sign in.
- You'll be asked for confirmation. If you know your current password, use the "Send Ctrl+Alt+Delete" option in your RDP software and select "Change a password".
- If you don't know your current password, click "Proceed".
- Select Rename to change the "username" required to sign in.
Make sure you take note of your new username and password!
Advanced options
These settings have the ability to break your server if you don't fully understand them and rely heavily on outside knowledge as a result. Please proceed with caution.
Windows Updates
There are a few ways to control Windows Updates to a finer degree than is possible with the Settings GUI.
SConfig
SConfig, or Server Core, is a command line utility that can be used to configure and control Windows Server instances in a variety of ways, but for this article the important part is that it can be used to configure how Windows updates behave.
SConfig is a command line utility, so you interact with it using the windows Command Prompt. You can open the Command Prompt by typing Command Prompt into the Windows Start Menu or the search bar on your task bar, if you have one. The command prompt application will show up as you type and will have an icon that looks like a black box with a minor white outline. Click on it in the application list to open it.
With the Windows Command Prompt open, you can run the sconfig command by typing sconfig into the Command Prompt window and pressing enter. This will give you a response that looks similar to the one printed in the text box to the below.
================================================================================
                      Welcome to Windows Server 2022 Standard
================================================================================

1)  Domain/workgroup:                   Workgroup: WORKGROUP
2)  Computer name:                      ******
3)  Add local administrator
4)  Remote management:                  Enabled

5)  Update setting:                     Manual
6)  Install updates
7)  Remote desktop:                     Enabled (more secure clients)

8)  Network settings
9)  Date and time
10) Telemetry setting:                  Required
11) Windows activation

12) Log off user
13) Restart server
14) Shut down server
15) Exit to command line (PowerShell)

Enter number to select an option:
The bottom of the return is asking for you to enter the number of the entry you want to select, with each of the listed settings having been
numbered 1-15. To control the settings for Windows Updates, you’ll want to select option 5.
After selecting option 5 by typing it into the console and pressing enter, you’ll be shown a response in the console similar to the one below.
================================================================================
								Update setting
================================================================================

Current update configuration is: Manual

Set updates to:

1) Automatic
2) Download only
3) Manual

or

4) Opt-in to preview updates

Select update configuration (Blank=Cancel):
From here you can select the option you want by entering the corresponding number and pressing the enter key, the details of each option are explained on the Microsoft Help Center, but the article isn’t correct when it says that the console will ask for letters instead of numbers.
GPedit (Group Policies)
The final option that provides the most control over Windows Update behavior is Group Policies. This is a very powerful system, but can be equally complicated. For that reason, we’re going to refer you to a Microsoft Help Center Article on using the Group Policy Editor to configure windows updates.