Windows Trading Servers
HostVenom provides Windows VPS services specifically optimized for trading applications. This article covers essential information about setting up, managing, and troubleshooting your Windows Trading Server.
Logging into Your Windows Trading Server
To log into your Windows Trading Server, you will need to use Remote Desktop Protocol (RDP). Follow these steps:
If you'd like to follow along with a video tutorial instead, check out this one we posted to our YouTube channel!
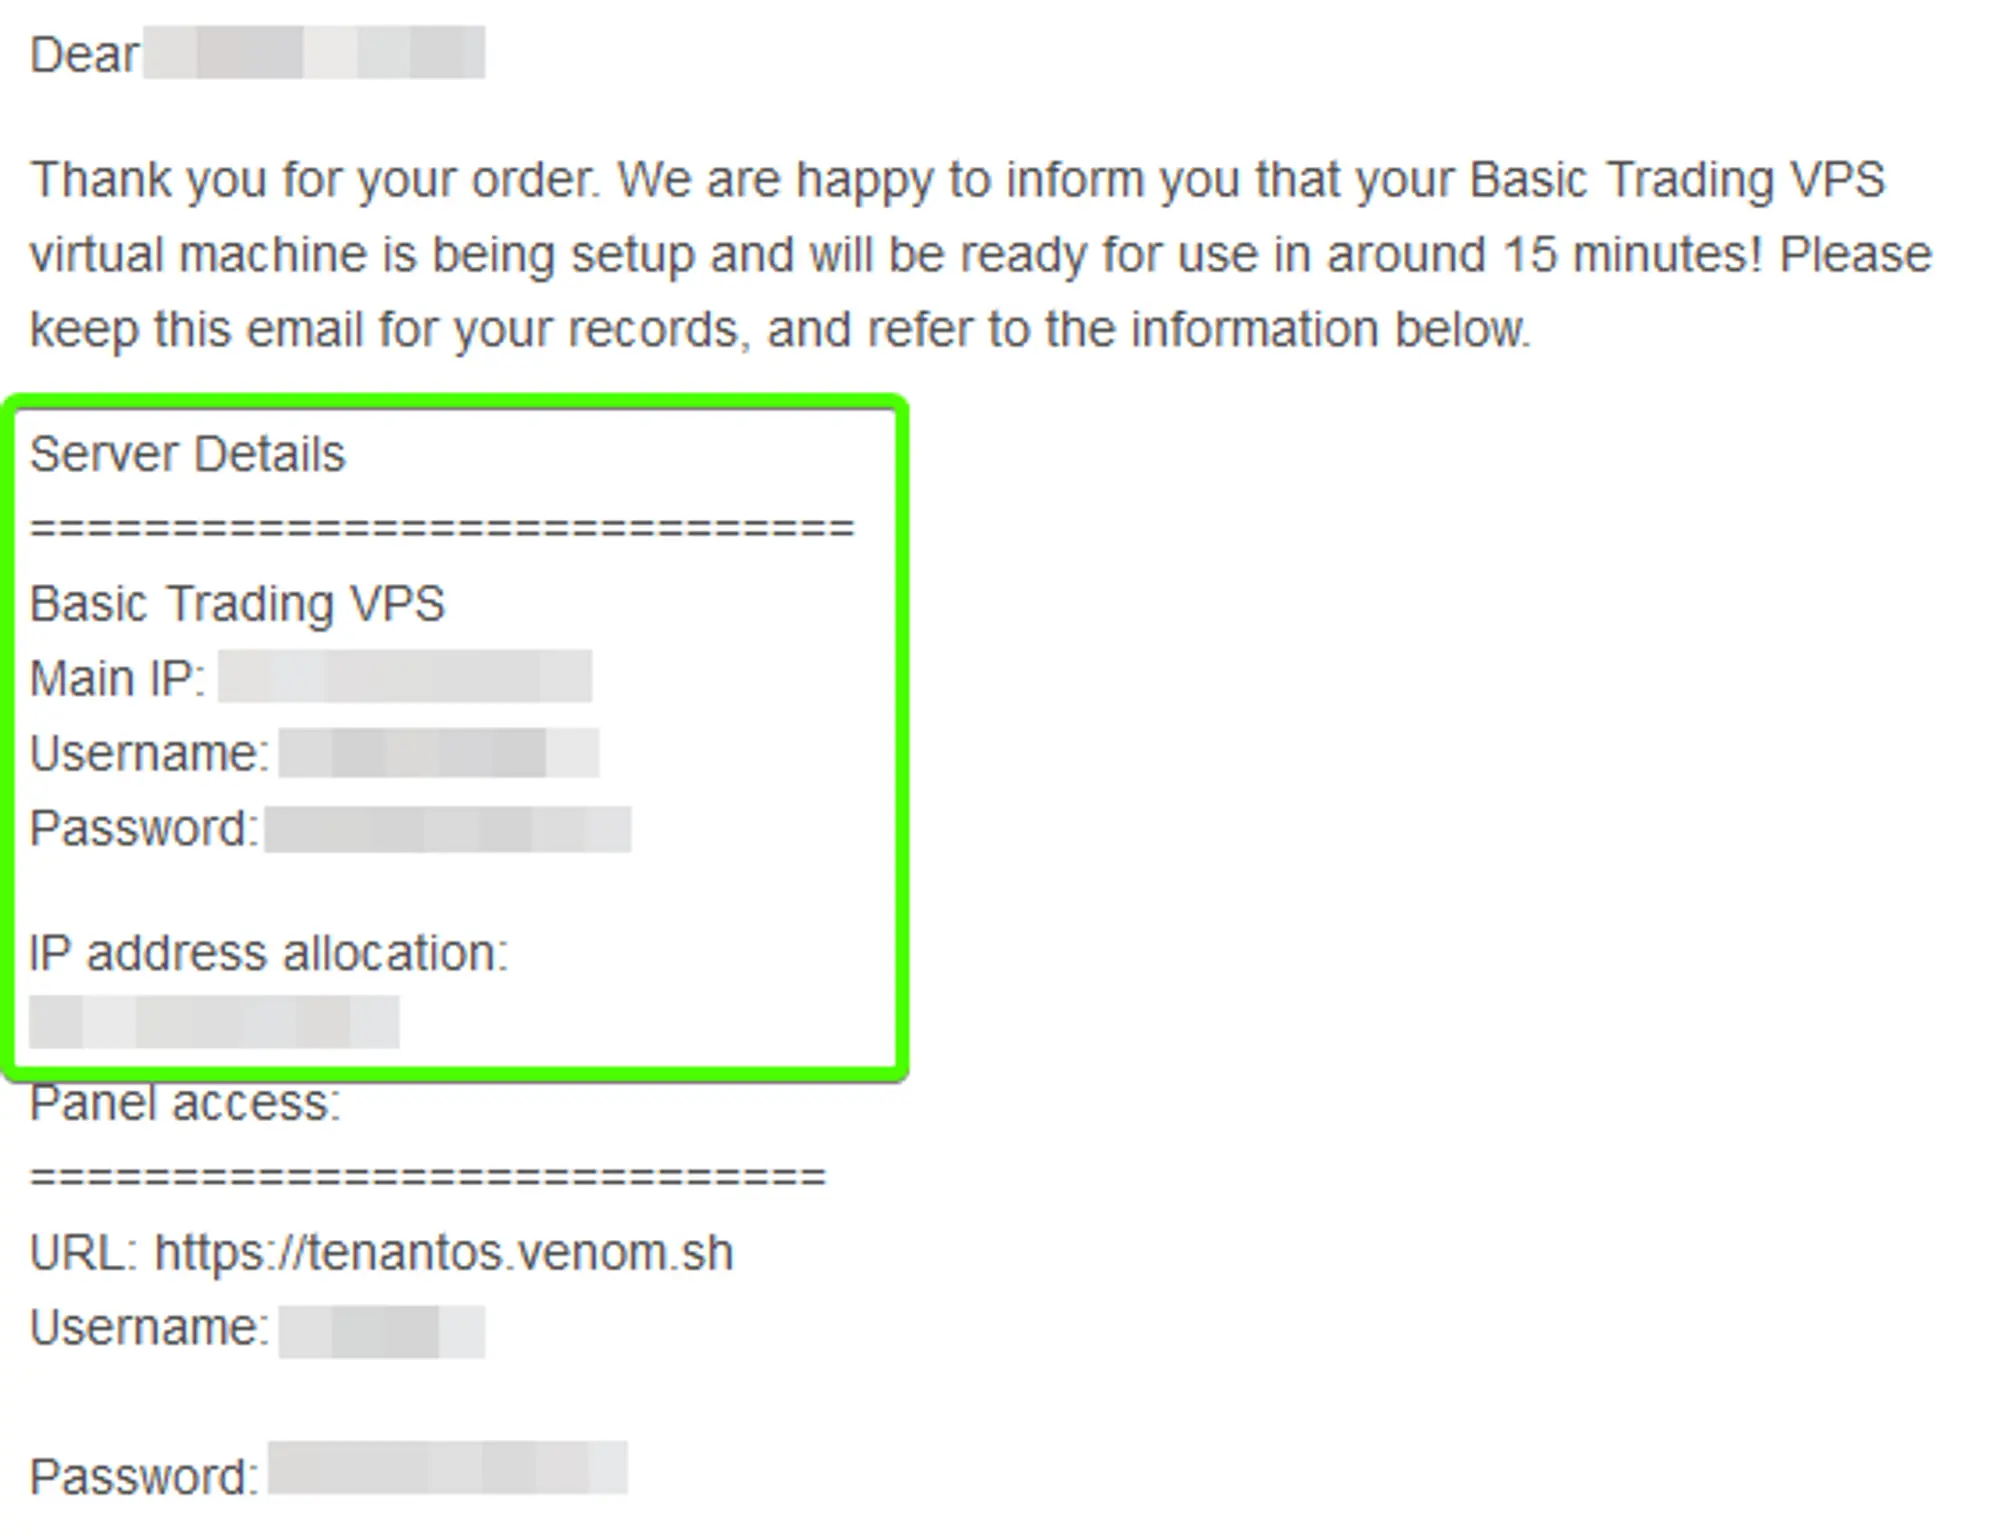
Locate your Credentials in you welcome email.
The credentials and IPv4 address for your server are provided in the “Server Details” section of the VPS Welcome Email that was sent to the address you signed up with, shown in the image to the right.
 Loading...
Open the Remote Desktop Connection application.
You can do this by opening the start menu on your Home PC and typing “Remote Desktop Connection” into the start menu. If you have a search bar directly in your taskbar, that can be used as well.
As you start to type the name of the program into the Start Menu, you should see the program appear in the results in a similar way to the image on the right. You can then either click on the entry in the list, press enter to launch the currently selected item, or press the
Openbutton on the right side of the start menu.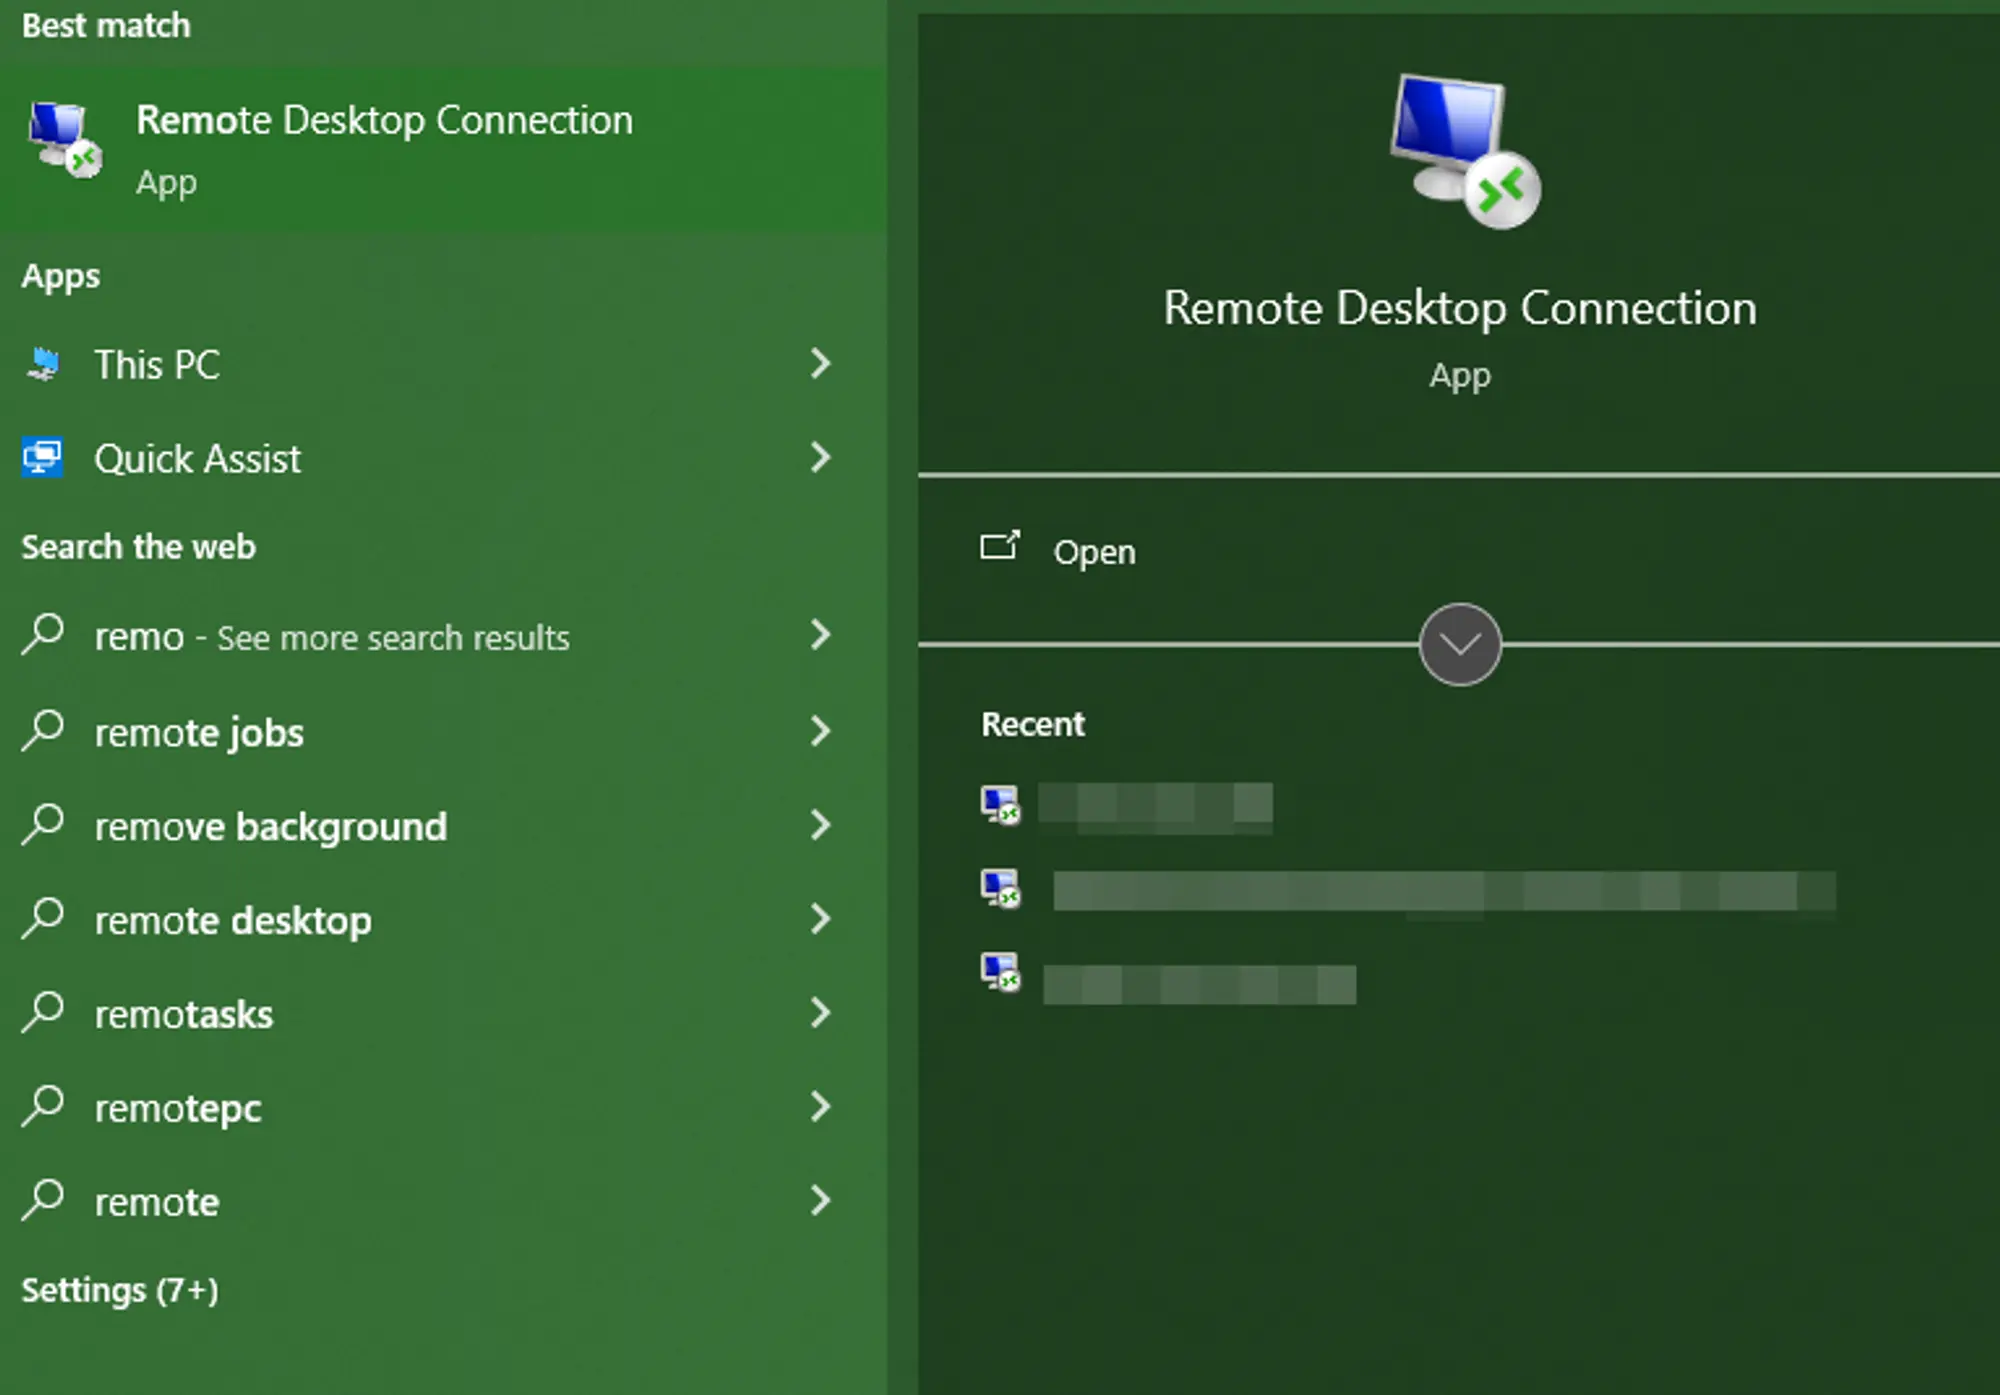 Loading...
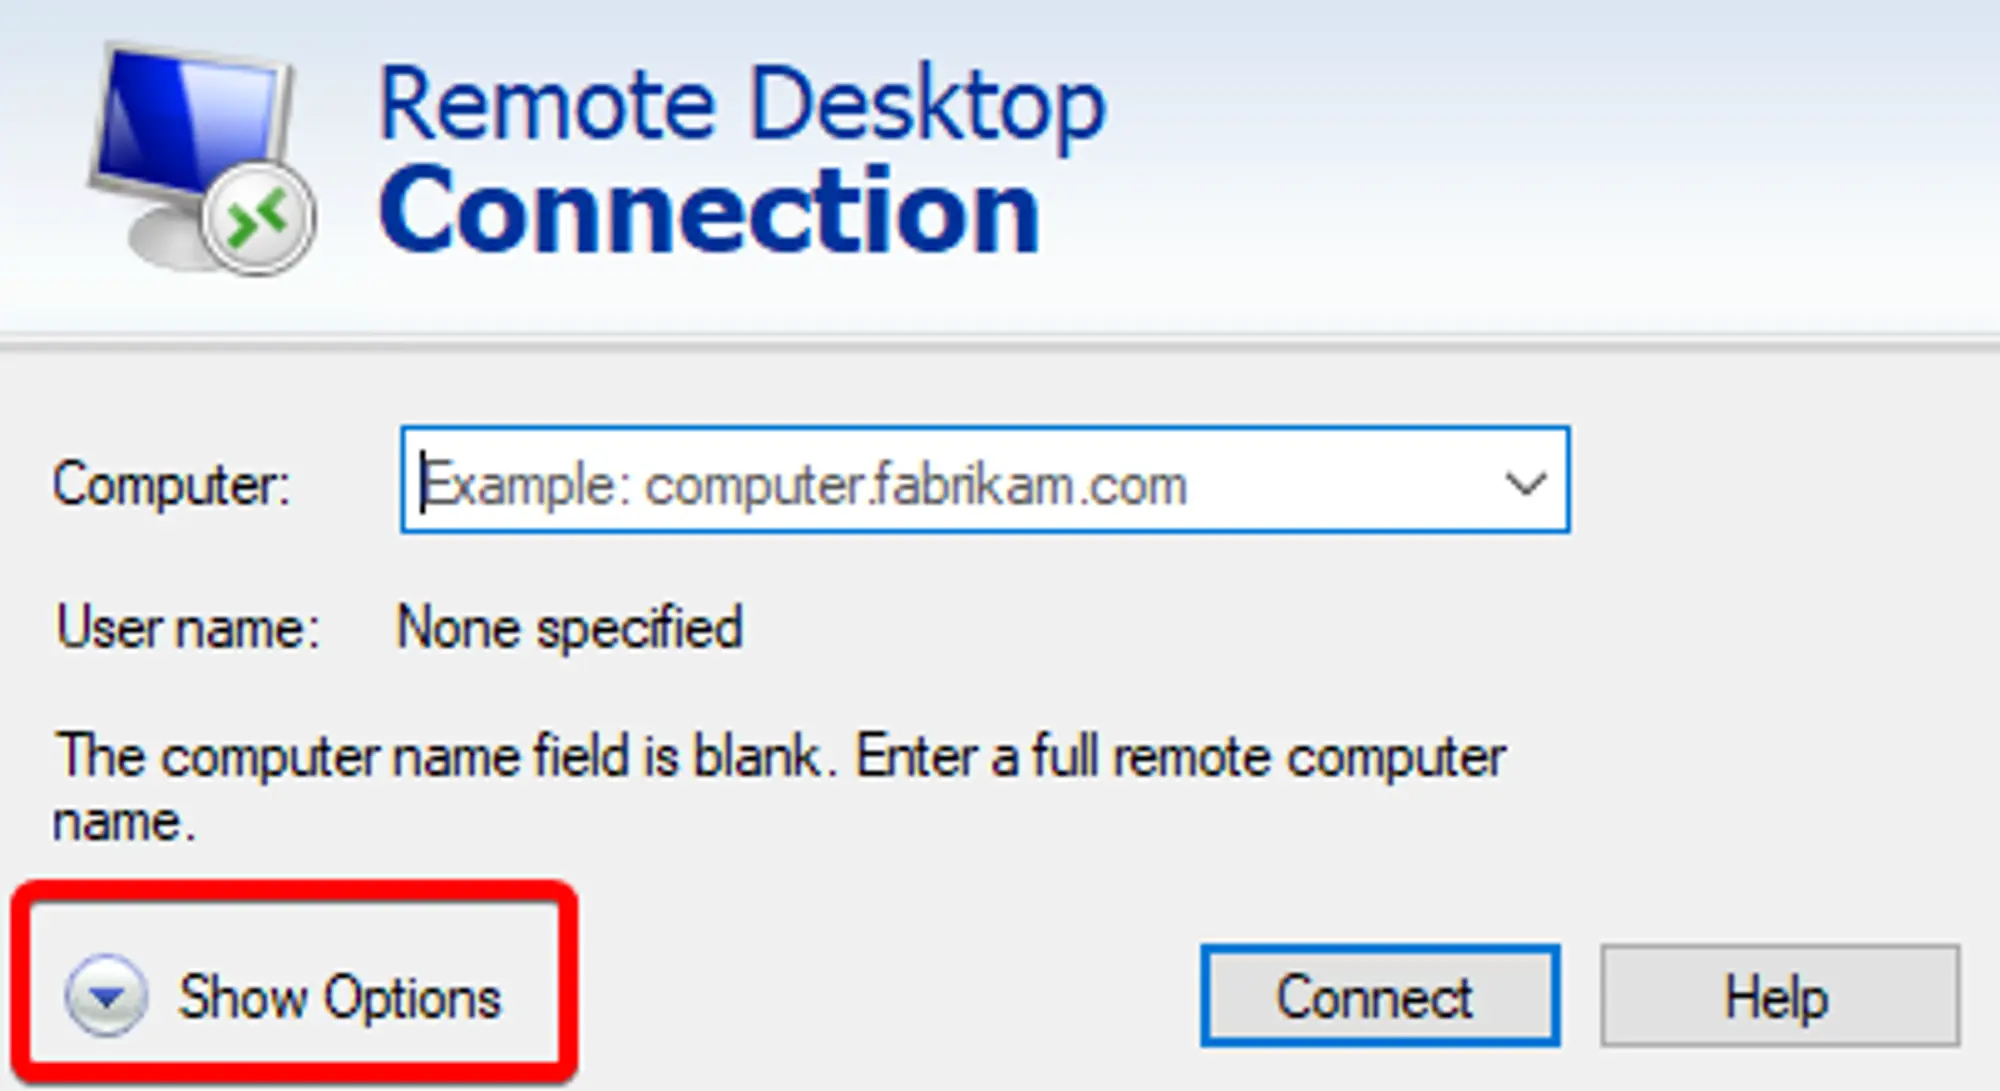
Enter your server's IP address from the VPS Welcome Email.
You should see a window that looks similar to the image shown on the right, with an empty computer address and a “none specified” username. Enter the IPv4 address contained within the VPS Welcome Email you received from HostVenom into the
computerfield and clickConnect.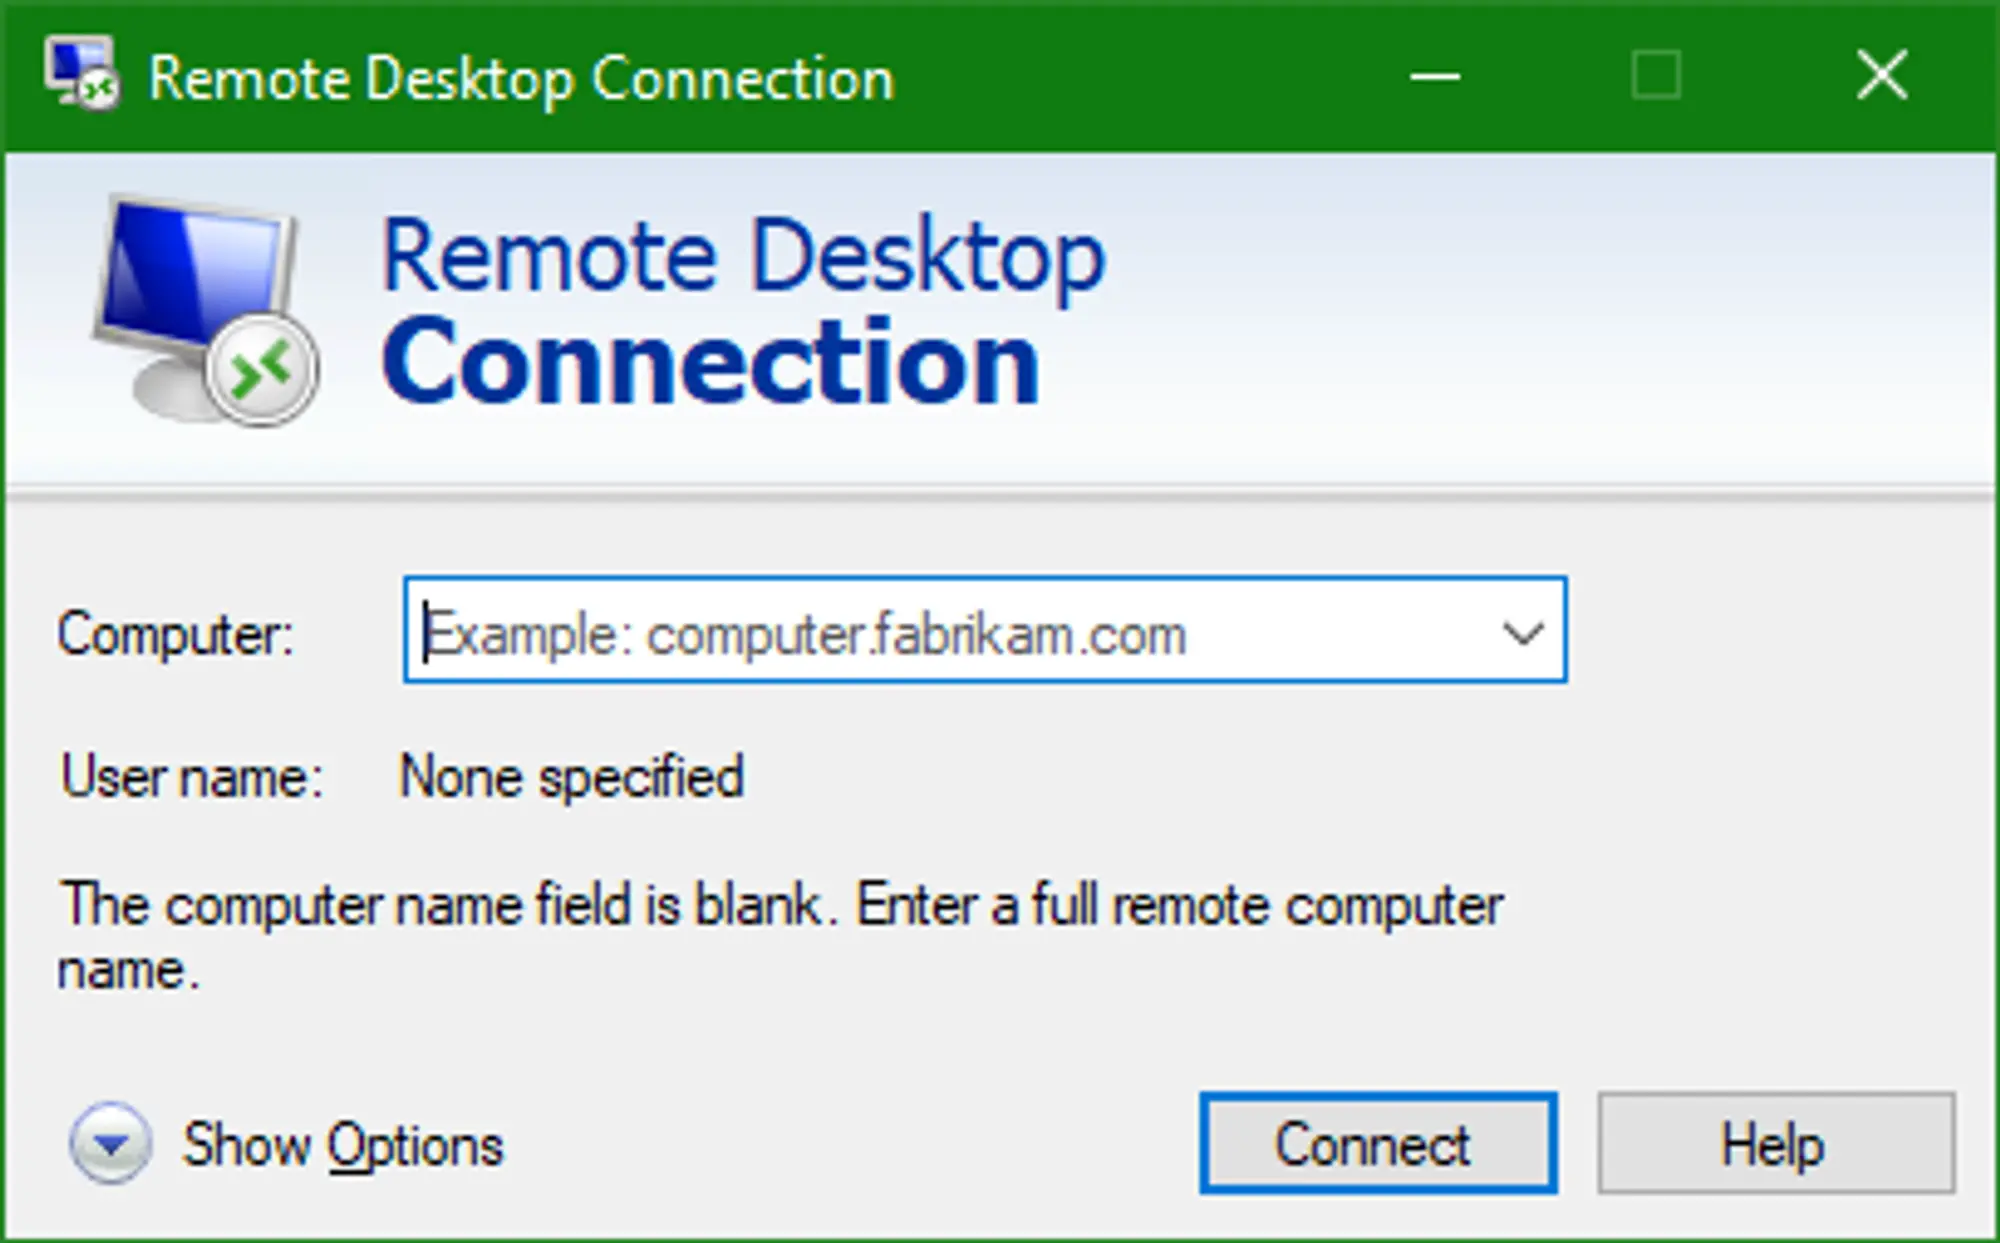 Loading...
- Click "Connect".
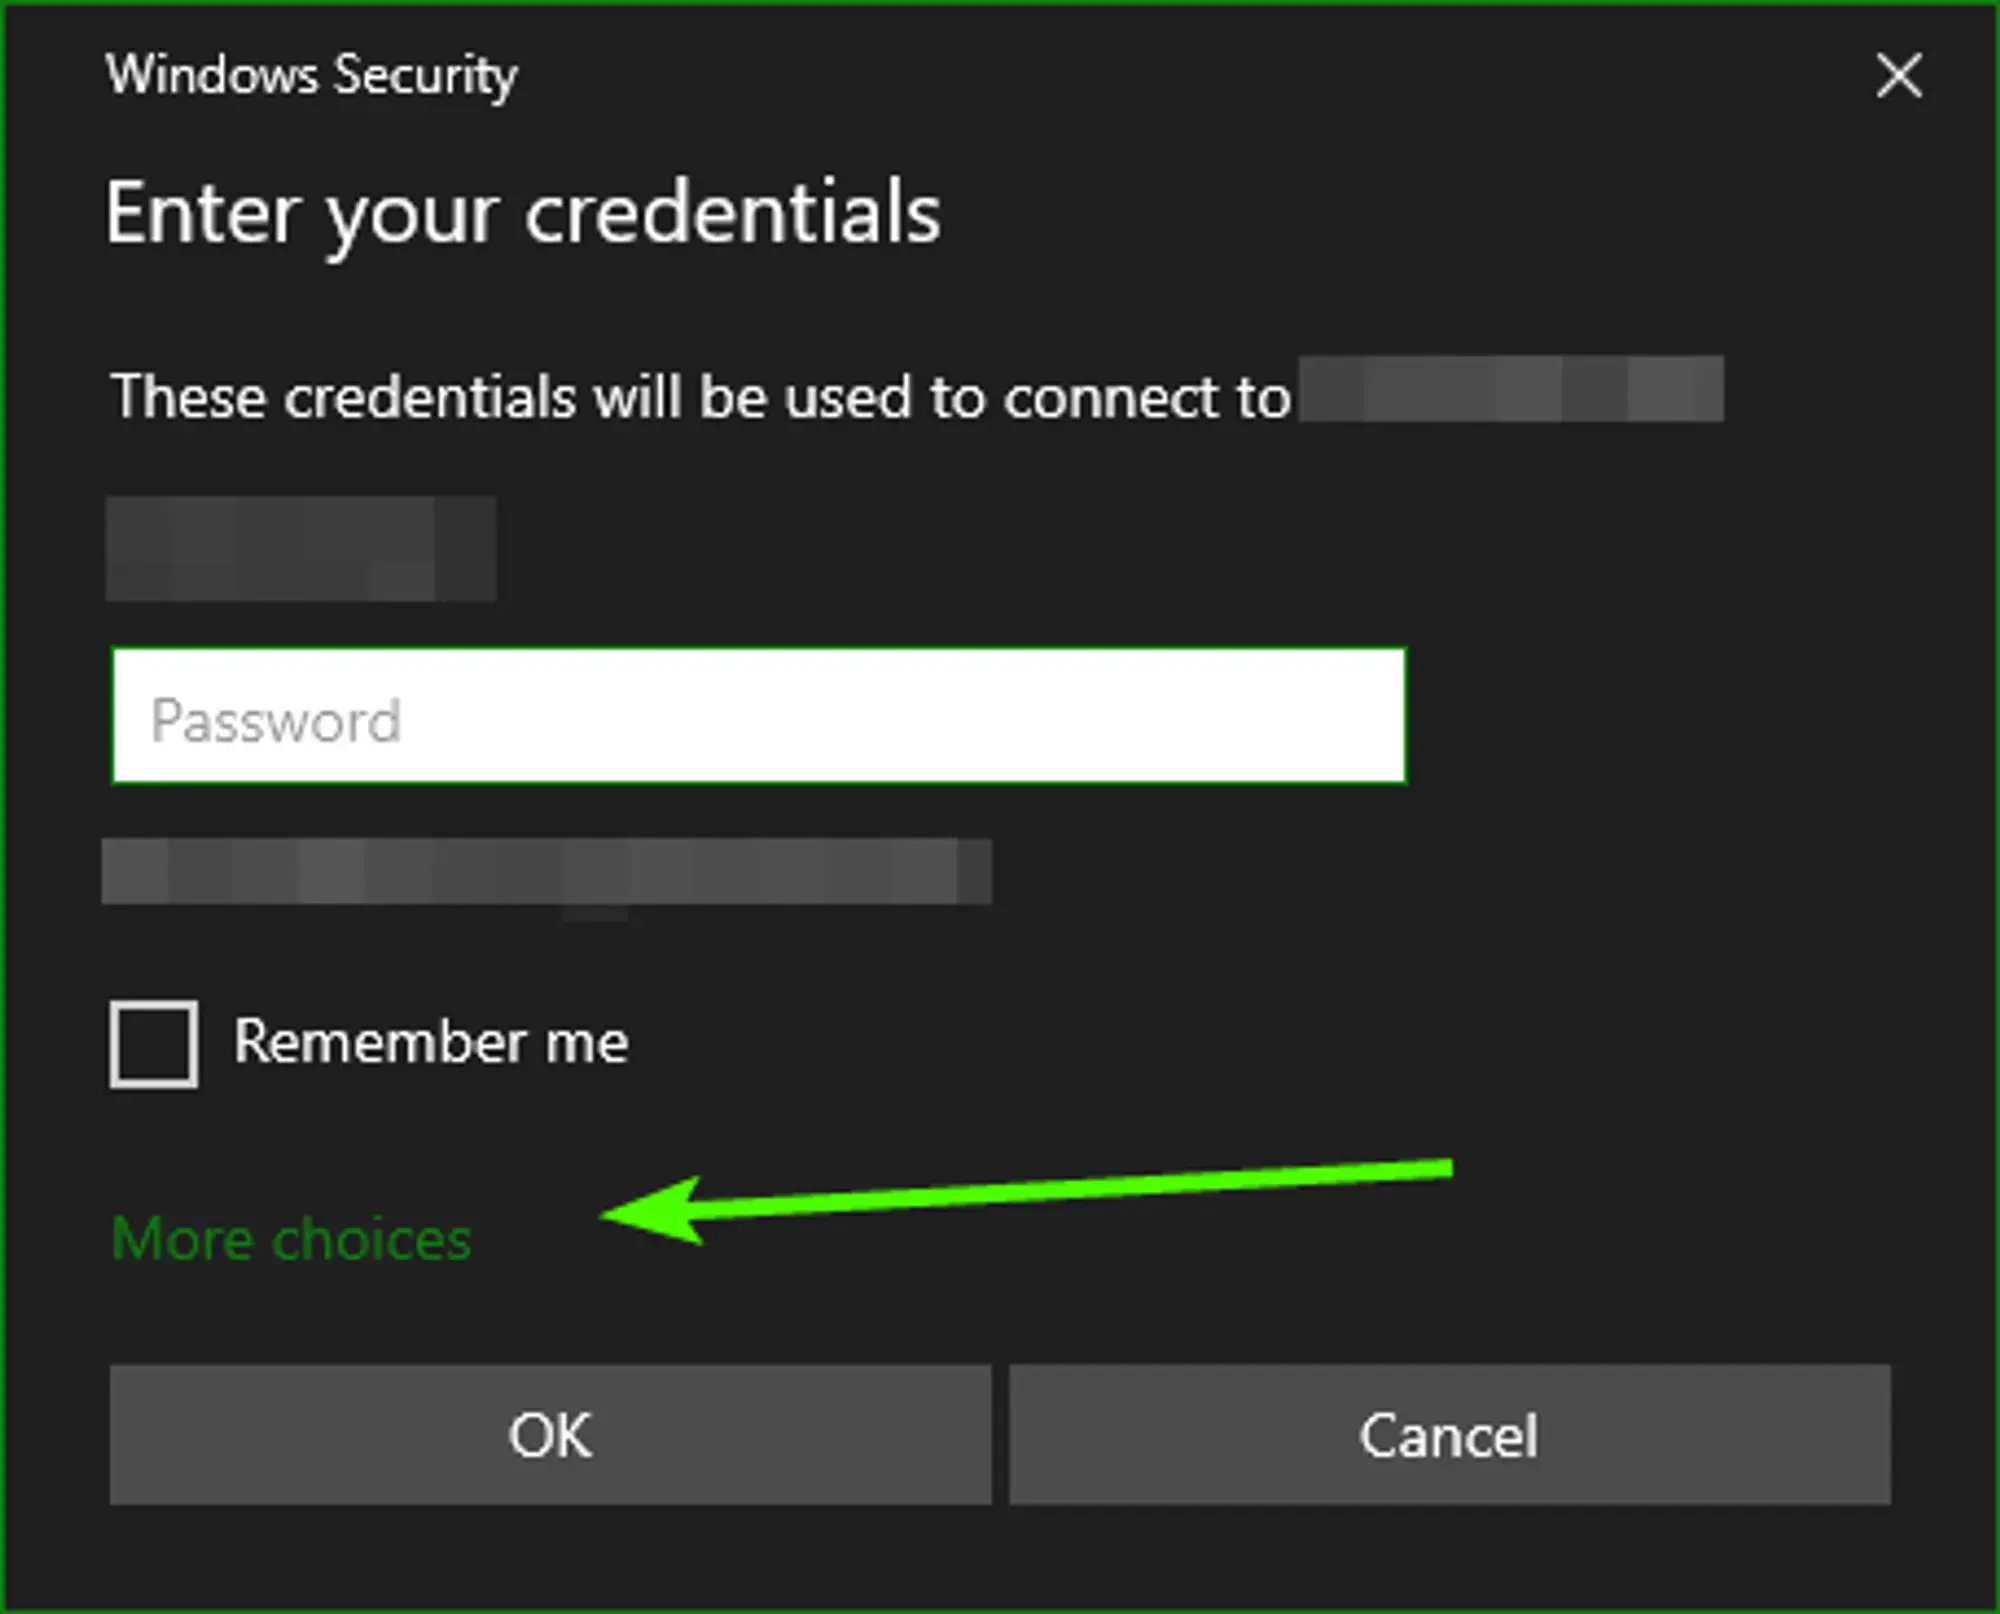
- Click the "More Choices" button then select "Use a different account".
Enter the login credentials from the VPS Welcome Email.
You should be able to enter both a username and password instead of just a password after selecting "More Choices" -> "Use a different account". You’ll need to enter the username and password provided by the VPS Welcome email you received from HostVenom.
 Loading...
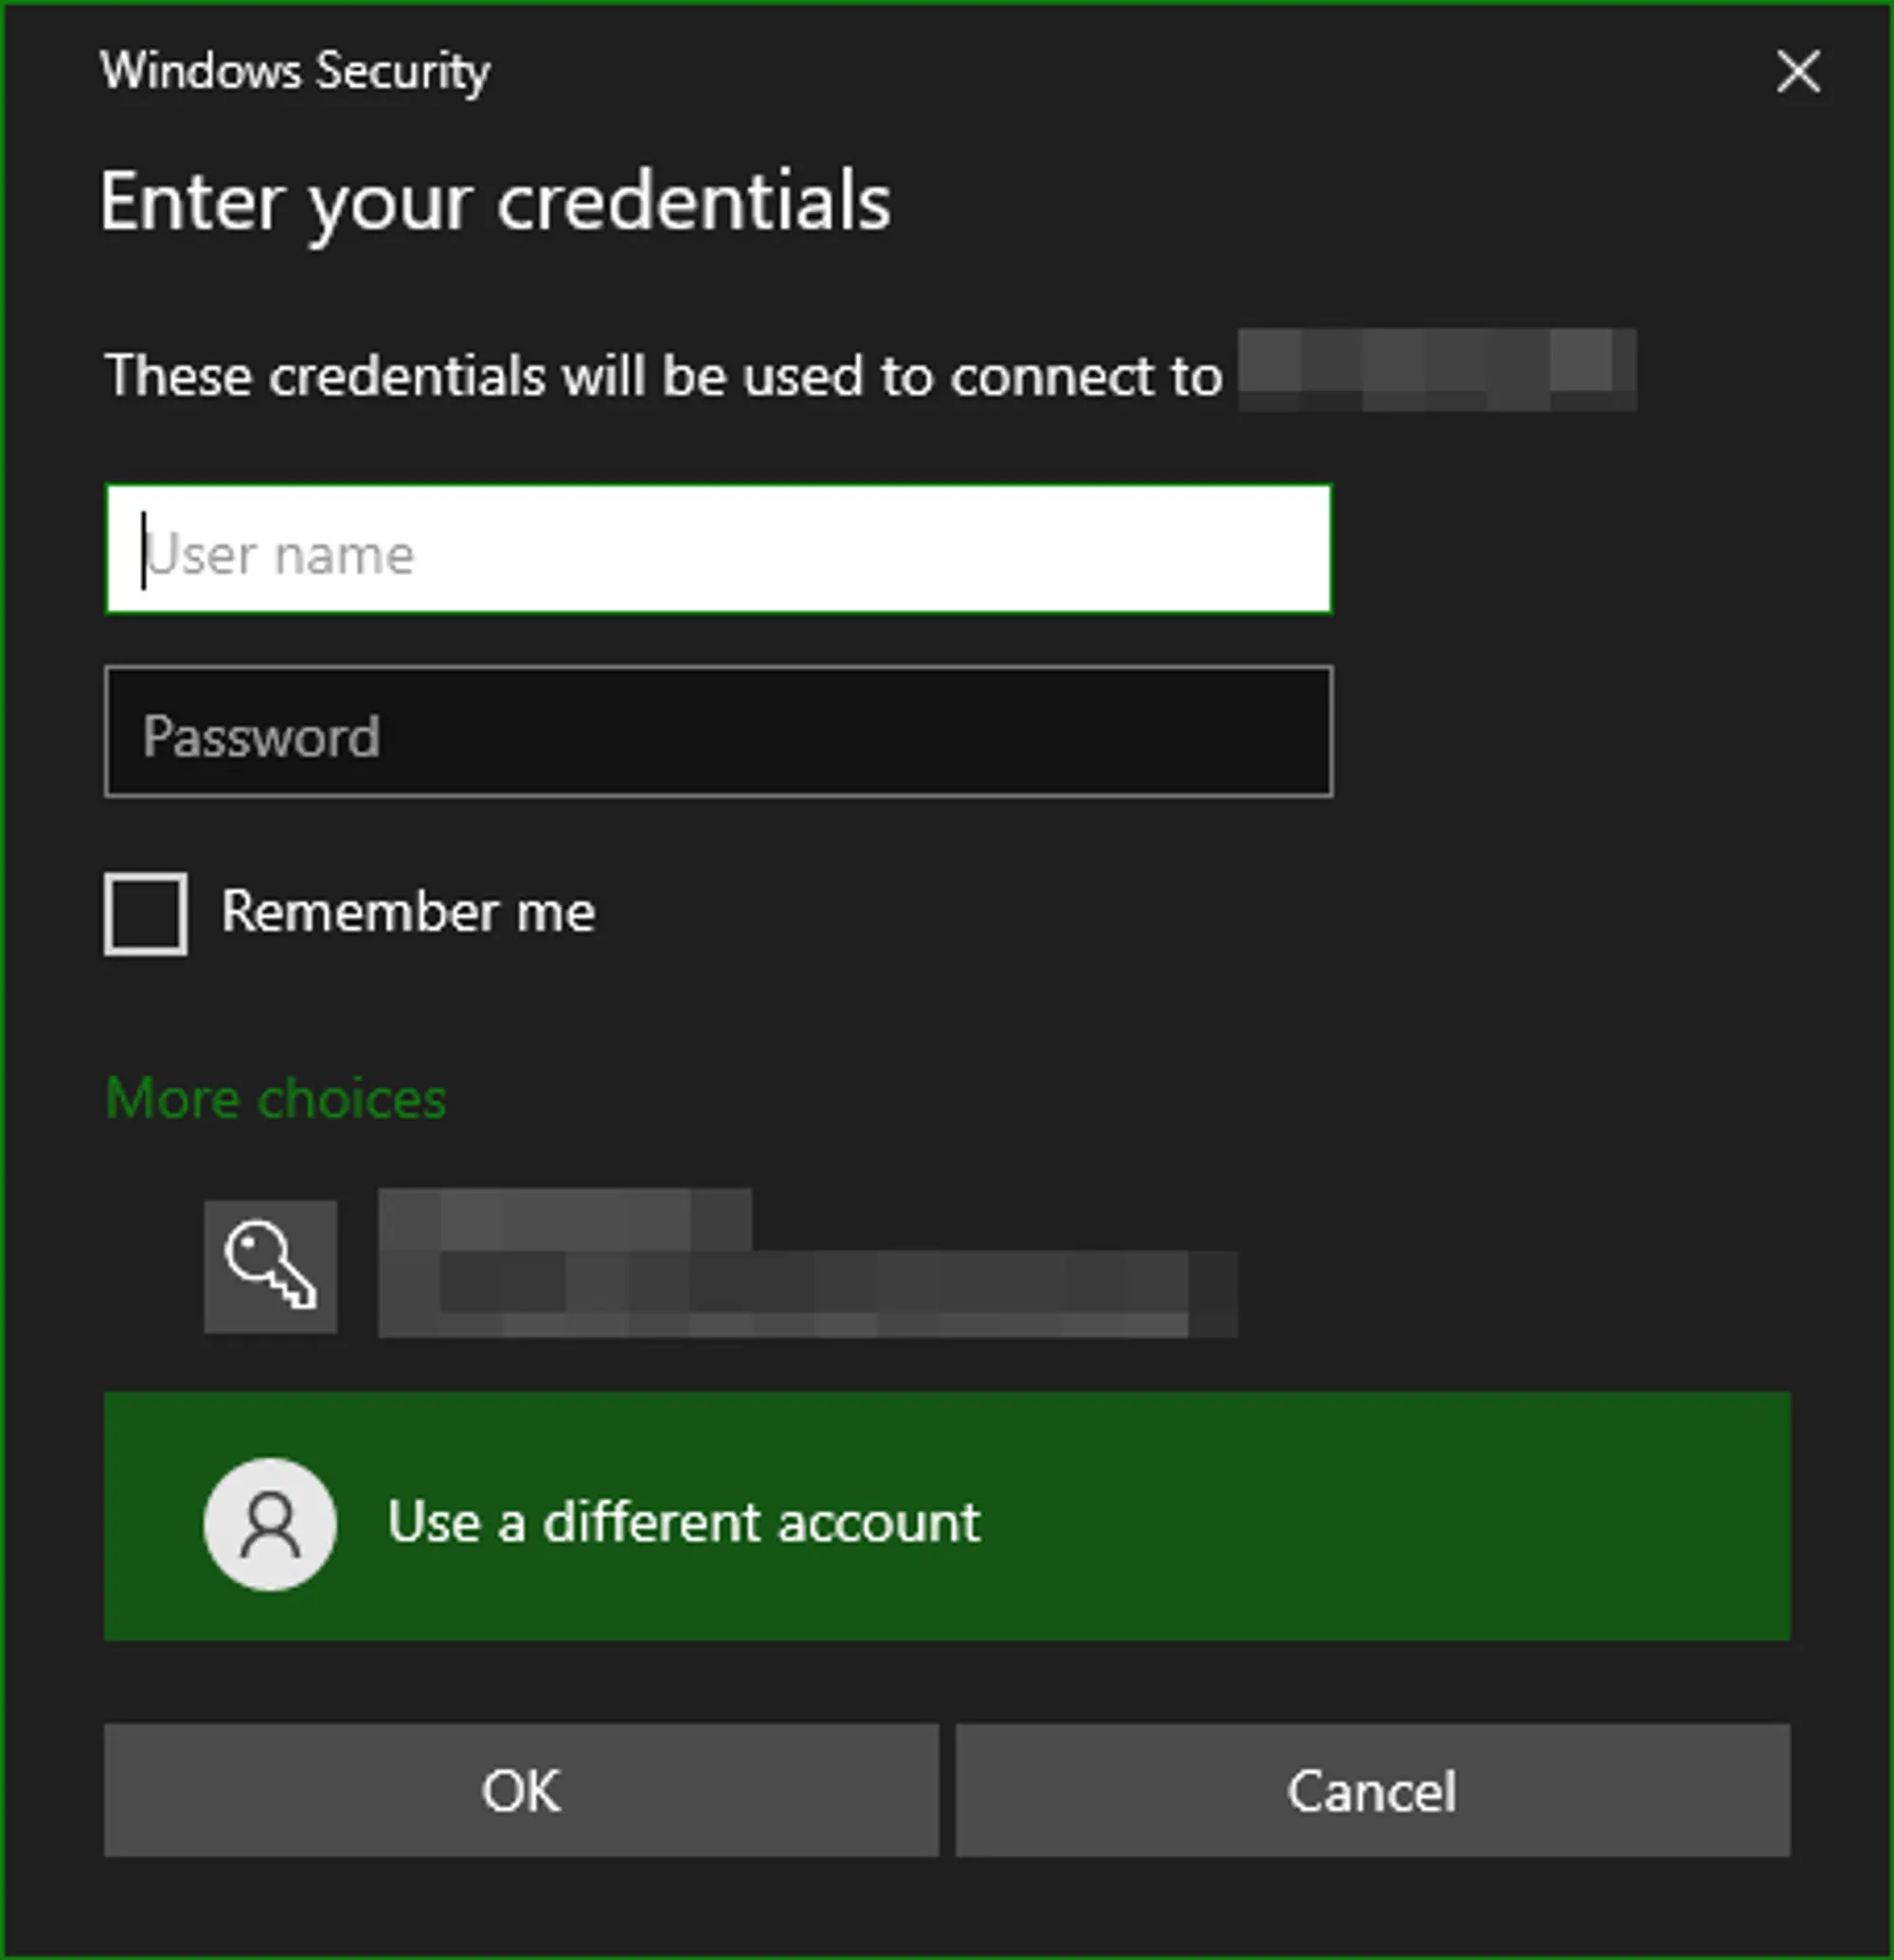 Loading...
Click "yes" to confirm that you want to trust the certificate provided by the server.
You'll get a warning during your first connection to your Windows 2019/2022 server saying that the remote computer could not be identified. This is normal for the first connection and has to do with the certificate used to prove that the server is the server you’re wanting to connect to.
Since you haven’t connected to the server in the past, and the server’s certificate isn’t registered with a 3rd party, your computer is relying on you to say that you want to trust this connection. The only time you should be worried about this warning is when it shows up when you are connecting to a Windows 2019/2022 server you’ve connected to before.
 Loading...
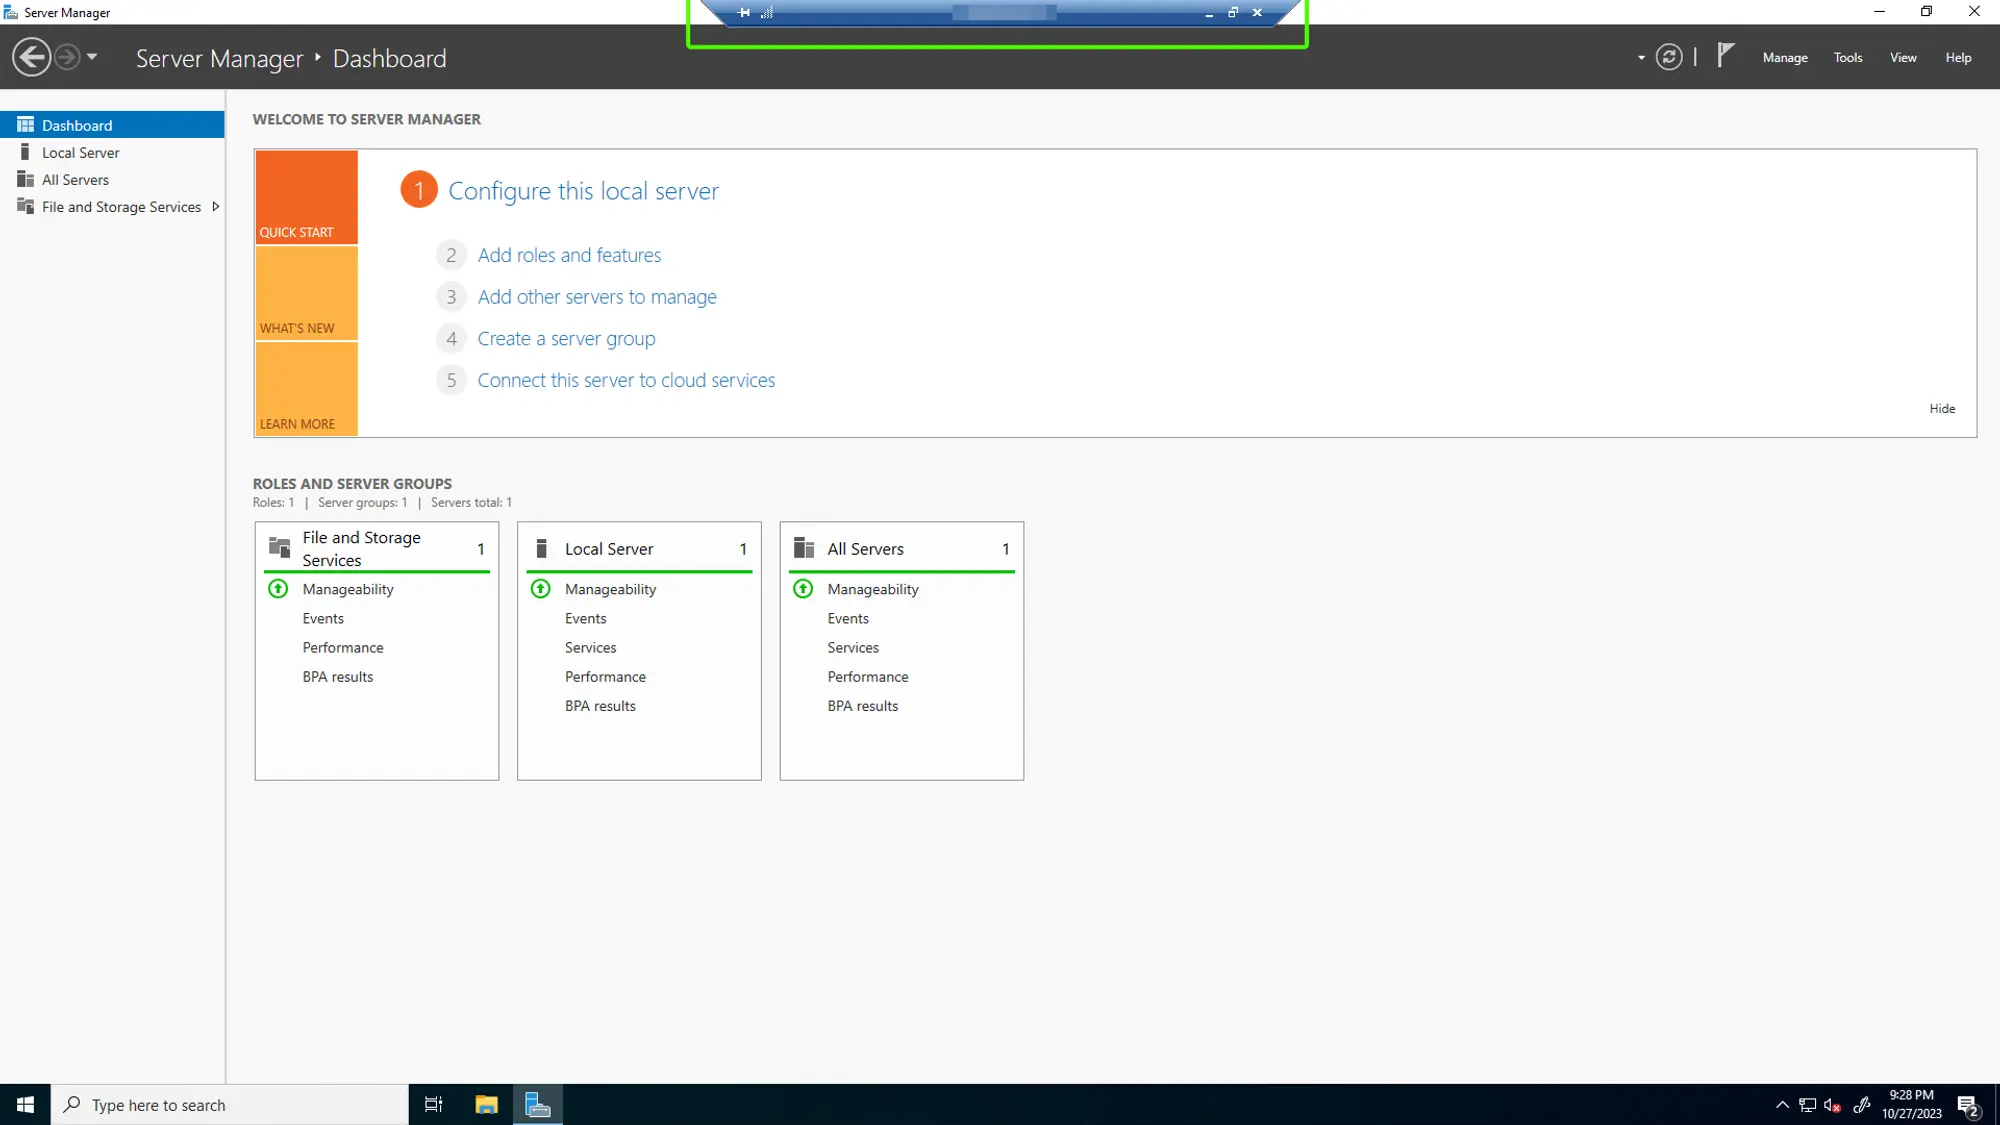
Close the Server Manager to access your Windows Server Desktop.
On the first connection and after a restart, HostVenom VPSs will have the Windows Server Manager open, which is used to interact with and configure your server remotely. You can close this application using the close button in the top right corner, just like on your Home PC running Windows.
After closing the Windows Server Manager, you should see the default windows background and a Windows taskbar. There won't be any icons on the desktop but most of the default Windows applications will be installed, like Microsoft Edge, so you'll need to open them through the start menu.
 Loading...
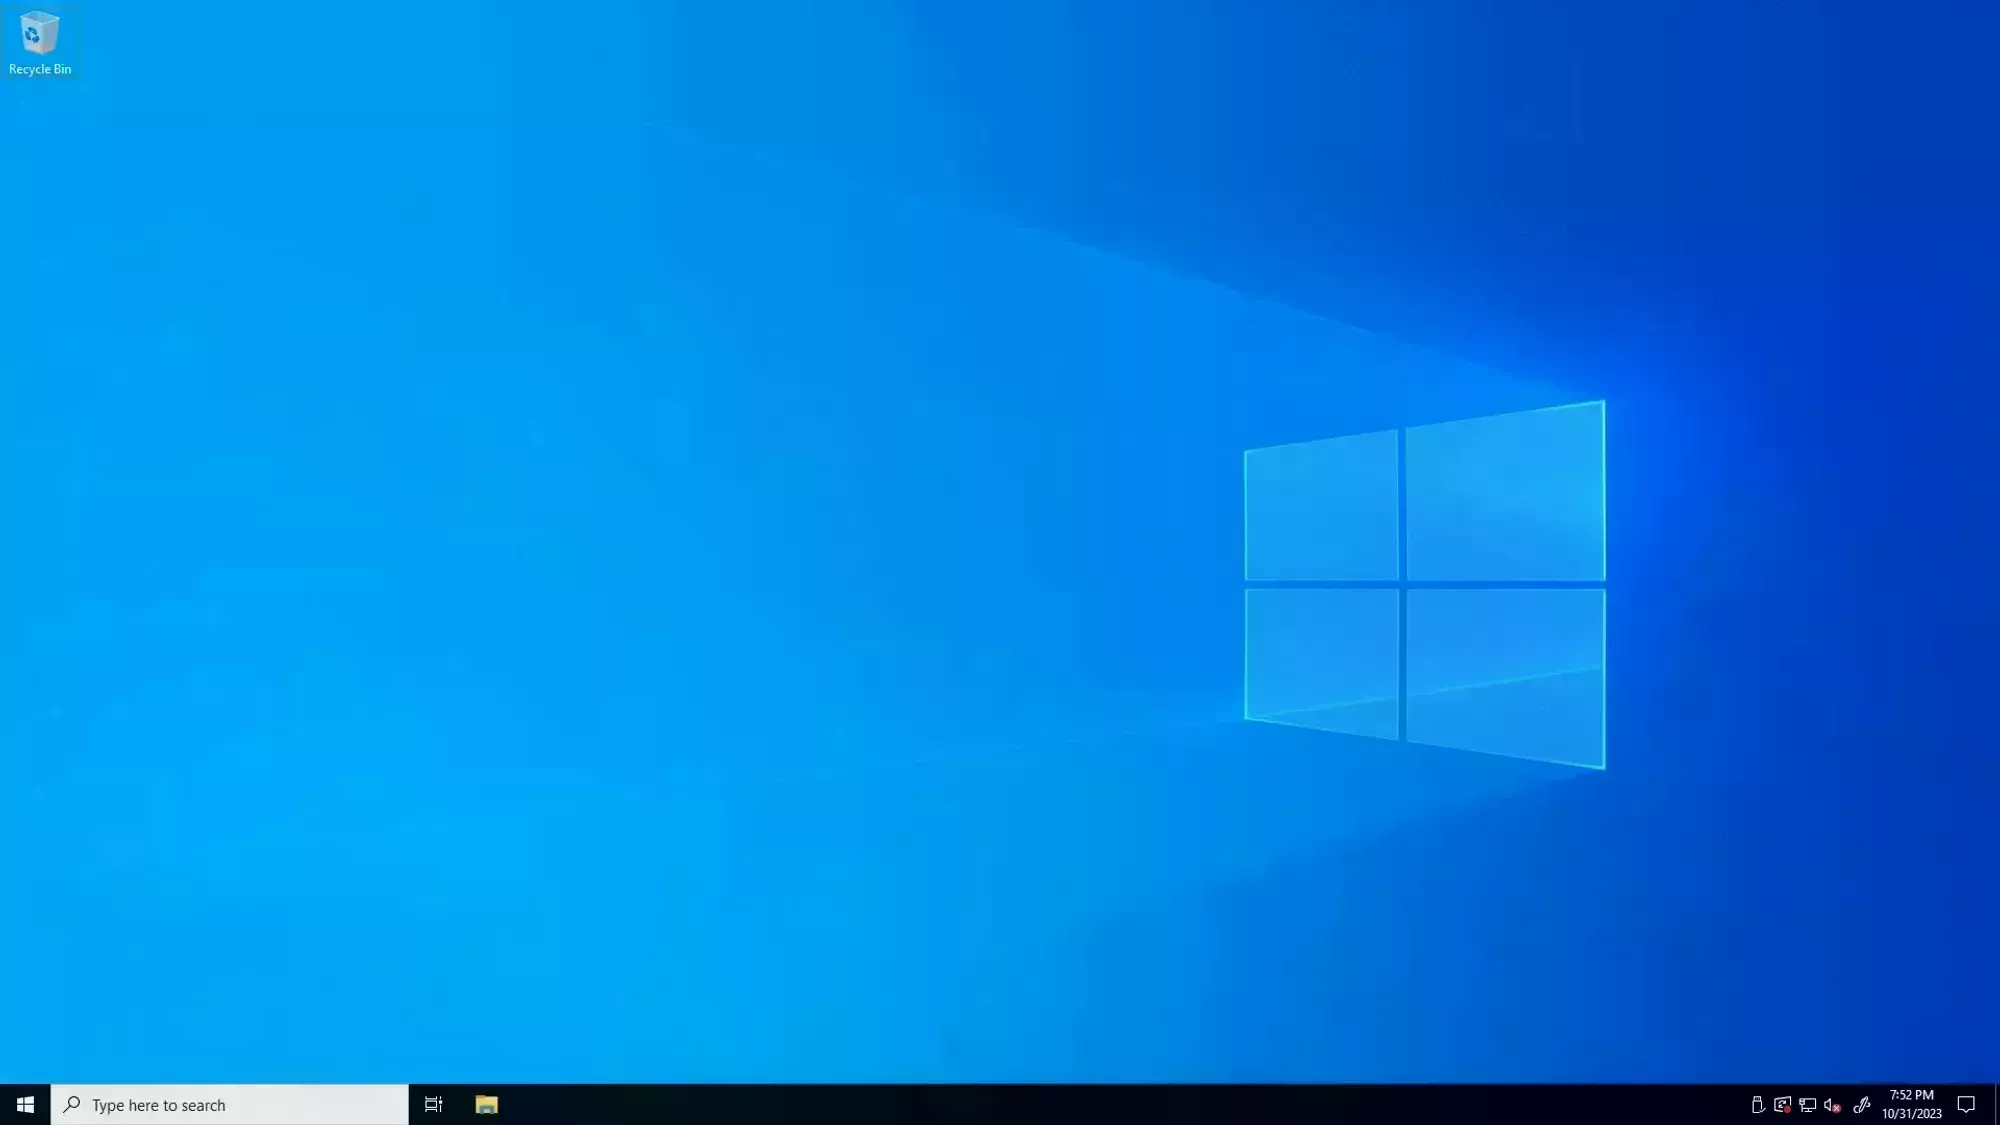 Loading...disable server manager
If you restart your VPS frequently, you might want to check out our section on Disabling the Server Manager startup on boot.
Check out our Troubleshooting RDP page for troubleshooting tips!
RDP Tips
If you're connected but aren't sure what to do from here, check out these pages!
How do I use multiple monitors with RDP?
If you have multiple physical monitors on your Windows PC, you can configure the Remote Desktop session to use 2 or more of the monitors instead of the default of only using one. You can either use the connection GUI, or you can use the .rdp file you create by following this section.
Multiple monitors using the connection GUI.
- Open the RDP Application.
Click "More Options" in the bottom right.
 Loading...
- Navigate to the "Display" tab.
- Check the "Use all my monitors for the remote session" check box.
Click "Connect".
Your settings will be saved as the new default for all connections. If you'd like to only use some of your monitors, or use different settings for different connections, check out the section on
.rdpfiles and this section on using.rdpfiles to change monitor settings.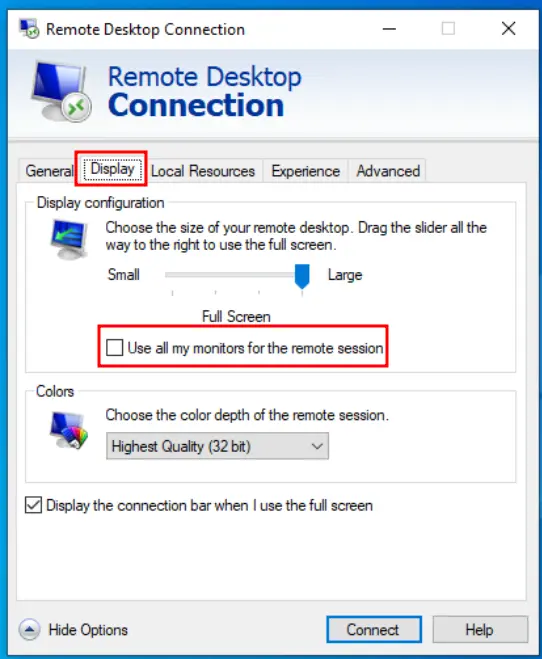 Loading...
Multiple monitors using .rdp
If you want to use a subset of your monitors and/or already have an .rdp file you use to connect to your Windows server, then you can add the multimon parameter to change the settings fot multiple monitors over your RDP session.
- Save your connection as an
.rdpfile be following these steps. - Open the
.rdpfile in Windows Notepad Add this line to the
.rdpfile.use multimon:i:1You can find more of these property values from this table on the Microsoft Help Center.
The property should be
use multimon:i:1where1stands in fortrueand sets theuse multimonproperty.If wanted, limit the monitors used by adding this line, where each
#is the monitor ID you want to use:selectedmonitors:s:#,#warningIf you just want to use all of your monitors, you don’t need to use this property!
This property lists the monitor IDs that will be used as remote monitors. This defaults to all of the monitors on your Windows PC, so if you don’t want to limit the monitors you use, or you only have two, you don’t need to use this option.
The monitor IDs start at 0 and go up, where 0 is your primary monitor. You can get the IDs of each of your monitors by using the command
mstsc /lin the Windows Command Prompt. When running that command, you’ll get a new window that looks similar to the one on the right, where the first column of data is the Monitor ID of each monitor, the second column is the resolution of the monitor, and the 3rd is it’s position relative to the larger monitor structure.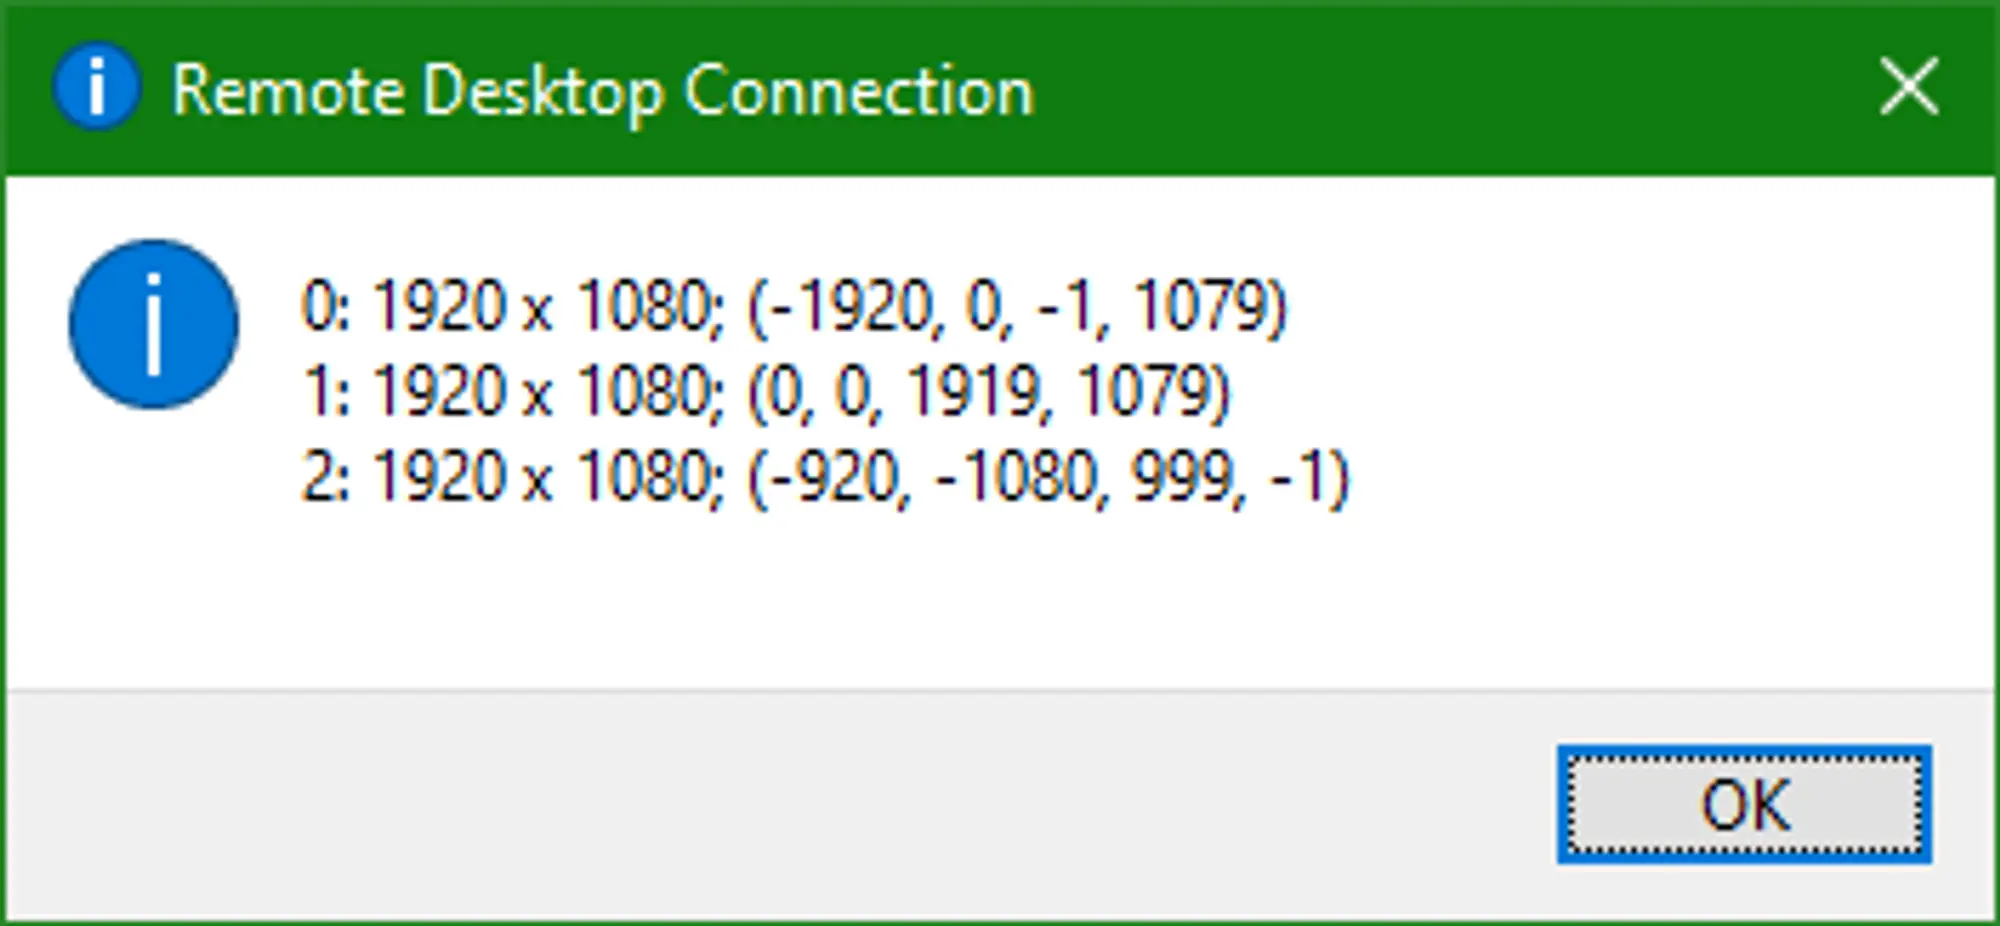 Loading...
After getting the response from the command, place the IDs of the monitors you want to use in a comma separated list after the
selectedmonitors:s:property. For example, if you want to use your primary monitor and monitor1, you’d have the propertyselectedmonitors:s:0,1.If the number you entered isn’t the monitor you wanted, just try another number from the list. The exact ordering of the list can be a little ambiguous and trying again doesn’t hurt anything. Just close the session, edit/save the file, and start the session again.
Setting your Timezone
By default our servers are deployed with a timezone matching US Central Time. If you'd like to change your timezone, follow the steps below or in the provided video.
If you'd like to follow along with a video tutorial instead, check out this one we posted to our YouTube channel!
- After logging into your Windows Server, right click on the time on the right side of the task bar.
Select "Adjust date/time" from the context menu.
 Loading...
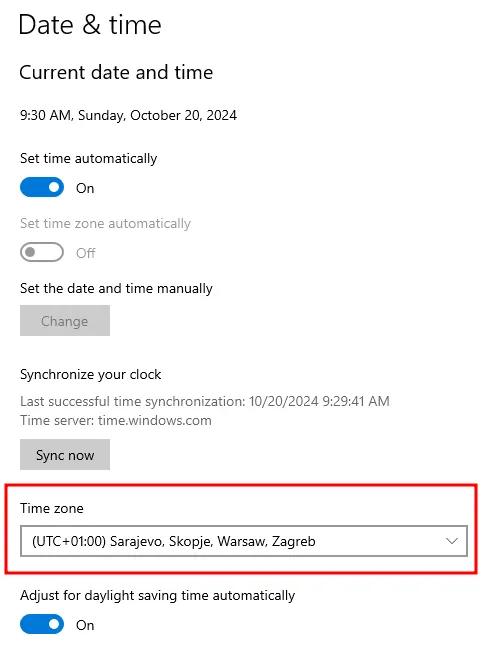
Locate the "Time zone" section of the "Settings" application after it opens.
 Loading...
Select the timezone you want to use from the list.
The easiest way to find the timezone you want is by the UTC Offset, which is just the difference between it and the UTC timezone.
Installing Software
Now that you have your preferred browser set up, you can start downloading the software you intend to use on your Windows Server. This is done the exact same way you’d do it on your Windows PC at home.
- Navigate to and click the download button.
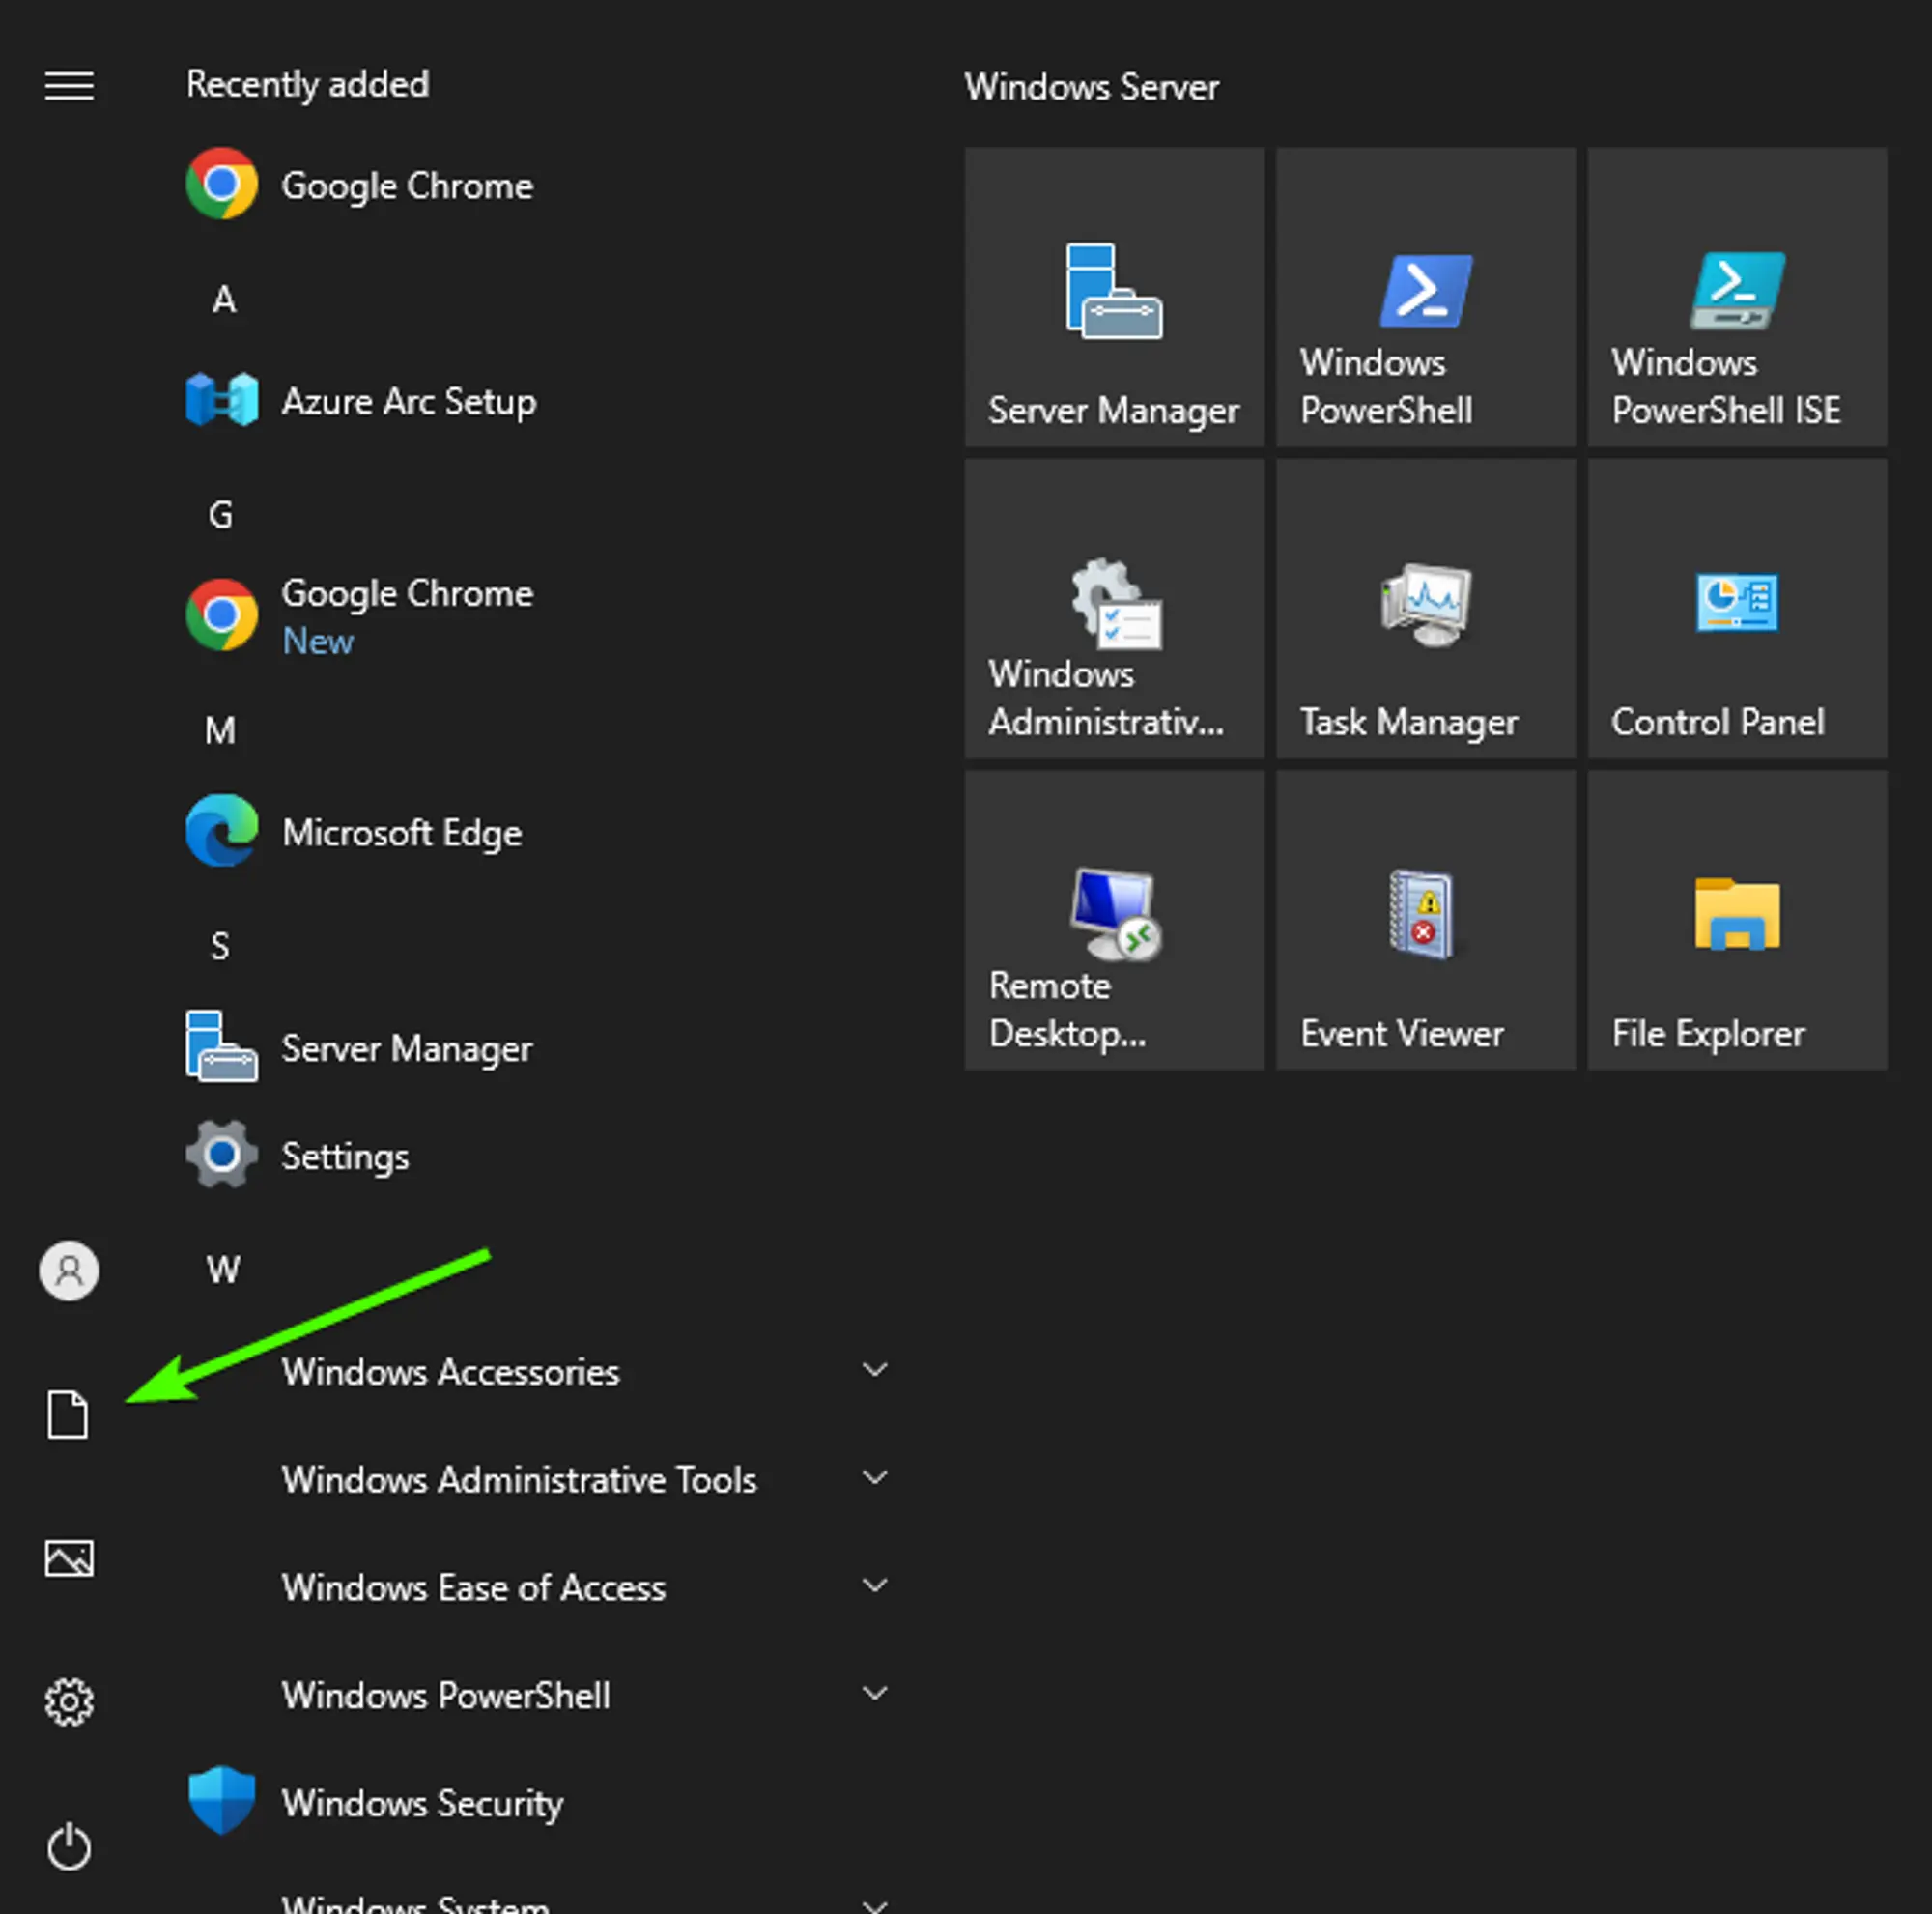
Open the File Explorer.
You can do this by opening the start menu and clicking on the Documents button on the bottom left of the start menu, above the power options.
 Loading...
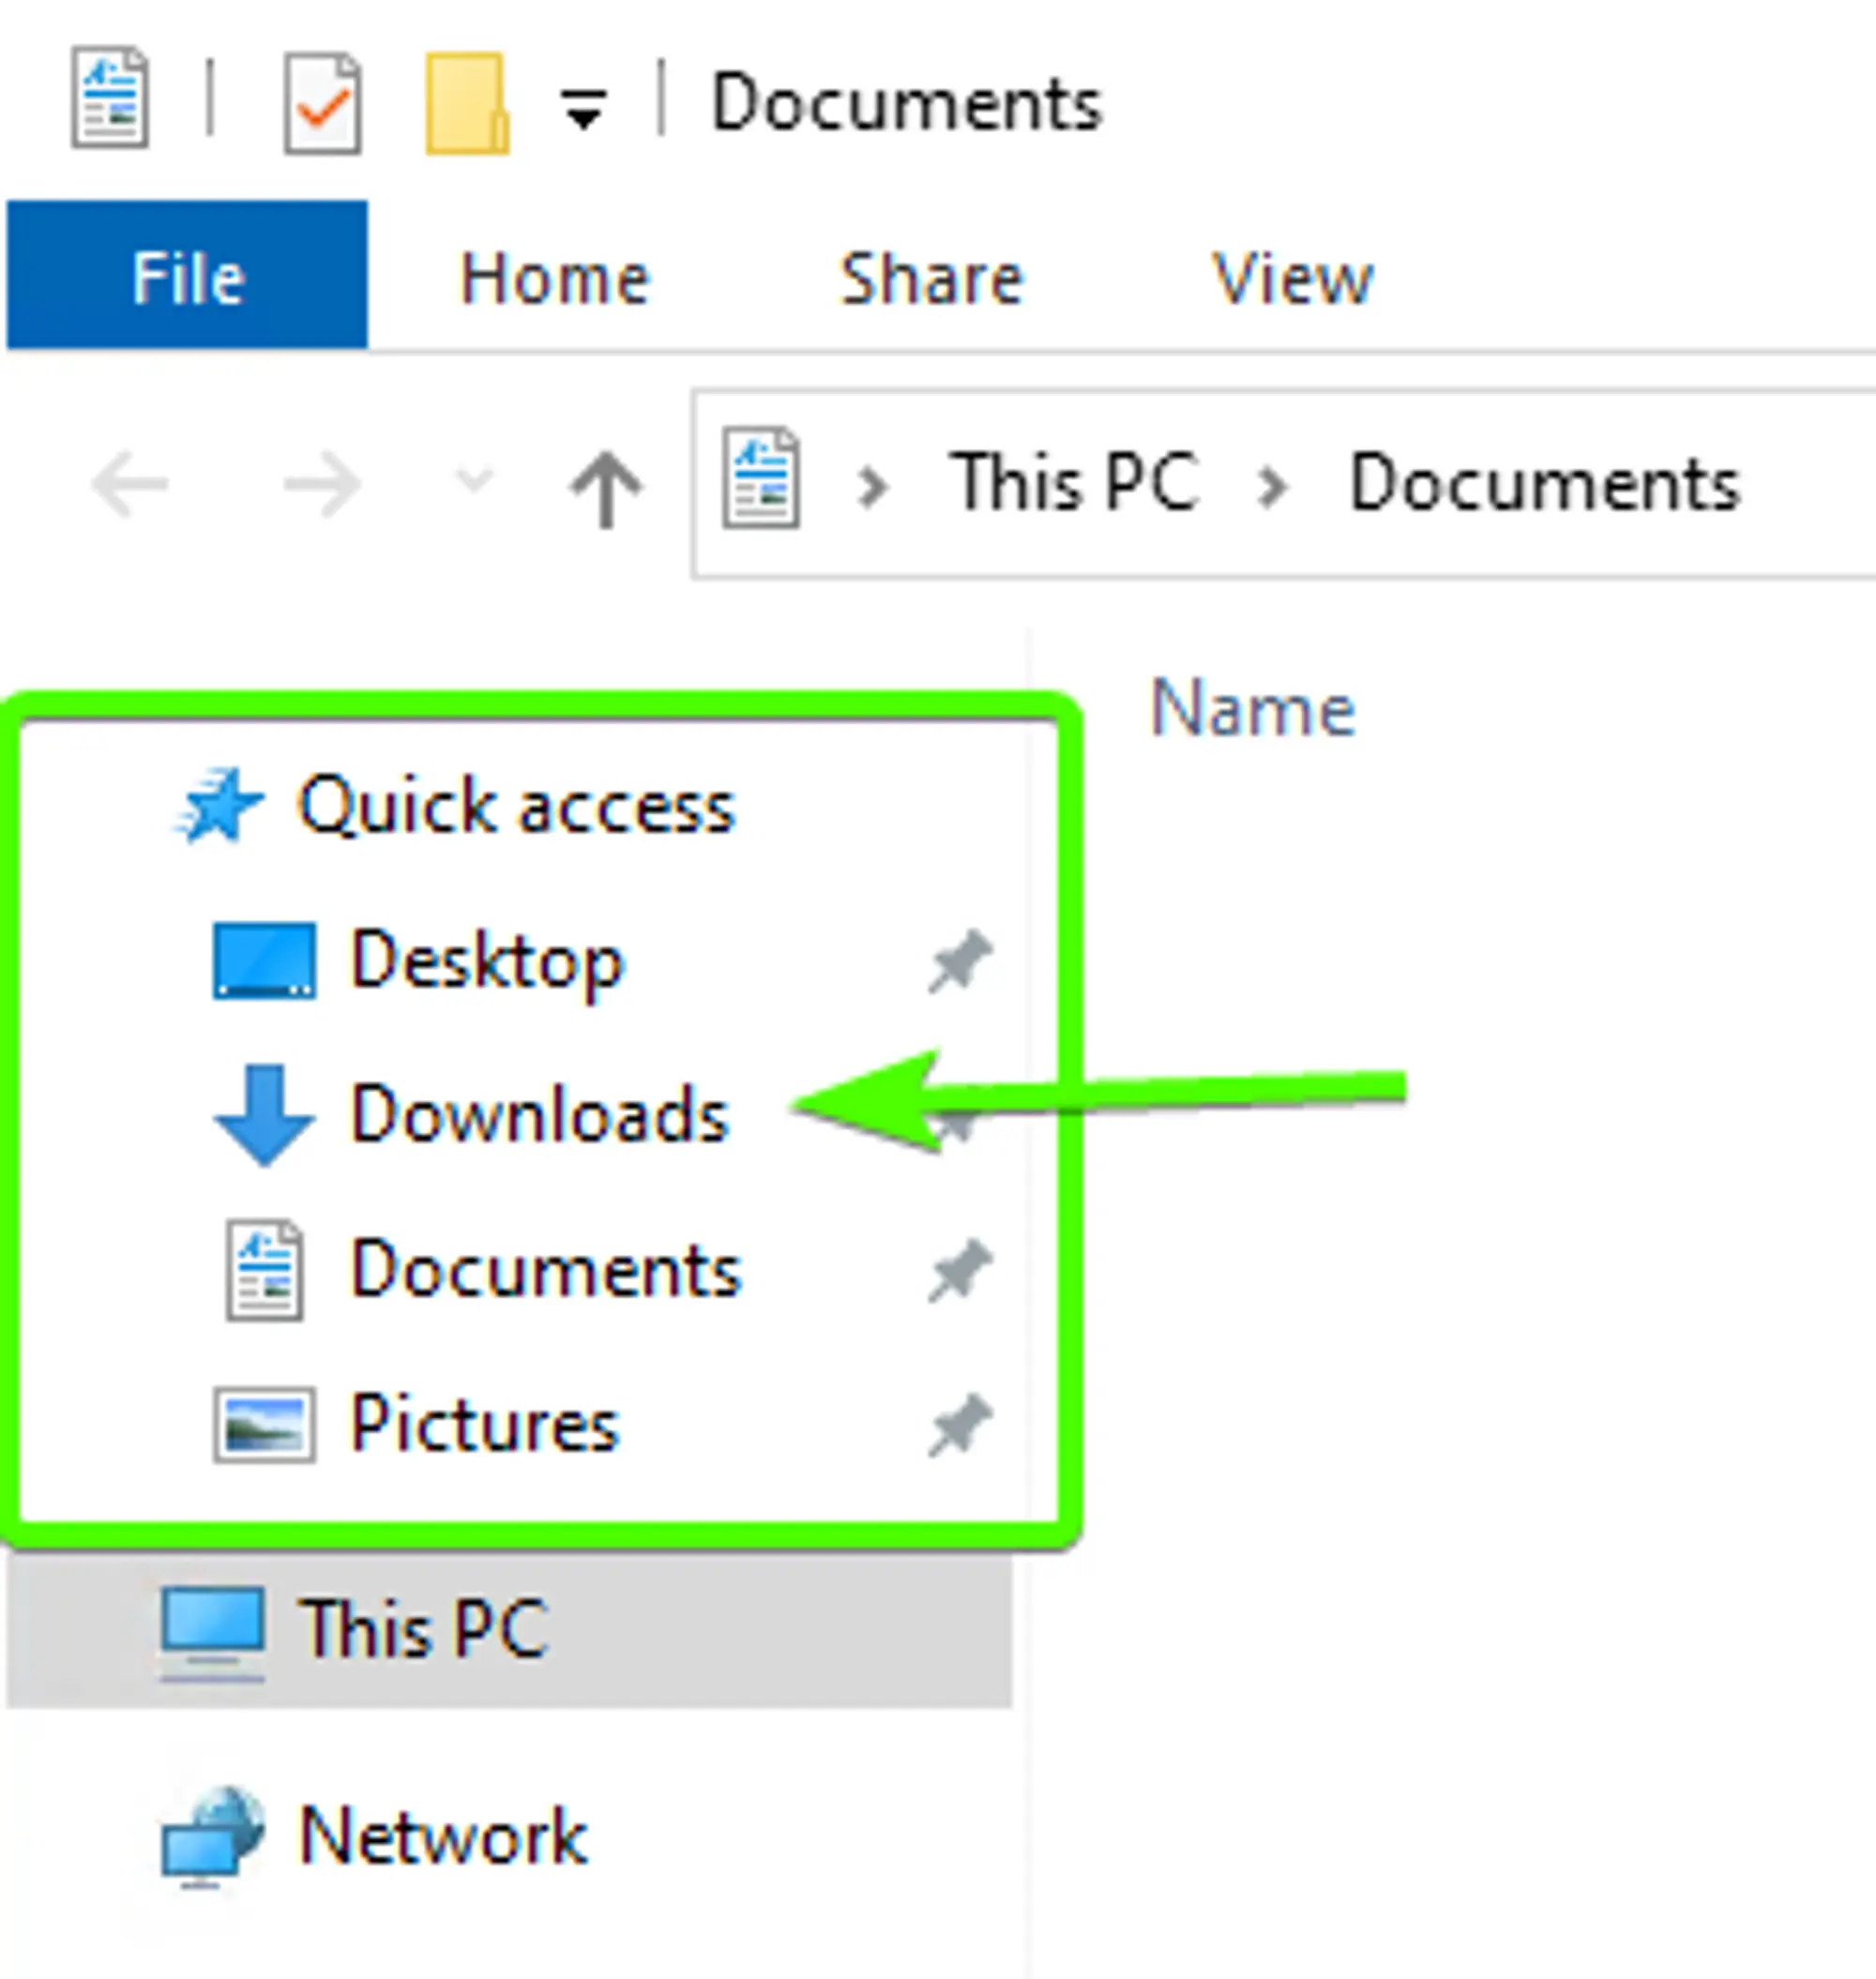
Navigate to your Downloads folder.
You can find the link to your downloads folder in the Quick Access menu on the left side of the File Explorer.
 Loading...
Locate and open the Executable file for the program you want to install
The files should be sorted by date, so the file at the top is most likely the one you downloaded.