Billing Account 2FA
- Log into the Billing Portal
Select "Profile" from the "Account & Panels" dropdown
This is located on the upper right of the page next to the navbar, after logging into the Billing Portal.
 Loading...
Open the "Security Settings".
This is located on the left side of the "Your Profile" page.
- Click the green "Click here to Enable" button.
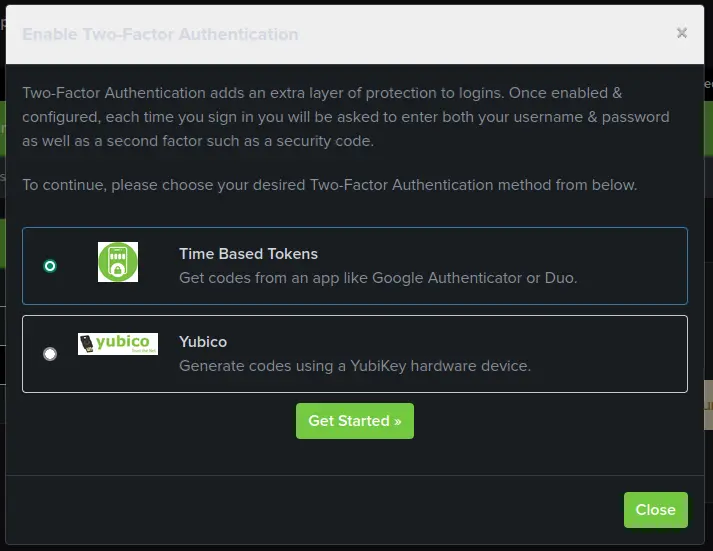
Select "Time Based Tokens" and click "Get Started".
You'll be presented with two options, "Time Based Tokens", which is what we've covered so far, and "Yubikey, which is an entirely different kind of 2FA that requires a specialized device.
 Loading...
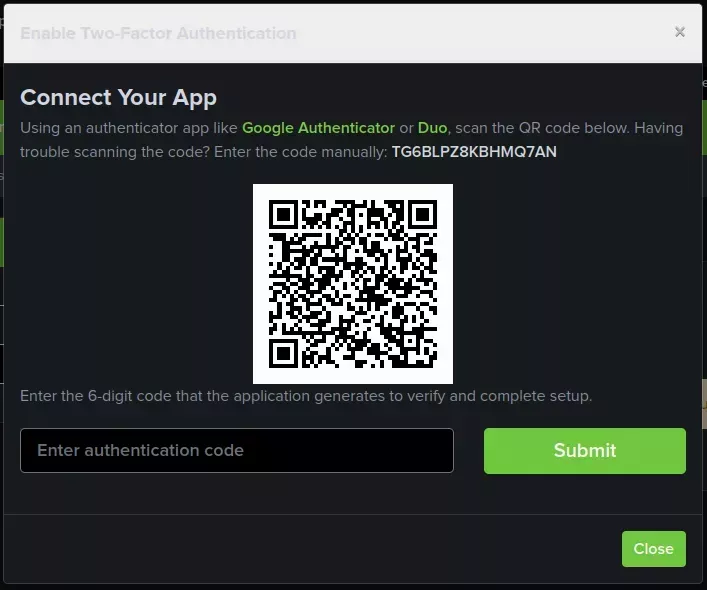
Scan the QR code with your authenticator app or enter the code directly.
You can scan the QR code using an app like Google Authenticator or Authy or you can enter the code manually into either of the two apps.
 Loading...
Make sure to save the alphanumeric code or QR code somewhere in a secure format. Good ways are in a private password manager or encrypted flash drive!
There are a lot of Authenticator apps with many different features, so you might want to try a few out or look at what’s provided by your phone already. If you save the code above then you’ll have no problem switching Authenticator apps!